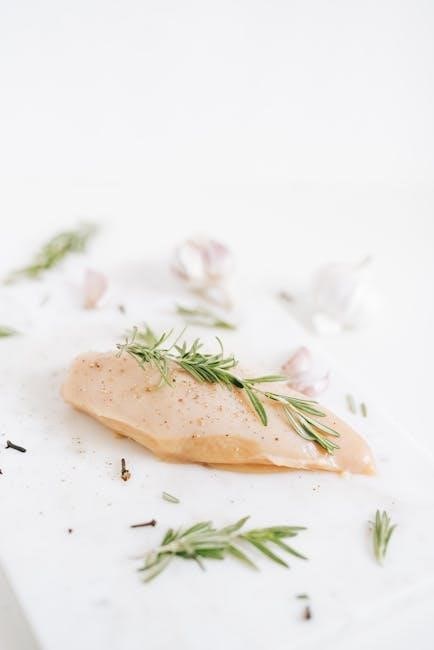
free baby doll knitting patterns to download pdf

Discover the joy of knitting with free baby doll patterns available as downloadable PDFs․ Create adorable outfits and accessories with these easy-to-follow designs, perfect for crafters of all skill levels․

Why Free Baby Doll Knitting Patterns Are Popular

Free baby doll knitting patterns are popular due to their accessibility and cost-effectiveness, making knitting accessible to everyone․ Crafters appreciate the convenience of downloadable PDFs, which provide instant access to designs․ These patterns cater to all skill levels, allowing beginners and experienced knitters alike to create adorable dolls and outfits․ The ability to customize and personalize projects also attracts many, fostering creativity․ Additionally, the global community of knitters shares and enjoys these patterns, creating a sense of connection and shared passion for the craft․

Benefits of Downloadable PDF Patterns for Knitting

Downloadable PDF patterns offer unparalleled convenience for knitters․ They provide instant access to designs, eliminating the need for physical copies․ PDFs are easily stored on devices, making them portable and accessible anywhere․ Free or low-cost options cater to all budgets, while clear instructions and visuals ensure projects are easy to follow․ Additionally, PDFs allow for eco-friendly printing of specific pages, reducing waste․ Their versatility and accessibility make them a preferred choice for crafters worldwide, fostering creativity and efficiency in knitting projects․

Popular Free Baby Doll Knitting Patterns

Explore a variety of free baby doll knitting patterns, including the beloved Izzy Doll, vintage-inspired designs, and modern outfits, perfect for creating unique and charming dolls․

Izzy Doll Knitting Patterns

The Izzy Doll Knitting Patterns are a popular choice among crafters, offering a simple yet charming design․ These patterns are available as free downloadable PDFs, making it easy for knitters of all skill levels to create adorable dolls․ The initiative, led by Shirley O’Connell, provides detailed instructions for knitting these endearing dolls․ Perfect for gifts or charity projects, the Izzy Doll patterns are widely appreciated for their versatility and heartwarming appeal․ They are also available in multiple languages, including French and Dutch, making them accessible to a global community of knitters․

Vintage-Inspired Baby Doll Knitting Patterns

Vintage-inspired baby doll knitting patterns bring a touch of classic charm to your creations․ These patterns often feature intricate details, such as lace trim, bootees, and delicate dresses, reminiscent of traditional doll clothing․ Available as free downloadable PDFs, they allow knitters to craft timeless outfits for their dolls․ Perfect for those who appreciate nostalgic designs, these patterns are widely shared on platforms like Etsy and other knitting communities, making it easy to access and enjoy these beautiful, retro-inspired designs for your baby dolls․

Modern and Stylish Outfit Patterns for Baby Dolls

Modern and stylish baby doll outfit patterns offer a fresh take on doll fashion․ These free downloadable PDFs feature contemporary designs, from trendy dresses to sleek cardigans and accessories․ Perfect for knitters who enjoy versatility, these patterns allow for customization to match current fashion trends․ With clear instructions, they cater to all skill levels, ensuring that every doll can sport a chic, up-to-date look․ Whether it’s a casual outfit or a festive ensemble, these patterns bring modern flair to your doll’s wardrobe, making them stand out with ease․

Materials and Tools Needed for Knitting Baby Dolls

Essential materials include soft yarn (like DK weight), knitting needles (straight or circular), and basic tools like scissors and stitch markers․ These ensure a smooth knitting experience for doll creation․

Recommended Yarn Types for Baby Doll Knitting

For baby doll knitting, medium-weight yarns like DK (Double Knitting) are ideal due to their softness and durability․ Hayfield Bonus DK is a popular choice, offering a variety of colors and a smooth texture that ensures cozy and adorable outfits․ Acrylic or blended yarns are also great for their softness and easy care, making them perfect for doll clothes․ Choose yarns with good stitch definition to bring out the details in your patterns, ensuring your dolls look their best․ Opt for colors that match your desired design for a personalized touch․

Essential Knitting Tools for Creating Dolls

To create adorable baby dolls, you’ll need a few essential tools․ Start with a pair of knitting needles, either straight or circular, in sizes specified by your pattern․ A stitch marker is handy for tracking patterns, while scissors and a tapestry needle are must-haves for cutting yarn and weaving ends․ A stitch holder can help with complex designs, and a measuring tape ensures accuracy․ Don’t forget a yarn needle for sewing seams․ With these tools, you’ll be well-equipped to craft beautiful, professional-looking dolls․

Step-by-Step Tutorials for Knitting Baby Dolls

Perfect your knitting skills with our step-by-step guides․ From basic stitches to assembling the doll, these tutorials offer clear instructions for crafters of all skill levels․

Beginner-Friendly Tutorials for Baby Doll Knitting

Start your knitting journey with beginner-friendly tutorials designed for baby doll patterns․ These guides offer step-by-step instructions, perfect for new knitters․ Learn basic stitches, doll assembly, and essential techniques through easy-to-follow PDF downloads․ Many tutorials include photos and videos to help you understand complex steps․ Popular platforms like Ravelry and Yarnspirations provide free resources tailored for beginners․ Patterns such as the Izzy Doll and vintage-inspired designs are great starting points․ With these tools, you can create adorable dolls and outfits with confidence, even if you’re new to knitting․

Video Guides and Tips for Knitting Dolls

Enhance your knitting skills with free video guides and expert tips available online․ Platforms like YouTube and Ravelry offer tutorials specifically for baby doll knitting․ These videos provide step-by-step instructions, from basic stitches to assembling complex patterns․ Tips include choosing the right yarn, mastering doll proportions, and troubleshooting common mistakes․ Many guides focus on popular patterns like the Izzy Doll and vintage-inspired designs․ Whether you’re a beginner or an experienced knitter, these resources help you create charming dolls with ease and precision․

Where to Find Free Baby Doll Knitting Patterns

Explore platforms like Ravelry, Yarnspirations, and Etsy for a wide variety of free downloadable PDF patterns․ These sites offer diverse designs, from vintage to modern styles, perfect for crafting adorable dolls․

Ravelry and Yarnspirations

Ravelry and Yarnspirations are top destinations for free baby doll knitting patterns․ Ravelry offers a vast community-driven library, while Yarnspirations provides curated, high-quality designs․ Both platforms feature PDF downloads, making it easy to access patterns for dolls, outfits, and accessories․ Explore a variety of styles, from the popular Izzy Doll pattern to vintage-inspired designs․ Users can filter by skill level, ensuring beginners and experienced knitters alike find suitable projects․ These sites are perfect for discovering unique and adorable doll knitting patterns to bring your creativity to life․

Etsy and Other Marketplaces

Etsy and other online marketplaces offer a wide range of free and premium PDF knitting patterns for baby dolls․ Many sellers provide instant downloads, allowing you to start your project immediately․ From vintage-inspired designs to modern outfits, these platforms cater to diverse tastes․ While some patterns are free, others may require a small fee․ Additionally, sites like eBay and independent craft stores often feature unique or exclusive doll knitting patterns․ These marketplaces are great for finding one-of-a-kind designs to enhance your doll collection or create personalized gifts․

Customization Ideas for Your Knitted Baby Dolls

Personalize your knitted dolls with unique outfits, accessories, and hairstyles․ Add embroidered details or fabric paint for a personalized touch, making each doll truly special and one-of-a-kind․

Personalizing Doll Clothes

Personalizing doll clothes allows you to add unique touches to your knitted creations․ Use colorful yarns, embroidery, or fabric paint to create distinctive designs․ Mix patterns, like stripes or polka dots, for a personalized look․ Add small accessories such as bows, buttons, or lace to enhance outfits․ Consider matching the doll’s clothes to your own or a child’s wardrobe for a special connection․ With free PDF patterns, you can experiment with various styles and details, making each doll truly one-of-a-kind․ This creative process fosters imagination and adds sentimental value to your handmade dolls․

Adding Accessories to Your Dolls

Accessorizing your knitted dolls can elevate their charm and uniqueness․ Hats, shoes, and small bags are popular additions that complement outfits․ Use yarn remnants to create hair bows, scarves, or belts․ For a vintage look, add lace trim or buttons to dresses․ Patterns often include options for these extras, allowing you to mix and match․ Accessories not only enhance the doll’s appearance but also provide an opportunity to express your creativity․ They make the doll more engaging and personalized, offering endless possibilities for customization and character development․

Charity and Community Involvement in Knitting

Knitting for charity fosters community and kindness․ Many knitters create dolls and clothes for donation, supporting causes like children’s hospitals or disaster relief․ The Izzy Doll initiative, for example, distributes handmade dolls globally, spreading joy and comfort․ Sharing free patterns encourages collective creativity and generosity, uniting crafters worldwide for meaningful projects․

Knitting Dolls for Charity

Knitting dolls for charity is a heartfelt way to give back to the community․ Many organizations, like the Izzy Doll Initiative, use free patterns to create dolls for children in need․ These dolls provide comfort and joy to kids worldwide․ Charities such as Simpsons Special Care Babies (SSCB) encourage young people to knit, fostering a sense of purpose․ By downloading PDF patterns, crafters can easily join these efforts, creating meaningful gifts while supporting good causes․ This collective creativity strengthens communities and spreads kindness globally․

Community Patterns and Collaborations

Knitting communities thrive on collaboration, with many creators sharing free baby doll patterns online․ Platforms like Ravelry and Yarnspirations host a wealth of shared designs, fostering creativity and connection among crafters․ Collaborative projects, such as the Izzy Doll Initiative, encourage global participation, with patterns available in multiple languages․ These efforts highlight the power of shared passion, uniting knitters worldwide to create unique and heartfelt designs for baby dolls, while inspiring innovation and camaraderie within the crafting community․

Storage and Organization of Knitting Patterns

Keep your knitting patterns organized by storing PDF downloads in cloud folders or on your device․ Print favorites and store them in binders or labeled envelopes for easy access․

Tips for Storing Digital and Physical Patterns

For digital patterns, create folders on your device or cloud storage, labeling them by type or size․ Regularly back up your files to prevent loss․ Use descriptive filenames like “12-inch-baby-doll-dress-pattern․pdf” for easy searching․ Print physical patterns and store them in binders with clear covers or labeled envelopes․ Consider organizing by doll size or outfit type․ Use acid-free paper and protect patterns from moisture and dust․ Keep frequently used patterns in an accessible location, while storing others in a dry, cool space․ This system ensures your collection remains tidy and easy to manage, saving time and reducing clutter․

Organizing Completed Knitting Projects

Keep your finished knitting projects tidy by storing them in labeled bins or boxes․ Use acid-free tissue paper to protect delicate items․ Photograph each completed doll or outfit and create a digital or physical portfolio for easy reference․ Store smaller accessories like hats or booties in separate compartments․ Maintain a list of materials used for future repairs․ Consider displaying a few favorite pieces on shelves or in glass-front cabinets․ This organized approach helps preserve your creations and makes them easy to admire or gift․

Cultural Impact of Knitting Baby Dolls

Knitting baby dolls has united global craft communities, fostering creativity and cultural exchange․ The availability of free PDF patterns has made this tradition accessible worldwide, preserving heritage while inspiring modern designs․

Global Popularity of Knitting Dolls

Knitting baby dolls has become a global phenomenon, with enthusiasts from diverse cultures creating adorable dolls using free downloadable PDF patterns․ The ease of access to these patterns has connected crafters worldwide, fostering a sense of community․ From vintage-inspired designs to modern outfits, the variety of patterns caters to all skill levels, making it a beloved hobby across the globe․ This shared passion has not only preserved traditional knitting techniques but also inspired creativity, uniting people through the joy of crafting․

Cultural Variations in Doll Knitting Patterns

Doll knitting patterns reflect diverse cultural influences, offering unique designs inspired by global traditions․ From Japanese kimonos to European folk dresses, patterns often incorporate local fabrics, colors, and motifs․ Crafters worldwide adapt these designs, blending traditional techniques with modern styles․ Such variations not only preserve cultural heritage but also inspire creativity, allowing knitters to explore global aesthetics․ This diversity enriches the hobby, making it a vibrant reflection of shared human creativity and cultural exchange․

Free baby doll knitting patterns offer a diverse range of creative projects for all skill levels․ These downloadable PDFs make it easy to start knitting adorable outfits and accessories, fostering creativity and joy for crafters worldwide․

Final Thoughts on Free Baby Doll Knitting Patterns

Free baby doll knitting patterns offer endless creativity and convenience for crafters․ With downloadable PDFs, you can instantly access designs for adorable outfits, accessories, and dolls․ These patterns cater to all skill levels, from beginners to experienced knitters, and allow for personalized touches․ The joy of creating something handmade for a child or charity is unparalleled․ Whether you’re making a vintage-inspired dress or a modern outfit, these patterns inspire creativity and provide a sense of accomplishment․ They are a wonderful way to give back to the community or simply enjoy a rewarding hobby․

georgia residential lease agreement pdf

A Georgia Residential Lease Agreement is a legally binding contract outlining rental terms‚ protecting both landlords and tenants. It ensures compliance with state laws‚ providing clarity on responsibilities and obligations‚ while offering customizable templates for easy creation and signing.

Overview of the Georgia Residential Lease Agreement

A Georgia Residential Lease Agreement is a detailed contract between a landlord and tenant‚ outlining terms for renting residential property. It covers rent‚ lease duration‚ responsibilities‚ and payment terms‚ ensuring both parties understand their obligations. This agreement is legally binding and customizable to fit specific needs‚ providing clarity on expectations and rights. It helps prevent disputes by addressing key issues upfront‚ making it essential for both landlords and tenants in Georgia. PDF templates are widely available for easy creation and signing.

Importance of a Written Lease Agreement in Georgia

A written lease agreement is crucial in Georgia as it provides legal protection for both landlords and tenants. It clearly outlines rental terms‚ responsibilities‚ and expectations‚ reducing the risk of disputes. A written contract ensures compliance with Georgia state laws and offers a reference point for resolving conflicts. By documenting rent amounts‚ payment terms‚ and lease duration‚ it provides clarity and security for both parties‚ making it an essential document for any rental arrangement in Georgia.

Key Components of a Georgia Residential Lease Agreement

A Georgia Residential Lease Agreement outlines essential terms‚ including tenant and landlord details‚ property description‚ rent‚ lease duration‚ and signatures. It ensures legal compliance and clarity for both parties‚ providing a structured framework for the rental relationship while addressing specific Georgia legal requirements and protecting the interests of all involved in the rental process.

Parties Involved in the Lease

The lease agreement identifies the landlord and tenant as the primary parties. The landlord owns the property‚ while the tenant rents it for residential use. Both parties must sign the agreement‚ acknowledging their roles and responsibilities. The landlord is responsible for property maintenance‚ while the tenant agrees to pay rent and adhere to lease terms. This section ensures clarity on who is legally bound by the agreement‚ establishing a formal rental relationship between the parties involved.

Property Description and Terms

The lease provides a detailed description of the rental property‚ including its address and specific features. It outlines permitted uses‚ such as residential occupancy‚ and any restrictions on alterations or subletting. This section ensures both parties have a clear understanding of the property’s condition and allowable activities; It also establishes the lease duration and occupancy limits‚ protecting both landlord and tenant by defining the scope of the rental arrangement. This clarity helps prevent future disputes over property use.

Rental Amount and Payment Terms

The lease specifies the rental amount‚ due dates‚ and accepted payment methods. It outlines late fees and penalties for overdue payments. This section ensures clarity on financial obligations‚ preventing disputes. It also defines any additional charges‚ such as security deposits or utility fees. By detailing payment terms‚ the agreement protects both parties‚ ensuring timely payments and outlining consequences for non-compliance. This transparency helps maintain a smooth landlord-tenant relationship throughout the lease period.

Lease Duration and Renewal Options

The lease duration specifies the start and end dates of the tenancy‚ whether fixed-term or month-to-month. It details renewal options‚ such as automatic renewal or required notice for extension. This section ensures both parties understand their commitment length and renewal rights. It also outlines termination procedures if renewal isn’t pursued‚ providing clarity on ending or continuing the agreement. This structure helps prevent misunderstandings and ensures a smooth transition at the lease’s conclusion.

Legal Requirements and Disclosures

Georgia Residential Lease Agreements must comply with state laws‚ including required disclosures about security deposits‚ habitability‚ and eviction processes‚ ensuring transparency and legal protection for both landlords and tenants.

Georgia-Specific Laws and Regulations

Georgia’s residential lease laws regulate security deposits‚ eviction processes‚ and landlord responsibilities. Landlords must maintain habitable premises and provide proper notice for lease terminations or rent increases. Tenants are protected from unfair practices‚ and specific disclosures are required in the lease agreement. Compliance with these laws ensures a balanced and legally sound rental relationship‚ safeguarding both parties’ rights and obligations under Georgia state law. Understanding these regulations is essential for drafting a compliant lease agreement.

Required Disclosures in the Lease Agreement

Georgia law mandates specific disclosures in residential lease agreements to ensure transparency and fairness. Landlords must disclose the security deposit handling procedures‚ lead-based paint hazards (if applicable)‚ and the identity of the property owner or manager. Additionally‚ they must comply with the Georgia Landlord-Tenant Act‚ which outlines tenant rights and landlord obligations. Failure to include these disclosures can lead to legal consequences‚ making it essential to thoroughly review and include all required information in the lease agreement.

Creating a Georgia Residential Lease Agreement

Creating a Georgia Residential Lease Agreement involves using a customizable template‚ ensuring all legal clauses are included‚ and tailoring terms to meet specific rental needs.

Steps to Draft a Lease Agreement

Drafting a Georgia Residential Lease Agreement begins with gathering necessary information‚ such as tenant and property details. Select a customizable template that complies with Georgia laws. Fill in the rental terms‚ including rent amount‚ payment methods‚ and due dates. Include property-specific rules and any additional clauses‚ like pet policies. Review the document for clarity and completeness‚ ensuring all legal requirements are met. Finally‚ save the document and prepare it for signatures from all parties involved.

Customizing the Lease for Specific Needs

Customizing a Georgia Residential Lease Agreement involves tailoring the document to address unique circumstances. Start with a standard template and modify clauses to suit the property and tenant requirements. Common customizations include pet policies‚ security deposit terms‚ and specific property rules. Ensure all additions comply with Georgia landlord-tenant laws. Clearly outline responsibilities for maintenance‚ repairs‚ and utilities. Review the lease to ensure it reflects the agreed-upon terms and protects both parties’ interests effectively.

Benefits of Using a Georgia Residential Lease Agreement

A Georgia Residential Lease Agreement offers legal protection‚ clear terms‚ and dispute prevention. It ensures landlord and tenant rights are upheld‚ fostering a harmonious rental relationship.

Protection for Landlords and Tenants

A Georgia Residential Lease Agreement provides mutual protection by outlining each party’s responsibilities. For landlords‚ it secures rental income and property protection‚ while for tenants‚ it ensures fair treatment and clarity on lease terms. Legal compliance safeguards both parties‚ preventing disputes and ensuring rights are upheld throughout the tenancy. This balanced approach fosters a respectful and legally sound rental relationship in Georgia.

Clarity on Responsibilities and Obligations

A Georgia Residential Lease Agreement clearly defines the roles and duties of both landlords and tenants. It specifies property maintenance responsibilities‚ rent payment terms‚ and lease duration. By outlining expectations‚ it reduces misunderstandings and ensures both parties understand their commitments. This clarity helps prevent disputes and promotes a harmonious rental relationship‚ ensuring all obligations are met as per the agreement.

How to Obtain a Georgia Residential Lease Agreement PDF

Download a customizable Georgia Residential Lease Agreement template online. Ensure it complies with state laws and includes all necessary clauses for a legally binding rental contract.

Downloading a Template Online

Downloading a Georgia Residential Lease Agreement template online is a convenient and efficient process. Websites like Rocket Lawyer and legal template platforms offer customizable PDF forms. These templates are designed to comply with Georgia state laws and include essential clauses. Simply search for “Georgia Residential Lease Agreement PDF‚” select a reputable source‚ and download the form. Ensure the template is editable to tailor it to your specific rental property needs. This method saves time and ensures compliance with legal requirements.

Filling Out the Lease Agreement Form

Filling out a Georgia Residential Lease Agreement form requires careful attention to detail. Start by entering the names and addresses of both the landlord and tenant. Include the property description‚ rental amount‚ and lease duration. Specify payment terms‚ late fees‚ and security deposit details. Outline responsibilities for maintenance and repairs. Customize clauses for pets‚ guests‚ and subletting. Ensure all fields are completed accurately to avoid disputes. Review the document thoroughly before signing to confirm all terms are agreed upon by both parties.

Signing the Lease Agreement

The landlord and tenant must sign the lease agreement‚ ensuring both parties understand the terms. Witnesses or notarization may be required for legal validity in Georgia.

Who Needs to Sign the Lease

The landlord or property manager and all tenants must sign the lease agreement. Witnesses or notarization may be required in some cases. Each party should receive a copy of the signed document to ensure transparency and legal validity. Signatures confirm mutual agreement to the terms outlined in the lease. Tenants under 18 may require a co-signer or guardian’s signature. Ensuring all parties sign prevents disputes and validates the contract under Georgia law.

Witnesses and Notarization Requirements

In Georgia‚ witnesses are not typically required for a lease agreement‚ but having one can add security. Notarization is also not mandatory unless specified by local law or unique circumstances. However‚ ensuring all parties sign the lease is crucial for its validity. For added protection‚ some landlords prefer notarizing the document‚ especially in complex agreements. Both tenants and landlords should retain a signed copy for their records. Consulting a legal professional can clarify specific requirements and ensure compliance with state regulations.

Common Mistakes to Avoid

Common errors include omitting key clauses‚ unclear rental terms‚ and improper handling of security deposits. Ensuring all terms are detailed and legally compliant is essential for both parties.

Errors in Lease Agreement Preparation

Common mistakes in preparing a Georgia Residential Lease Agreement include omitting key clauses like termination notices and repair responsibilities. Landlords often overlook including specific details about rent payment methods and due dates‚ which can lead to disputes. Additionally‚ failing to mention the handling of security deposits and property inspections can result in legal complications. It is crucial to ensure all terms are clearly defined and comply with Georgia state laws to avoid misunderstandings and potential legal issues down the line.

Omissions in Key Clauses

Omissions in a Georgia Residential Lease Agreement can lead to legal complications and misunderstandings. Common oversights include failing to specify rules for security deposits‚ lease termination procedures‚ and tenant repair responsibilities. Omitting details about rent payment methods or late fees can also cause disputes. Additionally‚ not including clauses about property inspections or pet policies may result in unresolved issues. Carefully drafting and reviewing the lease ensures all critical terms are included‚ protecting both landlords and tenants from potential conflicts and legal challenges.

Tenant’s Rights and Obligations

Tenants in Georgia have rights‚ such as fair housing and safe living conditions. Obligations include paying rent‚ maintaining the property‚ and adhering to lease terms responsibly.

Understanding Tenant Responsibilities

Tenants in Georgia have specific responsibilities under a lease agreement. These include paying rent on time‚ maintaining the property‚ and reporting needed repairs. Tenants must also comply with all lease terms‚ such as no unauthorized pets or subleasing. They are expected to keep the property clean and safe‚ respecting quiet enjoyment rights. Failure to meet these obligations can lead to legal action‚ emphasizing the importance of understanding and adhering to the lease agreement’s terms.

Legal Rights of Tenants in Georgia

Tenants in Georgia have legal rights protecting them under state law. These include the right to a habitable living space‚ protection from illegal evictions‚ and safeguards against unfair practices. Landlords must provide written notice for rent increases or lease terminations‚ typically 60 days in advance. Tenants are also entitled to due process before any legal action‚ ensuring their rights are upheld throughout the rental process.

Landlord’s Rights and Obligations

Landlords in Georgia have the right to collect rent‚ enforce lease terms‚ and manage property. They must maintain habitable conditions‚ provide proper notice for changes‚ and follow eviction laws.

Landlord Responsibilities Under Georgia Law

Georgia landlords must maintain rental properties in habitable condition‚ ensuring safety and functionality. They are required to disclose certain information in the lease‚ such as their contact details and any known hazards. Landlords must also adhere to legal eviction processes and provide proper notice for lease terminations or rent increases. Compliance with all state and local housing codes is mandatory to protect tenant rights and avoid legal disputes.

Enforcing Lease Agreement Terms

Landlords in Georgia can enforce lease terms by following legal procedures for addressing violations. This includes issuing proper notices for late payments‚ unauthorized occupants‚ or property damage. If tenants breach the agreement‚ landlords may pursue eviction after providing required notice periods. Courts typically favor landlords who adhere to Georgia’s eviction laws and maintain detailed records of lease violations. Legal action must be taken in compliance with state regulations to ensure enforceability of the lease terms.

Ending the Lease Agreement

A Georgia Residential Lease Agreement outlines termination clauses‚ notice periods‚ and eviction processes. It ensures both parties understand procedures for ending tenancy legally and amicably.

Termination Clauses and Notice Periods

Termination clauses outline conditions for ending a lease‚ such as breach of contract or expiration. Georgia requires landlords to provide notice‚ typically 60 days for lease termination. Tenants must also give 60 days’ notice before vacating. These clauses ensure both parties understand their obligations and timelines‚ preventing disputes. Proper notice periods align with Georgia landlord-tenant laws‚ ensuring smooth transitions and compliance. Clear terms safeguard both landlord and tenant rights‚ avoiding legal complications during lease termination.

Eviction Process in Georgia

The eviction process in Georgia involves legal steps for landlords to remove tenants. It begins with a termination notice for non-payment or lease violations. Landlords must file a dispossessory affidavit in court‚ leading to a hearing. If the court rules in favor of the landlord‚ a writ of possession is issued‚ allowing law enforcement to remove the tenant. Georgia law requires strict adherence to timelines and procedures‚ ensuring fairness and legal compliance for both parties. Understanding this process is crucial for landlords and tenants alike.

A Georgia Residential Lease Agreement is a vital document ensuring clarity and legal compliance for both landlords and tenants. It protects the rights and obligations of all parties involved‚ preventing potential disputes. By understanding the key components‚ legal requirements‚ and proper procedures‚ landlords and tenants can navigate the rental process smoothly. A well-crafted lease agreement fosters a balanced relationship‚ ensuring a fair and secure rental experience in Georgia.

aapc cpc exam questions and answers pdf

The AAPC CPC exam is a critical certification for medical coders, demonstrating expertise in coding guidelines and standards. It evaluates knowledge of medical terminology, anatomy, and coding systems, ensuring accurate and compliant coding practices in healthcare settings.

Overview of the AAPC CPC Certification

The AAPC CPC certification is a prestigious credential for medical coders, validating expertise in assigning accurate codes for medical services. It covers a wide range of topics, including ICD-10-CM, CPT, and HCPCS coding systems. The exam consists of 100 multiple-choice questions, requiring a deep understanding of coding guidelines, anatomy, and medical terminology. Passing the CPC exam demonstrates a coder’s ability to adhere to compliance standards and ensure precise billing and insurance claims. Preparation is crucial, as it assesses both theoretical knowledge and practical application, making it a cornerstone for a successful career in medical coding.

Importance of Preparation for the CPC Exam

Thorough preparation is essential for success on the CPC exam, as it evaluates both coding knowledge and practical application. Utilizing resources like AAPC CPC exam questions and answers PDFs ensures familiarity with exam formats and content. These materials provide realistic practice, helping candidates identify strengths and weaknesses. Regular study, flashcards, and joining study groups enhance retention and understanding. Time management and strategy development are also critical, as the exam’s 4-hour timeframe requires efficient problem-solving. Adequate preparation not only boosts confidence but also ensures accurate and compliant coding skills, vital for professional growth and industry standards.

Understanding the AAPC CPC Exam Format

The CPC exam consists of 100 multiple-choice questions, requiring 4 hours to complete. It assesses coding knowledge, guidelines, and practical application, ensuring readiness for real-world scenarios.

Structure of the CPC Exam

The CPC exam is divided into various sections, each targeting specific areas of medical coding expertise. The exam features multiple-choice questions, designed to test both theoretical knowledge and practical application. Candidates are given four hours to complete the exam, which includes questions on medical terminology, anatomy, ICD-10-CM, CPT, HCPCS, and coding conventions. The exam’s structure ensures a comprehensive assessment of a coder’s ability to accurately and efficiently assign codes in real-world scenarios. Proper time management is crucial to successfully complete all sections within the allotted timeframe.

Types of Questions on the CPC Exam

The CPC exam features a variety of question formats to assess coding proficiency. It includes multiple-choice questions, case studies, and coding scenarios that simulate real-world situations. Candidates are required to apply their knowledge of ICD-10-CM, CPT, and HCPCS codes to accurately assign codes. Some questions focus on specific coding guidelines, while others test the ability to interpret medical documentation. The exam also includes questions that require understanding of anatomical terms and coding conventions, ensuring a comprehensive evaluation of a coder’s skills and readiness for professional practice.

Time Management Strategies for the Exam

The CPC exam consists of 100 multiple-choice questions, requiring careful time management to ensure all are answered within the 4-hour timeframe. Start by skimming through the entire exam to identify easier questions and tackle them first. Allocate approximately 1.5 minutes per question, allowing extra time for complex scenarios or coding calculations. Regularly check progress to avoid falling behind. Practice exams can help refine pacing skills, ensuring a balanced approach that maximizes accuracy and covers all sections effectively. Prioritize questions with higher confidence to secure points, then revisit challenging ones if time permits.

Key Topics Covered in the AAPC CPC Exam

The AAPC CPC exam covers medical terminology, anatomy, ICD-10-CM, CPT coding guidelines, HCPCS Level II, and modifiers, essential for accurate and compliant coding in healthcare settings.

Medical Terminology and Anatomy

Medical terminology and anatomy are fundamental components of the AAPC CPC exam. Coders must understand prefixes, suffixes, and root words to accurately interpret medical terms. Anatomy knowledge, including body systems and organ functions, is crucial for assigning correct codes. The exam tests the ability to identify anatomical structures and their relationships, ensuring coders can apply this knowledge to real-world scenarios. This section requires thorough study of human physiology and pathophysiology, as well as practice with real exam questions to reinforce understanding and improve coding accuracy.

ICD-10-CM and CPT Coding Guidelines

ICD-10-CM and CPT coding guidelines are essential for accurate medical coding. The AAPC CPC exam thoroughly tests knowledge of these systems, ensuring coders understand classification, sequencing, and reporting rules. ICD-10-CM focuses on diagnosis coding, while CPT emphasizes procedural coding. Exam questions often present complex scenarios requiring the application of official guidelines to select correct codes. Mastery of these guidelines is critical for compliance and proper reimbursement, making them a cornerstone of the CPC certification process and a key area of focus in exam preparation materials.

HCPCS Level II Coding

HCPCS Level II codes are essential for non-physician services, durable medical equipment, and supplies. They cover items like injectables, transportation, and DME, differing from CPT, which focuses on physician services. The AAPC CPC exam evaluates the ability to assign these codes accurately, often presenting scenarios requiring correct guideline application. For example, understanding when to use specific modifiers is crucial. Practice questions and PDF resources aid in mastering these conventions, ensuring compliance and proper reimbursement. Accurate HCPCS coding is vital for healthcare billing, making it a critical area in CPC exam preparation.

Modifiers and Coding Conventions

Modifiers and coding conventions are critical in AAPC CPC exam preparation, as they ensure accurate code assignments. Modifiers like -25, -59, and -76 are frequently tested, requiring precise application to avoid reimbursement issues. Coding conventions, such as sequencing rules and laterality, are also emphasized. Exam questions often present scenarios where incorrect modifier use could lead to denied claims. Practicing with real exam questions and answers helps coders master these nuances, ensuring compliance with guidelines and optimal billing outcomes. Understanding these conventions is vital for passing the CPC exam and excelling in professional coding roles.

Importance of Using AAPC CPC Exam Questions and Answers PDF

Enhance your CPC certification skills with free questions updated hourly and answers explained by the AAPC community. Downloadable PDFs provide realistic practice, ensuring better exam preparation and understanding.

Benefits of Practicing with Real Exam Questions

Practicing with real exam questions enhances familiarity with the exam format, reduces anxiety, and improves time management. It provides insights into common question types, allowing focused study on challenging areas. Verified answers offer clear explanations, reinforcing learning and ensuring accurate understanding. Regular practice builds confidence and identifies knowledge gaps, enabling targeted preparation. Accessing these questions in PDF format allows convenient study anywhere, ensuring thorough readiness for the CPC exam. Realistic practice mimics exam conditions, helping candidates adapt and perform optimally on test day.

How to Use PDF Resources Effectively

Using AAPC CPC exam questions and answers in PDF format is an efficient way to prepare for the exam. Start by reviewing the questions regularly to familiarize yourself with the exam format and content. Focus on understanding the explanations provided with each answer to clarify doubts and improve coding accuracy. Use the PDFs to identify weak areas and target your study sessions accordingly. Additionally, simulate exam conditions by timing your practice sessions and avoiding distractions. The portability of PDFs allows you to study anywhere, making it easier to fit preparation into your schedule. Regularly reviewing and practicing with these resources ensures comprehensive readiness for the CPC exam.

Where to Find Reliable AAPC CPC Exam Questions and Answers PDF

Reliable AAPC CPC exam questions and answers PDFs can be found on the official AAPC website and recommended platforms like Docsity. These sources offer verified materials to aid exam preparation effectively.

Official AAPC Study Materials

The AAPC provides comprehensive study materials, including exam guides, practice questions, and coding manuals. These resources are designed to reflect real-world coding scenarios, ensuring exam readiness. They cover essential topics like ICD-10-CM, CPT, and HCPCS coding, as well as anatomy and terminology. The official AAPC study guides are updated annually to align with the latest coding guidelines. Candidates can access these materials through the AAPC website, ensuring they receive accurate and reliable information to prepare for the CPC exam effectively.

Recommended Practice Exam Websites

Several websites offer reliable AAPC CPC practice exams, including the official AAPC site, which provides authentic questions and study guides. Docsity is another popular platform, offering downloadable PDFs with verified answers. Additionally, websites like PracticeTestPlus and CodingExamPrep provide realistic exam simulations. These resources include multiple-choice questions, detailed explanations, and timed sessions to mimic actual test conditions. Many sites update their content annually to reflect the latest coding guidelines, ensuring candidates are well-prepared for the exam. Using these recommended sites can significantly enhance study effectiveness and confidence.

Free vs. Paid Resources: What to Choose

Free resources like sample questions from AAPC and practice tests on Docsity can provide a foundational understanding of exam formats. However, paid resources such as official AAPC study guides and premium practice exams offer comprehensive, updated content, including detailed explanations, which is crucial for in-depth preparation. While free options are a good starting point, paid resources often deliver higher quality and relevance, making them a worthwhile investment for serious exam-takers aiming to pass the CPC exam confidently.

Preparing for the AAPC CPC Exam

Effective preparation involves structured study strategies, regular practice with exam questions, and leveraging flashcards for quick revision. Utilize official AAPC resources and practice exams to ensure comprehensive readiness.

Study Strategies for Success

Develop a structured study plan, dedicating time to each topic like medical terminology and coding guidelines. Focus on weak areas identified through practice exams. Use flashcards to memorize key terms and concepts. Join study groups or forums to discuss challenging questions and gain insights. Regularly review and analyze real exam questions to understand patterns and improve accuracy. Prioritize understanding over memorization, ensuring a strong foundation in coding principles. Utilize official AAPC resources and verified answers to refine your skills and build confidence for exam day.

Using Flashcards for Quick Revision

Flashcards are an effective tool for quick and efficient revision, helping to reinforce memory retention of key terms and concepts. Create flashcards with coding terms, definitions, or questions on one side and answers or explanations on the other. Focus on high-yield topics like medical terminology, anatomy, and coding guidelines. Regularly review and test yourself to identify knowledge gaps. Use verified answers from AAPC resources to ensure accuracy. This method is particularly useful for complex areas like ICD-10-CM and CPT codes, allowing for focused practice and rapid recall during exam preparation.

Joining Study Groups and Forums

Engaging in study groups and forums can significantly enhance your preparation for the AAPC CPC exam. These platforms provide opportunities to collaborate with fellow candidates, share resources, and discuss challenging topics. Participate in AAPC-hosted forums or online communities to gain insights from experienced coders and access shared study materials. Many groups offer practice questions, answer explanations, and tips for tackling difficult areas. Active participation fosters a supportive environment, helping you stay motivated and well-prepared for the exam. Utilize these spaces to clarify doubts and refine your understanding of complex coding concepts.

AAPC CPC Exam Practice Questions and Answers

AAPC CPC exam practice questions and answers are essential for exam success. Downloadable PDF resources offer real exam questions with verified answers, ensuring comprehensive preparation.

Sample Questions from Previous Exams

Sample questions from previous AAPC CPC exams provide valuable insights into the exam format and content. These questions, available in PDF format, cover a wide range of topics, including medical terminology, anatomy, and coding guidelines. They closely resemble real exam scenarios, helping candidates understand the types of questions they may encounter. By practicing with these sample questions, aspiring coders can identify areas for improvement and refine their coding skills. Many resources offer verified answers, enabling learners to assess their progress and gain confidence in their abilities. Regular practice with these questions is a proven strategy for achieving exam success.

Understanding the Answer Key

Understanding the answer key is crucial for effective exam preparation. It provides detailed explanations for each question, helping candidates grasp why a particular answer is correct. The key often includes rationales based on coding guidelines, ensuring learners comprehend the reasoning behind each choice. By reviewing the answer key, candidates can identify common mistakes and strengthen their understanding of complex coding concepts. This resource is particularly valuable for self-study, as it offers insights into AAPC’s expectations and coding standards, ultimately enhancing overall exam performance and knowledge retention.

Real Exam Questions and Answers

Real exam questions and answers provide authentic practice, mirroring the actual AAPC CPC exam. They include verified solutions, helping candidates assess their readiness and identify areas for improvement.

Recent Exam Questions from 2023-2024

Recent exam questions from 2023-2024 offer updated content, reflecting current coding guidelines and practices. These questions cover various domains, including ICD-10-CM, CPT, and HCPCS Level II codes. They are designed to simulate real exam scenarios, helping candidates familiarize themselves with the format and difficulty. Verified answers are provided to ensure accurate feedback and improve understanding. These resources are essential for candidates aiming to pass the AAPC CPC exam, as they highlight key areas to focus on for optimal preparation.

Verified Answers for Practice Exams

Verified answers for practice exams are crucial for accurate feedback and effective preparation. They provide detailed explanations, helping candidates understand their mistakes and improve coding skills. These answers cover ICD-10-CM, CPT, and HCPCS Level II codes, ensuring comprehensive knowledge. By reviewing verified answers, coders can identify weak areas and refine their understanding of complex coding scenarios. This resource is essential for enhancing problem-solving abilities and boosting confidence before taking the actual AAPC CPC exam. Regular updates ensure the answers align with the latest coding guidelines and industry standards.

Common Challenges in the AAPC CPC Exam

Candidates often struggle with complex coding scenarios, anatomical terminology, and time management. Accurate application of guidelines and understanding modifiers are also challenging areas that require thorough preparation.

Difficult Areas to Focus On

The AAPC CPC exam presents challenges in areas like medical terminology, anatomy, and complex coding guidelines. Difficulties arise with ICD-10-CM and CPT coding, particularly in nuanced scenarios. Many struggle with HCPCS Level II codes and modifier applications. Understanding anatomical compartments and viscera is also critical, as seen in questions about thoracic structures. Time management and accurate guideline application are recurring issues. Candidates must focus on these areas, using practice exams and comprehensive study guides to build proficiency. Mastering these challenging topics is essential for success on the CPC exam.

Common Mistakes to Avoid

Avoiding common mistakes is crucial for success on the CPC exam. Many candidates overlook detailed coding guidelines, leading to errors. Misunderstanding anatomical structures and compartments, such as those in the thoracic cavity, can result in incorrect answers. Rushing through questions without thorough analysis is another pitfall. Candidates should also avoid relying solely on memory without verifying guidelines. Practicing with real exam questions helps identify these mistakes and improves accuracy and time management, ensuring a well-prepared approach to the certification exam.

Final Tips for Passing the AAPC CPC Exam

Practice with real exam questions, focus on weak areas, and manage time effectively. Stay calm, read carefully, and review answers to ensure accuracy and confidence during the exam.

Exam Day Strategies

Arrive early to avoid stress and familiarize yourself with the exam environment. Use the 4-hour timeframe wisely, skimming through questions to identify easier ones first. Manage your time by allocating 1-2 minutes per question. Answer confidently, ensuring each response aligns with coding guidelines. Review your answers if time permits to correct any mistakes. Stay calm and focused throughout the exam. Utilize the resources you’ve practiced with, such as AAPC CPC exam questions and answers PDF, to reinforce your knowledge and improve accuracy during the test.

Maintaining Confidence and Focus

Maintaining Confidence and Focus

Maintaining confidence and focus during the AAPC CPC exam is crucial for success. Practice with real exam questions and answers PDF helps build familiarity and reduces anxiety. Stay positive and remind yourself of your preparation. Take deep breaths to manage stress and approach each question methodically. Avoid second-guessing answers unless certain of an error. Use the process of elimination to narrow down options. Trust your knowledge and coding skills, as consistent practice ensures readiness. Stay hydrated, well-rested, and mentally prepared to tackle the exam with clarity and determination.

Mastering the AAPC CPC exam requires dedication, thorough preparation, and practice with real questions. Utilize PDF resources for effective study and stay confident to achieve success.

The AAPC CPC exam questions and answers PDF provides essential resources for exam preparation, offering realistic practice and in-depth understanding of coding concepts. Utilizing these materials helps candidates master medical terminology, anatomy, and coding guidelines. Time management and focused study strategies are crucial for success. Additionally, joining study groups and using flashcards can enhance retention and confidence. Staying updated with the latest exam questions and verified answers ensures readiness for the challenges of the CPC exam. Consistent practice and thorough preparation are key to achieving certification and advancing in medical coding careers.

Encouragement for Future Exam-Takers

Embarking on the AAPC CPC exam journey requires dedication and perseverance, but the rewards are immense. Leveraging resources like exam questions and answers PDFs ensures a strong foundation and familiarity with exam formats. Consistent practice and active participation in study groups can significantly boost confidence and understanding. Remember, every challenge is an opportunity to grow. Stay focused, utilize available tools, and trust in your preparation. With determination and the right strategies, you can successfully become a Certified Professional Coder and advance your career in medical coding.

i just can’t wait to be king lyrics pdf

This iconic song from The Lion King captivates audiences with its vibrant rhythm and ambitious themes, making it a timeless classic in both film and theater․

1․1 Overview of the Song’s Popularity

“I Just Can’t Wait to Be King” remains a crowd favorite, celebrated for its lively melody and themes of ambition and youthful energy․ Its appeal spans generations, resonating through its feature in The Lion King and various stage adaptations․ Performances by artists like JD McCrary and Shahadi Wright Joseph, along with its presence in a downloadable PDF songbook, have maintained its popularity․ Easy access to PDF lyrics online has further enhanced its reach, making it a beloved and enduring anthem in popular culture․

1․2 Historical Context of the Song

“I Just Can’t Wait to Be King” was created in 1994 for Disney’s The Lion King, written by Elton John and Tim Rice․ The song captures Simba’s youthful ambition and desire for freedom, resonating with audiences globally․ Its release coincided with the film’s massive success, making it an instant classic․ Over the years, the song has remained relevant, with its lyrics readily available in PDF formats, ensuring its accessibility and enduring popularity․ This historical context highlights its significance as a cultural and musical milestone․

1․3 Relevance of the Song in Modern Culture

“I Just Can’t Wait to Be King” remains a cultural phenomenon, widely referenced in media and pop culture․ Its themes of ambition and identity resonate with modern audiences, making it a favorite in both original and cover versions․ The song’s availability in PDF formats has made it accessible for educational purposes, such as language learning and theatrical performances․ This timeless appeal ensures its continued relevance, bridging generations and inspiring new interpretations․ Its presence in digital platforms highlights its enduring impact on music and entertainment today․

The Origin of the Song

“I Just Can’t Wait to Be King” was created by Elton John and Tim Rice for The Lion King, capturing Simba’s youthful ambition and desire for freedom․ The song’s catchy melody and memorable lyrics, featured in the movie’s soundtrack, have made it a beloved classic․ Its origin stems from the film’s narrative, reflecting themes of leadership and growing up, and has since become a cultural anthem․ The song’s success is a testament to the collaboration of its creators and its timeless appeal․

2․1 The Lion King as a Source of Inspiration

The Lion King’s narrative of Simba’s journey to kingship served as the primary inspiration for the song․ “I Just Can’t Wait to Be King” reflects Simba’s youthful ambition and desire for freedom, capturing the essence of his character development․ The song’s creation was deeply rooted in the film’s African setting and themes of leadership, with Elton John and Tim Rice crafting lyrics that mirrored Simba’s internal struggle and aspiration․ The movie’s success and timeless appeal ensured the song’s enduring popularity, making it a cornerstone of both the film and its legacy․

2․2 The Role of Elton John and Tim Rice

Elton John and Tim Rice were instrumental in creating the iconic soundtrack for The Lion King․ Elton John composed the music, infusing it with his signature style, while Tim Rice crafted the lyrics, ensuring they aligned with Simba’s journey․ Their collaboration brought depth and emotion to the song, capturing Simba’s youthful ambition․ John’s melody and Rice’s wordplay perfectly complemented the film’s narrative, making “I Just Can’t Wait to Be King” a standout piece․ Their creative partnership not only enhanced the movie but also solidified the song’s place in musical history, earning widespread acclaim and enduring popularity․

2․3 The Song’s Place in the Movie Soundtrack

“I Just Can’t Wait to Be King” holds a prominent position in The Lion King soundtrack, serving as a vibrant and energetic highlight; The song is performed by young Simba, showcasing his eagerness to assume kingship and escape his responsibilities․ Accompanied by Nala and Zazu, the track emphasizes Simba’s youthful ambition and naivety․ Its upbeat melody contrasts with the film’s darker themes, making it a fan favorite․ The song’s placement in the movie underscores Simba’s character development, setting the stage for his eventual growth․ It remains a defining piece in the soundtrack, reflecting the film’s blend of joy and underlying complexity․

Lyrics Analysis

This song’s vibrant rhythm and themes of ambition and youthful impatience captivate listeners․ Its lyrics explore Simba’s journey through metaphors, highlighting his transformation from prince to king․

3․1 The Theme of Ambition and Power

The song vividly captures Simba’s hunger for leadership and his eagerness to embrace kingship․ Through bold declarations like “I’m gonna be a mighty king,” it reflects his desire to break free from Mufasa’s shadow․ The lyrics highlight the tension between youthful impatience and the responsibilities of power, showcasing Simba’s internal struggle to balance confidence with humility․ This theme resonates universally, as it explores the complexities of ambition and the journey toward self-discovery․ The song’s portrayal of Simba’s aspirations makes it a compelling narrative of growth and the pursuit of destiny․

3;2 The Use of Metaphors and Wordplay

The song employs vivid metaphors and clever wordplay to convey Simba’s youthful energy and ambition․ Lines like “I’m gonna be the mane event” use wordplay to highlight Simba’s desire for prominence․ The metaphor of kingship is central, with references to power and leadership․ The lyrics also use playful comparisons, such as contrasting Simba’s lack of hair with traditional lion kings․ These elements create a lively, engaging narrative that captures Simba’s personality and aspirations․ The wordplay adds depth and humor, making the song memorable and relatable to audiences of all ages․

3․3 The Psychological Depth of Simba’s Character

The song offers a glimpse into Simba’s inner world, revealing his impatience, ambition, and desire for freedom․ The lyrics capture his youthful arrogance and struggle with responsibility, showcasing his emotional complexity․ Simba’s character is portrayed as both confident and naive, highlighting his journey from immaturity to leadership․ The song’s dialogue between Simba and Zazu underscores his internal conflict, illustrating his desire to break free from constraints․ This psychological depth makes Simba relatable, as audiences witness his growth and ultimate acceptance of his destiny․ The lyrics effectively convey his transformation, setting the stage for his future as a wise king․

Cultural Impact

The song has left a lasting mark on pop culture, inspiring numerous covers and theatrical performances․ Its catchy melody and relatable themes continue to engage global audiences, solidifying its legacy․

4․1 The Song’s Influence on Pop Culture

“I Just Can’t Wait to Be King” has become a cultural phenomenon, inspiring countless covers and parodies․ Its catchy melody and relatable themes of ambition resonate across generations․ The song’s influence extends beyond music, featuring in films, TV shows, and even social media trends․ Its iconic lyrics have been referenced in various forms of media, cementing its status as a pop culture staple․ The song’s versatility allows it to be enjoyed in both its original form and through creative reinterpretations, ensuring its lasting impact on modern entertainment and culture․

4․2 Covers and Remixes of the Song

The song has inspired numerous covers and remixes, showcasing its timeless appeal․ Artists like JD McCrary and Shahadi Wright Joseph have delivered vibrant renditions, while others have created unique acoustic and orchestral versions․ The track’s versatility allows for creative reinterpretations, from energetic pop mixes to soulful ballads․ Its catchy melody and memorable lyrics make it a favorite for both professional artists and amateur performers․ These covers not only highlight the song’s adaptability but also introduce it to new audiences, ensuring its relevance across generations and musical genres․

4․3 The Song’s Role in Theatrical Performances

“I Just Can’t Wait to Be King” is a cornerstone of The Lion King theatrical productions, electrifying audiences worldwide․ Its energetic rhythm and lively choreography make it a standout moment in the show․ Performers bring Simba’s youthful ambition to life, captivating viewers with dynamic stage presence․ The song’s theatrical adaptation enhances its emotional impact, blending music, dance, and storytelling seamlessly․ It remains a fan favorite, embodying the essence of Simba’s journey and the magic of the production․ This ensures its enduring appeal in live performances, solidifying its place in theatrical history․

PDF Resources and Downloads

PDF versions of “I Just Can’t Wait to Be King” lyrics are widely available online, offering convenient access for fans and educational purposes․ Legal sources ensure copyright compliance, while proper attribution remains essential for ethical use․

5․1 Availability of “I Just Can’t Wait to Be King” Lyrics in PDF

The lyrics of “I Just Can’t Wait to Be King” are widely available in PDF format online, accessible through platforms like Scribd and official Disney websites․ Fans and educators can download these PDFs for free or purchase them as part of official songbooks․ The PDF files often include sheet music, making them valuable for musical performances and learning․ Legal sources ensure copyright compliance, while free downloads may require registration or subscription․ Proper attribution is crucial when sharing or using these resources, as they are protected under intellectual property laws․ This accessibility makes the song a popular choice for both personal enjoyment and educational purposes․

5․2 Legal and Free Sources for Download

Several legal and free sources offer “I Just Can’t Wait to Be King” lyrics in PDF format․ Platforms like Scribd and official Disney websites provide easy access to these documents․ Some sites require registration or subscription for downloads, while others offer free access without fees․ Legal sources ensure compliance with copyright laws, protecting both creators and users․ Free downloads are often available through educational or promotional campaigns, making the lyrics accessible to fans and educators alike․ Always verify the legitimacy of sources to avoid pirated content and support intellectual property rights․

5․3 The Importance of Proper Attribution

Proper attribution is crucial when using “I Just Can’t Wait to Be King” lyrics in PDF format․ It ensures respect for the creators, including Elton John and Tim Rice, and compliance with copyright laws․ Legal sources like official Disney websites and licensed platforms provide proper attribution, protecting both users and creators․ Failing to credit the original authors can lead to legal consequences and undermine the value of their work․ Always verify the source and cite it appropriately to maintain ethical standards and support the creators’ rights․ This practice fosters a culture of respect for intellectual property and artistic contributions․

Educational Value

The song’s lyrics offer valuable educational tools, aiding language learners in vocabulary expansion and providing material for literary analysis and music composition studies, fostering creativity and critical thinking․

6․1 Using the Song in Language Learning

The song’s catchy melody and repetitive phrases make it an excellent tool for language learners, aiding in pronunciation practice and vocabulary expansion․ Its rhythmic structure simplifies comprehension, while the emotional expression enhances intonation skills․ PDF versions of the lyrics provide visual aids for studying syntax and word choice, making it ideal for classroom activities․ Additionally, the cultural context of The Lion King offers insights into storytelling and themes, enriching language acquisition with meaningful content․ This makes the song a versatile and engaging resource for learners at various proficiency levels, fostering both linguistic and cultural understanding․

6․2 Analyzing the Lyrics for Literary Studies

The lyrics of “I Just Can’t Wait to Be King” offer rich material for literary analysis, exploring themes of ambition, identity, and coming-of-age․ The song’s vivid metaphors and wordplay, such as “I’m gonna be the mane event,” highlight Simba’s youthful arrogance and desire for power․ The repetitive structure and rhythmic cadence emphasize the character’s emotional journey․ PDF versions of the lyrics enable close reading, allowing students to dissect literary devices and thematic elements․ This makes the song a valuable text for studying character development and narrative techniques in a musical context, blending storytelling with musical expression․

6․3 The Song’s Role in Music Education

“I Just Can’t Wait to Be King” is a valuable resource in music education, offering insights into rhythm, melody, and lyrical composition․ Its upbeat tempo and catchy tunes make it ideal for teaching musical concepts like syncopation and harmony․ PDF versions of the lyrics and sheet music provide educators with accessible tools for classroom activities․ The song also encourages vocal exercises and performances, helping students develop their musical skills․ Additionally, its cultural significance and emotional depth allow for discussions on storytelling in music, making it a versatile tool for both theoretical and practical music education․

Historical References

The song subtly alludes to historical figures like King Charles II, reflecting themes of monarchy and power․ Its lyrics symbolize kingship and royal lineage, adding depth to Simba’s journey․

7․1 The Mention of King Charles II

The lyrics subtly reference King Charles II, highlighting themes of monarchy and inherited power․ This historical nod underscores Simba’s ambition and the weight of royal responsibility․ The mention of Charles II, known for restoring the monarchy, parallels Simba’s journey to reclaim his rightful place as king․ This historical allusion enriches the song’s narrative, linking it to real-world monarchies and their complexities․ The reference also serves as a metaphor for the transition of power and the challenges faced by future rulers, adding depth to Simba’s character development and the story’s universal appeal․

7․2 The Connection to Royal Dynasties

The song subtly draws parallels to royal dynasties, reflecting the transition of power and the complexities of kingship․ The lyrics evoke the grandeur and challenges faced by monarchs throughout history, much like Simba’s journey․ The reference to King Charles II in the context of Pennsylvania’s founding highlights the historical weight of royal authority․ This connection underscores the universal theme of ascension to power, making Simba’s ambition relatable across cultures and time․ The song’s portrayal of kingship mirrors the rise and fall of real-world dynasties, adding depth to its narrative and appeal․

7․3 The Symbolism of Kingship in the Lyrics

The lyrics of “I Just Can’t Wait to Be King” are rich in symbolism, particularly in their portrayal of kingship․ Simba’s ambition to rule reflects the universal theme of leadership and power, with the song using metaphors like “the mane event” to emphasize his destined role․ The reference to King Charles II ties the song to historical monarchies, symbolizing the weight of legacy and authority․ The lyrics also explore the duality of kingship—its glory and its burdens—highlighting Simba’s journey from youthful impatience to wise governance․ This symbolism resonates deeply, making the song a timeless commentary on leadership and identity․

Personal and Social Themes

The song explores themes of identity, ambition, and responsibility, reflecting Simba’s internal struggle to embrace his destiny and the societal expectations of leadership․

8․1 The Struggle for Identity

The song captures Simba’s journey of self-discovery, highlighting his impatience with his current role and eagerness to embrace kingship․ The lyrics reflect his internal conflict between youthful impulsiveness and the weight of responsibility․ Simba’s character embodies the universal struggle of finding one’s place in the world, navigating between personal desires and societal expectations․ This theme resonates deeply, as audiences relate to the challenges of growing up and defining oneself․ The song’s portrayal of Simba’s identity crisis adds emotional depth, making it a relatable and memorable element of The Lion King’s narrative․

8․2 The Concept of Leadership

The song explores Simba’s vision of leadership, blending youthful naivety with ambition․ It portrays leadership as a position of power and freedom, emphasizing the desire to rule without constraint․ The lyrics highlight Simba’s belief that leadership is about giving orders and enjoying authority, rather than understanding responsibility․ This perspective contrasts with the true essence of leadership, which involves accountability and wisdom․ The song serves as a reflection on the complexities of leadership, showing how Simba’s journey from immaturity to maturity mirrors the challenges of embracing leadership roles effectively․

8․3 The Balance Between Freedom and Responsibility

The song delves into Simba’s desire for freedom from responsibility, reflecting his youthful ambition․ It highlights the tension between wanting to rule without constraints and the eventual realization that leadership requires accountability․ The lyrics convey Simba’s initial disregard for duty, showcasing his impulsive nature․ However, the song also hints at the necessity of balancing freedom with responsibility, a lesson Simba learns as he matures․ This theme is central to his journey, emphasizing that true leadership involves both power and the wisdom to wield it wisely, creating a harmonious balance between autonomy and obligation․

Musical Composition

The song features a vibrant melody by Elton John and playful lyrics by Tim Rice, creating a lively and catchy rhythm that captivates listeners and enhances its emotional depth․

9․1 The Melody and Rhythm

The melody of “I Just Can’t Wait to Be King” is lively and upbeat, crafted by Elton John to reflect Simba’s youthful energy and ambition․ The rhythm, driven by African-inspired beats and playful percussion, creates a sense of movement and joy․ The song’s structure, with its catchy chorus and layered harmonies, enhances its memorable appeal․ Tim Rice’s lyrics seamlessly blend with the melody, emphasizing Simba’s desire for freedom and leadership․ The interplay of brass and percussion instruments adds vibrancy, making the track a standout piece in both the film and theatrical adaptations․

9․2 The Use of Instruments and Orchestration

The song features a vibrant mix of instruments, with brass sections, including trumpets and trombones, adding energy and grandeur․ Percussion elements like drums and congas provide a lively, rhythmic foundation, emphasizing the African-inspired feel․ Woodwinds, such as flutes, complement the melody, creating a playful and dynamic atmosphere․ The orchestration layers these elements seamlessly, building excitement and reflecting Simba’s youthful enthusiasm․ The instrumentation, combined with Elton John’s signature style, creates a balanced yet exuberant sound that enhances the lyrical themes of ambition and freedom, making the track a memorable part of The Lion King’s legacy․

9․3 The Song’s Emotional Impact

The song evokes a powerful emotional response, blending Simba’s youthful energy with a deep longing for freedom and responsibility․ Its upbeat melody contrasts with the underlying tension of Simba’s journey, creating a sense of urgency and hope․ The lyrics resonate with listeners, capturing the universal desire for independence and self-discovery․ The emotional depth is heightened by the interplay between Simba’s optimism and the wisdom of surrounding characters, making it a relatable and inspiring anthem․ The track’s ability to balance joy with introspection has cemented its place as a timeless emotional connection for audiences worldwide․

Performances and Interpretations

The song has been performed by various artists, including JD McCrary, Shahadi Wright Joseph, and John Oliver, each bringing unique energy to Simba’s aspirations and youthful charisma․

10․1 Notable Performances of the Song

The song has been memorably performed by JD McCrary, Shahadi Wright Joseph, and John Oliver in the 2019 version of The Lion King․ Additionally, North West, daughter of Kanye West and Kim Kardashian, delivered a charming rendition at the Hollywood Bowl, showcasing the track’s cross-generational appeal․ These performances highlight the song’s enduring popularity and its ability to captivate diverse audiences, blending youthful energy with the timeless narrative of Simba’s journey to kingship․

10․2 Different Interpretations by Artists

Artists have reimagined “I Just Can’t Wait to Be King” in various styles, from orchestral arrangements to acoustic renditions․ Some versions emphasize the song’s playful rhythm, while others highlight its emotional depth․ Covers by diverse performers showcase the track’s versatility, blending jazz, rock, and even classical elements․ These interpretations not only honor the original’s spirit but also offer fresh perspectives, reflecting Simba’s journey from youthful impatience to royal responsibility․ Each rendition captures the essence of ambition and growth, resonating with audiences across generations and cultural boundaries․

10․3 The Song’s Reception by Audiences

Audiences worldwide have embraced “I Just Can’t Wait to Be King” for its infectious energy and relatable themes․ The song’s upbeat melody and playful lyrics resonate with listeners of all ages, making it a crowd favorite in both film and theatrical performances․ Fans often sing along enthusiastically, connecting with Simba’s youthful ambition and desire for freedom․ The track’s universal appeal lies in its ability to evoke joy and nostalgia, creating a shared experience that transcends generations and cultural boundaries․ Its enduring popularity is a testament to its timeless charm and emotional resonance․

Digital Resources and Accessibility

The song’s lyrics are widely accessible online through various platforms, offering downloads in PDF and other formats, ensuring easy access for fans and educational purposes globally․

11․1 Online Platforms for Lyrics Access

The lyrics of “I Just Can’t Wait to Be King” are readily available on various online platforms, including Genius, MetroLyrics, and Scribd, ensuring easy access for fans and educators․

These platforms provide accurate transcriptions of the song, often in downloadable formats like PDF, making it convenient for educational purposes and personal use․

Additionally, official Disney websites and legal lyric repositories offer reliable sources, ensuring that users can access the song’s words without copyright concerns or misinformation․

11․2 The Role of PDF in Preserving Lyrics

PDFs play a crucial role in preserving lyrics like “I Just Can’t Wait to Be King” by maintaining their formatting and ensuring accessibility across devices․

These files are widely shared on platforms like Scribd and official Disney sites, offering a stable and consistent way to view lyrics without losing their original structure․

This format is particularly valuable for educational purposes, enabling easy printing and sharing for language learning or musical analysis while respecting copyright and proper attribution․

11․3 The Future of Digital Music Resources

The future of digital music resources, like PDFs of “I Just Can’t Wait to Be King” lyrics, lies in enhanced accessibility and interactivity․ Platforms like Scribd and official Disney sites will likely integrate AI-driven search and personalization features, making lyrics more discoverable․ Cloud storage solutions will ensure universal access, while preserving the integrity of musical heritage․ Additionally, interactive PDFs could offer clickable lyrics, linking to performances or translations․ This evolution will maintain the song’s relevance in the digital age, blending innovation with tradition to cater to diverse audiences while ensuring proper attribution and legal access․

The timeless appeal of “I Just Can’t Wait to Be King” ensures its legacy, with PDF resources preserving its lyrics for future generations to enjoy and study․

12․1 The Enduring Legacy of the Song

“I Just Can’t Wait to Be King” remains a beloved anthem, its catchy melody and memorable lyrics transcending generations․ Available in PDF, it continues to inspire and entertain, ensuring its place in musical history․ The song’s themes of ambition and identity resonate universally, making it a timeless classic․ Its availability in digital formats like PDF has further cemented its legacy, allowing new audiences to discover its magic․ As a result, the song’s impact endures, solidifying its status as a cultural treasure․

12․2 The Importance of Preserving Musical Heritage

Preserving musical heritage ensures that iconic works like “I Just Can’t Wait to Be King” remain accessible for future generations․ The availability of its lyrics in PDF formats highlights the value of maintaining cultural artifacts․ This practice allows for educational exploration, such as analyzing themes and musical composition․ It also fosters appreciation for the creativity of artists like Elton John and Tim Rice․ By safeguarding these works, we honor their impact on pop culture and ensure their continued relevance in the digital age, making them timeless treasures for both study and enjoyment․

12․3 The Song’s Relevance in the Digital Age

In the digital age, “I Just Can’t Wait to Be King” remains highly relevant, with its lyrics readily available in PDF formats for easy access․ This accessibility has led to widespread use in educational settings, such as language learning and literary analysis․ The song’s themes of ambition and identity resonate universally, making it a popular choice for theatrical performances and covers․ Its enduring appeal is evident in its presence on online platforms, ensuring that future generations can engage with and appreciate this musical masterpiece, keeping its legacy alive in a rapidly evolving world․

freestyle freedom lite manual pdf

Welcome to the FreeStyle Freedom Lite manual, your comprehensive guide to understanding and using Abbott’s innovative blood glucose monitoring system. This manual provides detailed instructions for setup, operation, maintenance, and troubleshooting, ensuring optimal use of the device. Designed for both new and experienced users, it covers essential features, safety precautions, and compliance with medical standards. By following this guide, you’ll master the FreeStyle Freedom Lite, enhancing your glucose monitoring experience.

1.1 Overview of the FreeStyle Freedom Lite System

The FreeStyle Freedom Lite system, developed by Abbott, is a cutting-edge blood glucose monitoring solution. It offers advanced features like voice commands, customizable settings, and multilingual support. Designed for ease of use, the system is compatible with various accessories and ensures accurate glucose tracking. Its user-friendly interface and robust design make it a reliable choice for managing blood glucose levels effectively.

1.2 Importance of the Manual for Users

The FreeStyle Freedom Lite manual is crucial for safe and effective use of the device. It provides detailed instructions for setup, testing, and troubleshooting, ensuring accurate glucose monitoring. The manual also covers safety precautions, proper handling, and compliance with medical standards. By following the guidelines, users can optimize the device’s performance and maintain their health effectively. Regular reference to the manual is highly recommended.

Key Features of the FreeStyle Freedom Lite

The FreeStyle Freedom Lite offers advanced glucose monitoring with voice command functionality, customizable settings, and multilingual support. Its sleek, portable design ensures ease of use, while automatic backups and compatibility with iOS and Android enhance user convenience. The device is designed for accuracy and reliability, making it a trusted choice for blood glucose management.

2.1 Advanced Functionalities

The FreeStyle Freedom Lite boasts advanced functionalities such as voice command operation, customizable settings, and multilingual support, ensuring ease of use. It features automatic data backup and seamless integration with iOS and Android devices. These features enhance user convenience, providing a reliable and personalized glucose monitoring experience. The device’s portability and intuitive design further complement its advanced capabilities, making it a versatile choice for managing blood glucose levels effectively.

2.2 Compatibility and Design

The FreeStyle Freedom Lite is ergonomically designed for both left- and right-handed users, with a rotating testing area for comfort. It supports multiple languages, ensuring accessibility worldwide. The device is compatible with a range of approved accessories, including USB cables and power adapters, enhancing its versatility. Its sleek and portable design makes it easy to carry, while the intuitive interface ensures a seamless user experience.

Setting Up the FreeStyle Freedom Lite

Setting up the FreeStyle Freedom Lite involves unboxing, inserting the battery, and navigating the menu for initial configuration. Pairing with compatible accessories completes the setup process;

3.1 Initial Setup and Configuration

Begin by carefully unboxing the FreeStyle Freedom Lite and inserting the battery as instructed. Navigate through the menu to set the date, time, and unit preferences. Perform the first test strip insertion to initialize the device. Ensure all settings align with your preferences before proceeding to pair with accessories or conduct your first glucose test.

3.2 Pairing with Accessories

Pairing the FreeStyle Freedom Lite with compatible accessories ensures seamless integration and enhanced functionality. Turn on the device, navigate to the menu, and select “Pair Device.” Follow on-screen instructions to connect with the FreeStyle Libre scanner or other approved accessories. Use the USB cable for initial setup or firmware updates. Ensure all paired devices are listed in the manual for compatibility.

Using the FreeStyle Freedom Lite

Using the FreeStyle Freedom Lite is straightforward with its intuitive design and advanced features. Refer to the manual for step-by-step guidance on testing and interpreting results for optimal glucose monitoring.

4.1 Testing Procedures

For accurate results, follow the testing procedures outlined in the manual. Wash your hands, prepare the meter, and use a test strip. Gently prick your finger or alternate site with a lancet. Apply a small blood sample to the strip, ensuring proper filling. Avoid squeezing the finger excessively. Wait for the meter to display your blood glucose reading. Properly dispose of used strips and lancets after testing.

4.2 Understanding the Display and Results

The FreeStyle Freedom Lite display shows your blood glucose reading, date, time, and battery status. The large LCD screen ensures readability, with a backlight for low-light conditions. The device stores up to 400 test results, allowing you to track trends. Interpret results based on your target range, set by your healthcare provider. Refer to the manual for guidance on understanding symbols and error messages.

Maintenance and Care

Regularly clean the FreeStyle Freedom Lite with a soft cloth and avoid moisture. Store it in a dry place at room temperature. Replace batteries as instructed to ensure optimal performance and accuracy. Proper care extends the device’s lifespan and maintains reliable glucose readings. Follow manual guidelines for cleaning and storage.

5.1 Cleaning and Storage

Cleaning and Storage are crucial for maintaining your FreeStyle Freedom Lite. Use a soft, dry cloth to wipe the device, avoiding any harsh chemicals or moisture. For tougher stains, slightly dampen the cloth but ensure it’s thoroughly dried afterward. Handle the screen gently to prevent scratches. Store the meter in a protective case to safeguard it from dust and physical damage. Keep it in a cool, dry place, away from direct sunlight, to preserve accuracy and longevity.

5.2 Battery Management

Battery Management ensures your FreeStyle Freedom Lite operates reliably. Use the provided USB cable for charging, avoiding damaged or third-party cables. The device has a long-lasting battery, typically requiring recharging every few months. A low-battery indicator alerts you when power is low. Store the meter with a partial charge if not in use for extended periods to maintain battery health and prevent deep discharge.

Troubleshooting Common Issues

Identify and resolve common issues with your FreeStyle Freedom Lite, such as error codes, connectivity problems, or inaccurate readings, by following the manual’s dedicated troubleshooting section.

6.1 Error Codes and Solutions

The manual details common error codes like E-1, E-2, and provides clear solutions. Restarting the device, replacing the battery, or reinserting the test strip often resolves issues. For persistent errors, calibration checks or contacting Abbott support is recommended. This section ensures users can quickly address and fix problems, minimizing disruptions to glucose monitoring routines. Always refer to the manual for specific error code meanings and step-by-step fixes.

6.2 Resolving Connectivity Problems

To address connectivity issues with the FreeStyle Freedom Lite, restart the device and ensure Bluetooth is enabled on your smartphone. Re-pair the device through the app settings, and verify that the app is updated. If problems persist, reset the device or contact Abbott support for assistance. Proper connectivity ensures seamless glucose data syncing and accurate monitoring.

Compatible Accessories

The FreeStyle Freedom Lite supports various accessories, including USB cables, power blocks, and carrying cases, ensuring optimal performance and convenience for users.

7.1 List of Approved Accessories

The FreeStyle Freedom Lite is compatible with several approved accessories, including USB cables for data transfer, power blocks for charging, and carrying cases for convenient transport. Additional items like test strip holders and lancing devices are also available. These accessories ensure seamless operation and portability of the device, enhancing user experience and adherence to monitoring routines. Always use Abbott-recommended products for optimal performance.

7.2 Where to Purchase Accessories

Approved accessories for the FreeStyle Freedom Lite can be purchased through Abbott’s official website, authorized medical supply retailers, or select pharmacies. Online platforms like Amazon may also carry verified products, but ensure they are A Abbott-authorized sellers. Additionally, the FreeStyle Libre software portal provides links to purchase compatible accessories directly. Always verify authenticity to ensure proper functionality.

Software and Digital Integration

The FreeStyle Libre software enhances glucose monitoring by seamlessly integrating with the FreeStyle Freedom Lite, offering advanced data management and compatibility across multiple devices for optimal tracking.

8.1 FreeStyle Libre Software Overview

The FreeStyle Libre software is a comprehensive digital tool designed to work seamlessly with the FreeStyle Freedom Lite system. It allows users to track and analyze glucose levels, set reminders, and generate detailed reports. The software supports multiple languages and is compatible with various devices, making it a versatile solution for managing diabetes effectively. Regular updates ensure enhanced functionality and user experience.

8.2 Data Management Tools

The FreeStyle Freedom Lite system offers advanced data management tools, enabling users to track and analyze glucose levels effortlessly. These tools provide detailed reports, trend analysis, and customizable alerts, helping users make informed decisions. Compatible with Abbott’s software, they ensure seamless data synchronization and storage, empowering users to manage their diabetes effectively with real-time insights and comprehensive monitoring capabilities.

Multilingual Support

The FreeStyle Freedom Lite manual is available in multiple languages, ensuring accessibility for users worldwide. Language-specific manuals are provided, catering to diverse linguistic needs and preferences.

9.1 Availability in Multiple Languages

The FreeStyle Freedom Lite manual is accessible in numerous languages, including English, Italian, Greek, Danish, and more, ensuring global accessibility. This multilingual support allows users to understand the device’s features, setup procedures, and troubleshooting tips in their native language, enhancing user experience and compliance with medical standards worldwide. Language-specific versions are available for download as PDFs online. Abbott prioritizes inclusivity and clarity for all users.

9.2 Language-Specific Manuals

The FreeStyle Freedom Lite manual is offered in multiple languages, including Italian, Greek, and Danish, ensuring accessibility for diverse users. Each language-specific manual provides detailed instructions tailored to regional preferences, covering setup, testing, and troubleshooting. For example, the Italian manual highlights advanced features like voice commands, while the Greek version emphasizes data management tools. Users can download these manuals in PDF format, ensuring clarity and ease of use in their native language.

Safety Precautions

Always read the manual’s instructions carefully before using the FreeStyle Freedom Lite. Adhere to all warnings and cautions to ensure safe operation and accurate results. Proper handling techniques are essential to maintain device performance and user safety.

10.1 Warnings and Cautions

Read all instructions in the manual before using the FreeStyle Freedom Lite. Always follow proper testing procedures to avoid inaccurate results. Handle the device with care to prevent damage. Avoid using damaged test strips, as they may compromise accuracy. Keep the device out of reach of children. Do not expose the meter to extreme temperatures or strong magnetic fields, as this may affect performance. Adhere to all safety guidelines provided in the manual to ensure safe and effective use.

10.2 Proper Handling Techniques

Handle the FreeStyle Freedom Lite with care to ensure accurate performance. Clean the device regularly with a soft cloth and avoid harsh chemicals. Store the meter in a protective case when not in use. Avoid exposing the screen to direct sunlight or moisture. Keep the device dry and avoid extreme temperatures. Proper handling ensures longevity and reliable glucose monitoring results.

Regulatory Compliance

The FreeStyle Freedom Lite complies with regulatory standards, including ISO certifications and CE marking, ensuring safe and effective glucose monitoring as per medical guidelines.

11.1 Certifications and Approvals

The FreeStyle Freedom Lite is certified to international medical standards, including ISO 15197:2013, ensuring accuracy and reliability in blood glucose monitoring. It holds CE marking, confirming compliance with EU health and safety requirements. The device has undergone rigorous testing to meet regulatory standards, ensuring its performance and safety for users worldwide.

11.2 Compliance with Medical Standards

The FreeStyle Freedom Lite adheres to stringent medical standards, ensuring precise and reliable glucose monitoring. It meets ISO 15197:2013 requirements for blood glucose monitoring systems, guaranteeing accuracy and consistency. The device is FDA-cleared and CE-marked, aligning with global healthcare regulations. Compliance with these standards assures users of its safety, performance, and reliability for accurate blood glucose measurement and management.

User Reviews and Ratings

The FreeStyle Freedom Lite has received positive user reviews, with an average rating of 8.2 out of 10. Users praise its ease of use, accuracy, and portability, making it a reliable choice for blood glucose monitoring.

12.1 Average Ratings and Feedback

The FreeStyle Freedom Lite has an average rating of 8.2 out of 10, with users praising its ease of use, accuracy, and portability. Many appreciate its intuitive design and reliability, while some note minor connectivity issues. Overall, it is well-regarded for its performance and convenience, making it a popular choice among glucose monitoring systems.

12.2 Common User Experiences

Users report positive experiences with the FreeStyle Freedom Lite, emphasizing its user-friendly interface and accurate readings. Many highlight its portability and ease of testing, while some mention occasional connectivity issues with accessories. The system’s reliability and quick results have made it a preferred choice for daily glucose monitoring, with overall satisfaction reflecting its effectiveness and convenience for managing blood sugar levels.

Comparison with Other Models

The FreeStyle Freedom Lite stands out for its advanced features and compatibility, offering improvements over earlier models like the FreeStyle Lite, with enhanced design and functionality.

13.1 FreeStyle Freedom Lite vs. FreeStyle Lite

The FreeStyle Freedom Lite offers advanced features like multilingual support and enhanced compatibility compared to the FreeStyle Lite, which is more basic; The Freedom Lite boasts improved design and software integration, making it a superior choice for users seeking modern glucose monitoring solutions.

13.2 Key Differences and Upgrades

The FreeStyle Freedom Lite introduces advanced features such as multilingual support, enhanced software integration, and a more user-friendly interface compared to the FreeStyle Lite. It offers improved accuracy and faster testing capabilities, making it a more versatile and efficient glucose monitoring solution for users seeking upgraded functionality and connectivity options.

Downloading the Manual

The FreeStyle Freedom Lite manual is available for download in PDF format from official Abbott sources, offering clear instructions and guidelines for optimal device usage and troubleshooting.

14.1 PDF Availability and Sources

The FreeStyle Freedom Lite manual is readily available in PDF format on Abbott’s official website and trusted medical resource platforms. Users can download it for free, ensuring access to detailed instructions and guidelines. The PDF document, such as ART22310 504 Rev A, provides comprehensive information on system operation, maintenance, and troubleshooting.

14.2 Instructions for Downloading

To download the FreeStyle Freedom Lite manual, visit Abbott’s official website or authorized medical resource platforms. Search for the device model, select the PDF document, and follow the on-screen instructions. Ensure compatibility with your device and save the file for easy access. This process is straightforward, allowing users to quickly obtain the manual for reference.

The FreeStyle Freedom Lite manual provides essential guidance for optimal device use, ensuring accurate glucose monitoring and user safety. Refer to it regularly for best results.

15.1 Summary of Key Points

The FreeStyle Freedom Lite manual is a comprehensive guide covering setup, usage, maintenance, and troubleshooting. It emphasizes safety precautions, proper handling, and compliance with medical standards. Regular review ensures optimal performance and accurate glucose monitoring, helping users manage their health effectively. The manual is available in multiple languages and formats for convenience.

15.2 Final Tips for Optimal Use

For optimal use of the FreeStyle Freedom Lite, ensure regular calibration, use strips correctly, and store the device properly. Always follow the manual’s guidelines for testing and maintenance. Keep the device clean and check battery levels frequently. For troubleshooting, refer to the error codes section. Consult Abbott’s official support for any unresolved issues to maintain accuracy and reliability.

Additional Resources

Visit Abbott’s official website for support links, community forums, and detailed guides. These resources provide troubleshooting tips, software updates, and user testimonials to enhance your experience.

16.1 Official Abbott Support Links

Visit Abbott’s official support page for the FreeStyle Freedom Lite, offering direct access to the PDF manual, FAQs, troubleshooting guides, and customer support contact information. This resource ensures you have reliable assistance for any device-related queries, helping you maximize the functionality of your glucose monitoring system.

16.2 Community Forums and Guides

Engage with the diabetes community through forums like Diabetes Forums and Glucose Monitoring Groups, where users share tips and experiences with the FreeStyle Freedom Lite. These platforms offer practical advice, troubleshooting solutions, and real-world insights. Additionally, find user-generated guides on websites like Abbott Support Community and Glucose Monitoring Hub, enhancing your understanding and use of the device effectively.

bounty hunter metal detector instruction manual

Welcome to the Bounty Hunter Metal Detector, a versatile and easy-to-assemble device designed for both beginners and experienced users. Featuring motion detection technology, it ensures efficient and accurate metal detection across various terrains. With its lightweight design and user-friendly controls, this detector is perfect for treasure hunting, relic recovery, and outdoor adventures. Whether you’re exploring fields, beaches, or forests, the Bounty Hunter Metal Detector is a reliable companion for uncovering hidden treasures.

Overview of the Bounty Hunter Metal Detector

The Bounty Hunter Metal Detector is a user-friendly, lightweight, and ergonomic device designed for efficient treasure hunting. It features multiple detection modes, including All-Metal, Tone, and Discrimination, allowing users to tailor their experience. With adjustable sensitivity and discrimination controls, it adapts to various terrains, from beaches to forests. Ideal for both beginners and experienced detectors, it offers a balanced mix of simplicity and advanced features. The detector is built for durability and ease of use, making it a popular choice for outdoor adventures and metal detection enthusiasts.

Key Features of the Bounty Hunter Metal Detector

The Bounty Hunter Metal Detector boasts multiple detection modes, including All-Metal, Tone, and Discrimination, allowing users to customize their hunting experience. It features adjustable sensitivity and discrimination controls to filter unwanted metals and optimize performance in various environments. The detector is lightweight and ergonomic, ensuring comfortable use during extended sessions. With a waterproof search coil and durable construction, it is suitable for diverse terrains, including beaches and forests. The device operates on alkaline batteries and includes a warranty for added reliability. Its motion-based detection technology requires the search coil to move for accurate metal identification.

Why Choose the Bounty Hunter Metal Detector?

Choose the Bounty Hunter Metal Detector for its user-friendly design and versatility, making it ideal for both beginners and experienced hunters. Its lightweight and ergonomic build ensures comfort during long searches. The detector offers multiple detection modes, catering to diverse needs, and its motion-based technology enhances accuracy. With an affordable price and robust features, it provides excellent value. The warranty adds reliability, making it a trustworthy choice for treasure hunting adventures. Its ease of use and durability make it a top pick for outdoor enthusiasts seeking a dependable metal detection experience.

Understanding the Components

The Bounty Hunter Metal Detector consists of a searchcoil, control box, and adjustable shaft. The searchcoil detects metal, while the control box houses settings and controls, ensuring precise detection and ease of use. Batteries power the device, and ergonomic design enhances comfort during extended use. Each component is designed for durability and functionality, making the detector reliable for various terrains and conditions. Understanding these parts is essential for optimal performance and troubleshooting.

Main Parts of the Bounty Hunter Metal Detector

The Bounty Hunter Metal Detector includes essential components for effective operation. The searchcoil is the heart of the detector, detecting metal objects underground. The control box houses the circuitry, knobs, and mode switches, allowing users to adjust settings. An adjustable shaft ensures comfort for users of different heights. The handle is designed for grip and control, while batteries provide power. Together, these parts work seamlessly to deliver accurate and reliable performance, making the detector suitable for various environments and user preferences. Proper assembly and maintenance of these components are key to optimal functionality.

Searchcoil and Its Importance

The searchcoil is the primary component of the Bounty Hunter Metal Detector, responsible for detecting metal objects underground. It must be swept continuously to function, as a motionless coil cannot detect targets. The searchcoil is waterproof, allowing use in wet conditions, and its size and type impact detection depth and accuracy. Proper handling and care are essential to maintain performance. Regular inspection for damage and ensuring it is securely attached to the detector are crucial for optimal results. The searchcoil’s efficiency directly affects the detector’s ability to locate treasures effectively in various terrains and environments. Always store it safely to prevent damage.

Control Box and Its Functions

The control box is the nerve center of the Bounty Hunter Metal Detector, housing the electronic circuitry that processes detection signals. It features knobs for adjusting sensitivity, discrimination, and volume, allowing users to customize settings for different environments. The mode selection switch enables choosing between All-Metal, Tone, and Discrimination modes. These controls help in filtering unwanted metals and optimizing detection accuracy. The control box is designed for user-friendly operation, ensuring easy access to essential functions. Its intuitive design allows both beginners and experienced users to fine-tune their settings for better performance. Proper use of the control box enhances the overall metal detecting experience.

Batteries and Power Management

The Bounty Hunter Metal Detector operates on 9-volt alkaline batteries, ensuring reliable performance in the field. For optimal use, avoid using heavy-duty batteries, as they may reduce detection accuracy. Some models require two AA alkaline batteries, providing extended operation. Proper battery care is essential to maintain the detector’s functionality. Always check battery life before use and replace them when power levels drop. Turn off the detector when not in use to conserve energy. Regularly inspect battery compartments for cleanliness to prevent corrosion. Following these guidelines ensures consistent and efficient power management for your metal detecting adventures.

Assembly and Setup

Unpack and inventory all parts carefully. The Bounty Hunter Metal Detector is lightweight and easy to assemble without tools. Follow the step-by-step instructions provided for a seamless setup experience.

Unpacking and Inventory of Parts

Carefully unpack your Bounty Hunter Metal Detector and ensure all components are included. Expect the searchcoil, control box, adjustable armrest, and battery compartment. Check for any damage. Inventory includes the detector shaft, searchcoil cable, and user manual; Verify battery requirements, typically 9-volt alkaline or AA batteries, depending on the model. No tools are needed for assembly. Familiarize yourself with each part before proceeding to assembly. Ensure all items are in good condition to guarantee proper functionality. This step ensures a smooth and successful setup process for your metal detecting adventures.

Step-by-Step Assembly Instructions

Begin by attaching the control box to the detector shaft using the provided screws. Ensure it is securely fastened. Next, connect the searchcoil to the control box by aligning the plug with the socket. Gently tighten the connector. Insert the required batteries into the battery compartment, typically located in the control box. Adjust the armrest to your height for comfort. Finally, test the detector by turning it on and ensuring all functions operate smoothly. Follow these steps carefully to ensure proper assembly and optimal performance for your Bounty Hunter Metal Detector.

Adjusting the Detector to Your Height

Adjusting the Bounty Hunter Metal Detector to your height ensures comfort and optimal performance during use. Begin by loosening the detector shaft’s adjustment collar using the provided knob. Slide the shaft up or down to match your height, ensuring the searchcoil is approximately 1-2 inches above the ground. Once adjusted, tighten the collar firmly to secure the shaft in place. For added comfort, adjust the armrest to fit your forearm snugly. Proper height adjustment reduces fatigue and allows for smooth, efficient sweeping of the searchcoil during your metal detecting adventures.

Initial Testing of the Detector

Before your first hunt, perform an initial test to ensure your Bounty Hunter Metal Detector is functioning correctly. Turn on the detector and verify that it emits a clear, steady tone. Check all control knobs and ensure they adjust smoothly. Test the detector by passing a metal object, such as a coin, near the searchcoil to confirm it responds with a signal. If using Discrimination Mode, ensure unwanted metals are filtered out. Finally, verify ground balancing by adjusting the detector to your terrain. A successful test confirms your detector is ready for use.

Operating the Metal Detector

The Bounty Hunter Metal Detector operates in All-Metal, Tone, and Discrimination modes, allowing users to customize detection settings. Adjust sensitivity, discrimination, and volume via control knobs for optimal performance. Ground balancing ensures accurate detection across various terrains. Sweep the searchcoil steadily to detect metal targets efficiently. The detector emits distinct tones for different metals, aiding in target identification. Proper operation requires understanding the detector’s settings and terrain adjustments for successful treasure hunting experiences.

Basic Operating Modes: All-Metal, Tone, and Discrimination

The Bounty Hunter Metal Detector features three primary operating modes: All-Metal, Tone, and Discrimination. All-Metal mode detects all types of metal without discrimination, ideal for locating treasures quickly. Tone mode emits distinct audio signals based on the metal type, aiding in target identification. Discrimination mode filters out unwanted metals like trash, allowing focus on valuable targets. These modes enhance versatility, enabling users to tailor detection settings to their environment and preferences. Proper use of these modes ensures efficient and accurate metal detection, making the Bounty Hunter a reliable tool for both beginners and experienced users.

Using the Control Knobs: Sensitivity, Discrimination, and Volume

The Bounty Hunter Metal Detector is equipped with three essential control knobs: Sensitivity, Discrimination, and Volume. The Sensitivity knob adjusts the detector’s responsiveness to metal targets, allowing users to optimize performance in different environments. The Discrimination knob filters out unwanted metals, such as trash or foil, ensuring focus on valuable targets. The Volume knob controls the audio output, enabling users to adjust the tone to their preference. Proper adjustment of these knobs enhances detection accuracy and ensures a more efficient hunting experience. Understanding and mastering these controls is key to maximizing the detector’s potential.

How to Sweep the Searchcoil for Optimal Detection

To achieve optimal detection, sweep the searchcoil in a steady, side-to-side motion, maintaining a consistent height above the ground. Avoid jerky movements, as they can disrupt the detector’s performance. Overlap your passes slightly to ensure thorough coverage of the search area. Adjust your sweep speed based on the terrain and sensitivity settings—slower sweeps enhance depth, while faster sweeps cover more ground. Always keep the coil parallel to the ground to maximize detection accuracy and avoid false signals. Proper sweeping technique is essential for uncovering hidden treasures effectively.

Understanding Detection Signals and Tones

The Bounty Hunter Metal Detector emits distinct tones to indicate the presence of metal objects. High-pitched tones typically signal valuable targets like coins or jewelry, while low tones may indicate larger or less conductive items. The detector’s discrimination feature helps filter out unwanted metals, such as trash or foil, by suppressing their signals. As you sweep, pay attention to the tone’s consistency and strength, as these can help gauge the target’s size, depth, and type. Practice interpreting these signals to refine your hunting skills and locate treasures more efficiently.

Ground Balancing for Different Terrains

Ground balancing adjusts the detector to compensate for mineralization in the soil, ensuring accurate detection. The Bounty Hunter Metal Detector offers both automatic and manual ground balancing. For most terrains, automatic mode suffices, while manual mode is ideal for highly mineralized areas. On beaches, lower sensitivity reduces interference from wet sand. In fields, adjust the balance to filter out iron deposits. Proper ground balancing minimizes false signals and enhances detection depth, allowing you to focus on genuine targets. Experiment with settings to optimize performance for your specific hunting environment and terrain conditions.

Detection Techniques

Effective detection techniques involve systematic sweeping patterns, overlapping passes, and adjusting sensitivity for optimal target discovery. Proper coil movement and mode selection enhance accuracy and efficiency in metal detection.

Scanning Techniques for Maximum Coverage

Effective scanning techniques ensure thorough coverage of your search area. Use parallel sweeps, overlapping each pass by about one-third of the searchcoil’s width to avoid missing targets. Maintain a steady, consistent speed and keep the coil close to the ground for optimal detection. For larger areas, divide the terrain into sections and methodically scan each part. Adjust sensitivity and detection modes based on the environment to enhance accuracy and efficiency.

This systematic approach maximizes the chances of locating hidden objects, making your metal detecting sessions more productive and enjoyable.

Pinpointing Targets with Precision

To pinpoint targets accurately, narrow the search area by reducing the sensitivity and discrimination settings. Use the searchcoil’s edge to locate the target’s center, as signals strengthen directly above the object. Move the coil slowly and steadily, listening for tone changes or visual cues on the LCD screen. Once the target is centered, mark the spot for retrieval. For deeper objects, adjust the coil angle to isolate the signal. This method ensures precise location and minimizes digging effort, making your metal detecting experience more efficient and rewarding.

Search Patterns for Efficient Hunting

For efficient hunting, adopt systematic search patterns such as parallel lines, grid patterns, or spiral searches. Start by dividing the area into sections and sweep the coil steadily, maintaining consistent height and overlap. This ensures thorough coverage and reduces the chance of missing targets. Adjust your pace according to sensitivity settings and terrain difficulty. Use discrimination and ground balancing features to focus on valuable items. By methodically covering the ground, you maximize detection opportunities and enhance your overall metal detecting experience with the Bounty Hunter Metal Detector.

Interpreting Target Signals

Understanding target signals is crucial for successful metal detecting. The Bounty Hunter Metal Detector emits distinct tones corresponding to the type of metal detected. In All-Metal mode, it provides continuous feedback, while Tone mode offers audio cues for specific metals. Discrimination mode filters out unwanted metals, producing signals only for targeted items. Higher-pitched tones often indicate valuable targets like coins or jewelry, while lower tones may signal trash. Adjust sensitivity and discrimination settings to refine signal accuracy. Practice interpreting tones to improve your ability to identify potential treasures and minimize false signals during your hunts.

Maintenance and Troubleshooting

Regularly clean the detector and store it in a dry place. Check batteries and replace them as needed. For issues, reset to factory settings or consult the manual for troubleshooting guides.

Cleaning and Storing the Metal Detector

Regular cleaning ensures optimal performance and longevity. Use a soft cloth to wipe down the metal detector, avoiding harsh chemicals. The searchcoil should be cleaned gently to remove dirt or debris. After use, store the detector in a cool, dry place, away from direct sunlight. Ensure all parts are dry to prevent rust or corrosion. For extended storage, remove batteries to avoid leakage. Proper care and storage will maintain your Bounty Hunter Metal Detector’s reliability and readiness for future adventures.

Checking and Replacing Batteries

Regularly inspect the batteries to ensure optimal performance. Use alkaline batteries (9-volt for most models) and avoid heavy-duty types. Check battery levels monthly or when detection accuracy decreases. To replace, open the battery compartment, remove the old batteries, and insert new ones, ensuring correct polarity. Store unused batteries in a cool, dry place, away from metal objects. Proper battery care extends the detector’s lifespan and ensures reliable operation. Refer to the manual for specific battery requirements for your Bounty Hunter model. Replace batteries promptly if you notice reduced sensitivity or intermittent signals.

Coil Maintenance and Care

Regularly inspect the searchcoil for damage or debris. Clean it with a soft brush or cloth to remove dirt or vegetation. Avoid submerging the coil in water for extended periods, as it may damage the internal components. Store the coil in a dry, protected area when not in use. Check for cracks or wear and tear, as this can affect detection accuracy. Replace the coil immediately if damaged, as it is essential for optimal performance. Proper maintenance ensures your Bounty Hunter Metal Detector operates effectively and prolongs its lifespan.

Troubleshooting Common Issues

Common issues with the Bounty Hunter Metal Detector include false signals, low sensitivity, or no detection. Check battery life and ensure they are fresh, as weak batteries can cause poor performance. Adjust sensitivity and discrimination settings to optimize detection. If interference occurs, ground balance the detector or move away from nearby electronic devices. Clean the searchcoil and inspect for damage. If issues persist, reset the detector to factory settings or consult the user manual for detailed troubleshooting steps. Proper maintenance and adjustments can resolve most problems effectively.

Resetting the Detector to Factory Settings

Resetting your Bounty Hunter Metal Detector to factory settings restores default configurations, resolving customization issues. Turn off the device, then press and hold the power and sensitivity knobs while turning it back on. Release after three seconds. This action resets all settings, including discrimination, volume, and ground balance. Perform this procedure if experiencing persistent operational problems or after making extensive adjustments. Resetting ensures optimal performance and returns the detector to its original state, ready for a fresh start in your treasure-hunting adventures. Always refer to the manual for specific reset instructions tailored to your model.

Advanced Features and Settings

The Bounty Hunter Metal Detector offers advanced features like customizable detection modes, sensitivity adjustments, and discrimination settings to enhance your treasure-hunting experience. Explore these settings to optimize performance for specific terrains and targets, ensuring precise detection and reducing false signals. Utilize the LCD screen (if available) to monitor real-time data, adjusting parameters for better accuracy. These features allow users to tailor the detector to their preferences, maximizing efficiency and success in various environments. Customize your settings to unlock the full potential of your Bounty Hunter Metal Detector.

Using Discrimination to Filter Unwanted Metals

The discrimination feature on your Bounty Hunter Metal Detector allows you to filter out unwanted metals like iron, aluminum, and steel, focusing only on valuable targets. By adjusting the discrimination knob, you can customize the detector to ignore specific metal types, reducing false signals and saving time. This feature is particularly useful in areas with high levels of trash or modern debris. Experiment with different settings to optimize detection for coins, jewelry, or relics, ensuring a more efficient and enjoyable hunting experience. Discrimination is a powerful tool for refining your searches and maximizing success.

Adjusting Sensitivity for Different Environments

Adjusting the sensitivity on your Bounty Hunter Metal Detector is crucial for optimizing performance in various environments. Higher sensitivity settings enhance detection depth and accuracy but may increase interference in mineral-rich or noisy areas. Lower settings reduce false signals, ideal for highly mineralized ground or urban locations with metal debris. Use the sensitivity knob to fine-tune the detector based on soil conditions and target depth requirements. Proper adjustment ensures clearer signals and better target identification, enhancing your overall metal detecting experience. Experiment with sensitivity levels to find the perfect balance for your hunting conditions.

Customizing Detection Modes

The Bounty Hunter Metal Detector offers customizable detection modes to suit different hunting needs. Switch between All-Metal, Tone, and Discrimination modes using the mode selection switch. All-Metal mode provides maximum sensitivity for detecting all types of metal, while Tone mode emits distinct sounds for different metals. Discrimination mode filters out unwanted metals, reducing false signals. Users can further customize these modes by adjusting sensitivity and discrimination levels, allowing for tailored detection experiences. This flexibility ensures optimal performance in various environments, whether searching for coins, relics, or precious metals. Customize your settings to match your target and terrain for better results.

Understanding the LCD Screen (if applicable)

Some advanced Bounty Hunter models feature an LCD screen, providing real-time feedback during detection. The screen displays target identification, depth indicators, and battery levels. It also shows detection mode and sensitivity settings, allowing users to monitor and adjust configurations easily. The LCD screen aids in identifying metal types, such as coins, jewelry, or relics, by categorizing signals. This feature enhances precision and streamlines the hunting process. Use the LCD screen to track your settings and optimize performance for better results in various environments. It’s a valuable tool for experienced users seeking detailed feedback.

Safety and Legal Considerations

Always use the detector outdoors, as indoor appliances may interfere with its operation. Ensure compliance with local laws and obtain necessary permits before metal detecting. Respect private property and historical sites to avoid legal issues. Handle the device responsibly to avoid accidents and damage. Follow all safety guidelines for a secure and enjoyable metal detecting experience. Adhere to environmental regulations to preserve natural and cultural heritage sites. Happy hunting responsibly!

Safety Precautions for Metal Detecting

Always use the Bounty Hunter Metal Detector outdoors, as indoor appliances may interfere with its operation. Avoid detecting near power lines or other hazardous areas. Respect private property rights and obtain permission before searching. Handle the device responsibly to prevent accidents. Follow local laws and regulations to ensure legal compliance. Be mindful of environmentally sensitive areas and historical sites. Never detect in restricted zones without proper authorization. Use the detector safely and responsibly to avoid damage to the device or the environment. Ensure a secure and enjoyable metal detecting experience by adhering to these guidelines.

Legal Restrictions on Metal Detecting

Always comply with local, state, and federal laws when using the Bounty Hunter Metal Detector. Metal detecting is restricted in certain areas, such as national parks, historical sites, and private properties without permission. Obtain necessary permits and approvals before detecting in sensitive or protected zones. Respect cultural and archaeological sites, as disturbing them may be illegal. Familiarize yourself with regional regulations to avoid legal consequences. Ensure you have landowner permission for private properties; Remember, legal compliance is essential for responsible and ethical metal detecting practices.

Respecting Private and Public Property

Always respect property rights when using the Bounty Hunter Metal Detector. Obtain explicit permission before detecting on private property, as trespassing is illegal and unethical. In public areas, ensure metal detecting is allowed, as some sites, like historical parks, may restrict it. Research local regulations to avoid violations. Leave the environment undamaged, filling any holes and avoiding sensitive areas like gravesites. Carry proof of permission for private lands and practice responsible detecting to preserve access for future enthusiasts. Respectful use ensures a positive experience for everyone.

Additional Resources

Download manuals, guides, and FAQs for Bounty Hunter metal detectors. Explore online forums and communities for tips and support. Visit First Texas Products for detailed resources and warranty information.

Downloadable Manuals and Guides

Access comprehensive downloadable manuals and guides for your Bounty Hunter metal detector online. These resources provide detailed instructions on assembly, operation, and troubleshooting. Visit the official First Texas Products website to find specific manuals for your model, such as the Tracker IV or Land Ranger Pro. PDF guides are available for easy viewing or printing, ensuring you have all the information needed to get the most out of your detector. These manuals also include tips for optimizing performance, understanding detection modes, and maintaining your device for long-term reliability.

Online Communities and Forums

Engage with online communities and forums dedicated to metal detecting enthusiasts. These platforms offer valuable insights, tips, and troubleshooting advice for Bounty Hunter metal detectors. Share experiences, ask questions, and learn from seasoned users. Popular forums discuss optimal settings, detection techniques, and model-specific advice. Stay updated on the latest trends and technologies in metal detecting. Participating in these communities can enhance your hunting skills and help you make the most of your Bounty Hunter metal detector. Join discussions to connect with fellow hobbyists and gain expert knowledge.

Customer Support and Warranty Information

The Bounty Hunter Metal Detector is backed by reliable customer support and a comprehensive warranty. For any inquiries or issues, contact the manufacturer directly via phone or email. The detector is warranted against defects in workmanship and materials for a specified period. Ensure to register your product to validate the warranty. Refer to the official website for detailed warranty terms and conditions. Customer support also provides access to downloadable manuals, troubleshooting guides, and repair services. Reach out to the support team for assistance with maintenance, repairs, or operational questions. Warranty coverage is limited to repairing or replacing defective units at the manufacturer’s discretion.

dental handbook pdf

Dental handbooks are essential guides for dental professionals, offering comprehensive coverage of clinical procedures, best practices, and evidence-based approaches. They serve as invaluable resources for students, dentists, and educators, providing accessible knowledge in formats like PDF for easy reference.

1.1 Overview of Dental Handbooks

Dental handbooks are comprehensive guides designed to provide dental professionals with essential information on clinical procedures, best practices, and evidence-based approaches. They cover a wide range of topics, from preventive care to specialized treatments, and are often updated to reflect the latest advancements in dentistry. These handbooks are available in various formats, including PDF, making them easily accessible for reference. They typically include detailed sections on restorative dentistry, orthodontics, and pediatric dentistry, as well as case studies and treatment philosophies. Dental handbooks serve as invaluable resources for dentists, students, and educators, ensuring consistent and high-quality patient care.

1.2 Importance of Dental Handbooks in Modern Dentistry

Dental handbooks play a pivotal role in modern dentistry by serving as clinical resources that promote best practices and ethical standards. They provide dentists, students, and educators with concise, evidence-based information, ensuring consistency in patient care. These handbooks often include guidelines for preventive and restorative dentistry, case studies, and treatment philosophies, making them indispensable for professional development. By integrating handbook guidelines into daily practice, dental professionals can enhance patient outcomes and stay updated with industry advancements. Additionally, handbooks like the Oxford Handbook of Clinical Dentistry are widely recognized for their practical insights, contributing to the overall quality of dental care globally.

Types of Dental Handbooks

Dental handbooks vary in scope, including clinical handbooks like the Oxford Handbook of Clinical Dentistry, policy handbooks such as the ADA Handbook, and specialized handbooks like the California Medi-Cal Dental Program Handbook, catering to specific dental needs and guidelines.

2.1 Clinical Dental Handbooks

Clinical dental handbooks are comprehensive guides designed for dental professionals, providing evidence-based approaches and practical tips. The Oxford Handbook of Clinical Dentistry is a prime example, offering concise information on various dental specialties. These handbooks cover essential topics such as preventive dentistry, restorative procedures, and orthodontics. They also include case studies and treatment philosophies, making them invaluable for both students and practicing dentists. Regular updates ensure they reflect the latest advancements in dental care, making them indispensable tools for maintaining high standards in clinical practice. Their availability in formats like PDF enhances accessibility for quick reference.

2.2 Policy and Procedure Handbooks

Policy and procedure handbooks provide detailed guidelines for dental programs, outlining rules, regulations, and operational protocols. Examples include the Delta Dental Participating Dentists Handbook and the California Medi-Cal Dental Program Handbook. These documents explain policies on patient benefits, service coverage, and reimbursement rates. They also address legal and ethical standards, ensuring compliance with regulatory requirements. Regular updates reflect changes in dental laws and program specifics. These handbooks are essential for dental teams to understand program operations, maintain compliance, and deliver care according to established guidelines. Their availability in formats like PDF ensures easy access for reference.

2.3 Specialized Dental Handbooks

Specialized dental handbooks cater to specific areas of dentistry, offering in-depth guidance on niche topics. For instance, the Ethics Handbook for Dentistry focuses on professionalism and leadership, while the Mi Dentistry Handbook emphasizes minimal intervention techniques. These handbooks often include case studies, treatment philosophies, and practical tips, making them valuable for advanced practitioners. Their content is tailored to address complex challenges in specialized fields, ensuring that dentists can apply evidence-based practices effectively. Availability in formats like PDF enhances accessibility, allowing professionals to reference these resources conveniently in clinical settings or academic environments. This specialization ensures targeted learning and application in modern dental care.

Purpose and Benefits of Dental Handbooks

Dental handbooks provide comprehensive knowledge, support continuing education, and serve as practical tools. They offer detailed guidance in PDF formats, aiding skill development and enhancing patient care outcomes.

3.1 Serving as a Clinical Resource

Dental handbooks are indispensable clinical resources for dentists, offering detailed insights into diagnostic methods, treatment protocols, and evidence-based practices. These guides are designed to enhance clinical decision-making by providing accessible information on various dental specialties and procedures. Many handbooks, such as the Oxford Handbook of Clinical Dentistry, include practical tips and case studies, making them invaluable for both experienced professionals and students. Available in formats like PDF, they ensure portability and easy access, enabling dentists to refer to critical information anytime, anywhere. This accessibility makes them essential tools for improving patient care and staying updated with modern dental practices.

3.2 Promoting Best Practices in Dentistry

Dental handbooks play a crucial role in promoting best practices by providing standardized protocols and evidence-based guidelines. They ensure consistency in clinical procedures, helping dentists deliver high-quality care. These resources often include sections on preventive measures, diagnostic techniques, and treatment philosophies, all designed to align with current professional standards. By adhering to these guidelines, dental professionals can minimize risks and enhance patient outcomes. Handbooks like the ADA Handbook and the Oxford Handbook of Clinical Dentistry are widely recognized for their comprehensive approach, making them indispensable for maintaining excellence in dental practice. Their availability in formats like PDF further ensures accessibility for all dental professionals.

3.4 Enhancing Patient Care Through Evidence-Based Approaches

Dental handbooks are instrumental in enhancing patient care by emphasizing evidence-based approaches. They integrate scientific research and clinical expertise, ensuring treatments are both effective and safe. These resources provide detailed guidelines on diagnostic procedures, treatment options, and preventive measures, all supported by current evidence. By following these evidence-based recommendations, dentists can offer personalized care tailored to individual patient needs. Handbooks like the Oxford Handbook of Clinical Dentistry and the ADA Handbook are particularly noted for their rigorous, research-backed content, available in accessible formats such as PDF, making them vital tools for improving patient outcomes.

Notable Dental Handbooks

  • Oxford Handbook of Clinical Dentistry: A trusted guide for dentists, offering practical tips and evidence-based practices in a concise format, available in PDF.
  • ADA Handbook for Dental Professionals: Provides clinical and policy guidelines, serving as a valuable resource for dental teams, accessible digitally.
  • California Medi-Cal Dental Program Handbook: Tailored for regional dental needs, it includes policies and procedures, widely used by dental providers in PDF format.

4.1 Oxford Handbook of Clinical Dentistry

The Oxford Handbook of Clinical Dentistry is a trusted guide for dental professionals, offering practical advice and evidence-based approaches. It covers diverse topics from preventive care to advanced treatments, making it an essential resource for dentists and students. Available in PDF format, it ensures accessibility and convenience for modern practitioners. Regularly updated, it reflects the latest advancements in dentistry, providing clear and concise information. Its comprehensive coverage and portability make it a go-to reference for clinical decision-making, ensuring high-quality patient care worldwide. It is widely regarded as an indispensable tool in both academic and clinical settings.

4.2 ADA Handbook for Dental Professionals

The ADA Handbook for Dental Professionals is a comprehensive resource designed to support clinical excellence and professional development. It provides detailed guidance on best practices, ethical considerations, and evidenced-based approaches in dentistry. Available in PDF format, it is easily accessible for dentists, students, and the entire dental team. The handbook emphasizes the integration of clinical expertise with patient needs, ensuring high-quality care. It also serves as a valuable tool for continuing education, helping professionals stay updated on industry standards. Its clear and concise format makes it an indispensable reference for daily practice, fostering professionalism and excellence in the dental field.

4.3 California Medi-Cal Dental Program Handbook

The California Medi-Cal Dental Program Handbook is a detailed guide for providers participating in the Medi-Cal Dental Program. It is updated monthly with information from Provider Bulletins and is available in both Table of Contents and PDF formats. The handbook provides essential information on program policies, procedures, and benefits, ensuring compliance with state regulations. It is an indispensable resource for dental professionals, offering clear guidance on patient eligibility, treatment coverage, and reimbursement processes. The PDF version allows for easy access and reference, making it a practical tool for daily practice within the Medi-Cal Dental Program framework.

Content and Structure of Dental Handbooks

Dental handbooks structure content to cover dental specialties, preventive care, and restorative treatments. They include case studies, treatment philosophies, and evidence-based approaches, ensuring comprehensive and practical guidance for professionals.

5.1 Comprehensive Coverage of Dental Specialties

Dental handbooks provide in-depth coverage of various dental specialties, ensuring a holistic approach to patient care. From orthodontics to restorative dentistry, each specialty is detailed with practical insights and evidence-based methods. These handbooks often include sections on periodontology, endodontics, and prosthodontics, offering clear guidelines for diagnosis and treatment. Additionally, they incorporate the latest advancements in dental technologies and materials, making them indispensable for both general practitioners and specialists. The structured format allows for easy navigation, ensuring that professionals can quickly access relevant information to enhance clinical decision-making and improve patient outcomes.

5.2 Detailed Sections on Preventive and Restorative Dentistry

Dental handbooks dedicate extensive sections to preventive and restorative dentistry, emphasizing evidence-based strategies to maintain oral health and repair damaged teeth. These sections cover fluoride treatments, dental sealants, and caries prevention, alongside restorative techniques like fillings, crowns, and implants. Detailed guidelines ensure practitioners can implement best practices, supported by case studies and clinical scenarios. The handbooks also highlight the importance of early intervention and personalized treatment plans, making them invaluable for both routine and complex dental care. This comprehensive approach ensures optimal patient outcomes and aligns with modern dental standards.

5.3 Inclusion of Case Studies and Treatment Philosophies

Dental handbooks often incorporate real-world case studies and treatment philosophies to illustrate practical applications of dental principles. These case studies provide insights into diagnosing and managing various clinical scenarios, while treatment philosophies outline evidence-based approaches to patient care. Detailed narratives and outcomes help dental professionals understand how to apply theoretical knowledge in practice. This inclusion enhances learning and decision-making skills, ensuring that professionals stay updated with modern dental trends and methodologies. Such resources are particularly valuable for educating students and guiding experienced practitioners in delivering optimal care, making handbooks indispensable tools in both academic and clinical settings.

Best Practices for Using Dental Handbooks

Integrate handbook guidelines into daily practice to ensure consistency and quality care. Regularly update knowledge with the latest editions and use handbooks for continuing education. Organize digital versions for easy access, fostering efficient reference and application of best practices in dentistry.

6.1 Integrating Handbook Guidelines into Daily Practice

Integrating handbook guidelines into daily practice ensures consistency and quality in dental care. These resources provide evidence-based standards, making them indispensable for clinical decision-making. By referencing handbooks regularly, professionals can align their practices with established protocols, reducing errors and enhancing patient outcomes. Staying updated with the latest editions ensures adherence to current best practices. PDF versions of handbooks, like the Oxford Handbook of Clinical Dentistry, offer portability and easy access, allowing seamless integration into routine workflows. This approach fosters a culture of continuous improvement and excellence in dental care delivery.

6.2 Staying Updated with the Latest Editions

Staying updated with the latest editions of dental handbooks is crucial for maintaining current knowledge and best practices. New releases often include updated guidelines, emerging trends, and evidence-based advancements. Professionals should regularly check for revised versions, such as the 2025 NYS Dental Policy and Procedure Manual, to ensure compliance with regulatory changes. PDF formats make it easy to access and reference the newest editions digitally. By keeping abreast of these updates, dentists can provide optimal care and remain aligned with industry standards, ensuring their practice remains contemporary and effective.

6.3 Utilizing Handbooks for Continuing Education

Dental handbooks are invaluable tools for continuing education, offering structured learning opportunities for professionals. They provide in-depth insights into clinical practices, treatment philosophies, and emerging trends, making them ideal for self-study and professional development. Many handbooks, such as the ADA Handbook and the Oxford Handbook of Clinical Dentistry, are designed to serve as educational resources, catering to both students and experienced dentists. Their concise format and evidence-based content make them perfect for reinforcing knowledge and staying updated on industry advancements.

Additionally, these handbooks often include case studies and practical tips, which can be used to enhance skill development. By leveraging these resources, dental professionals can ensure they remain at the forefront of modern dentistry, providing high-quality patient care and maintaining professional excellence.

Accessing Dental Handbooks in PDF Format

Dental handbooks in PDF format offer convenient access to essential information. Sources like Delta Dental, ADA, and California Medi-Cal provide downloadable versions, ensuring easy reference and organization.

7.1 Popularity of PDF Versions for Convenience

The popularity of dental handbooks in PDF format stems from their convenience and accessibility. PDF versions allow dental professionals to easily download and store handbooks on digital devices, enabling quick reference during clinical practice. Handbooks like the Oxford Handbook of Clinical Dentistry and the ADA Handbook for Dental Professionals are widely available in PDF, offering portability and searchability. This format is particularly advantageous for busy practitioners, as it eliminates the need for physical storage and facilitates rapid access to critical information. Additionally, PDFs can be easily shared and updated, ensuring that users always have the most current guidelines at their fingertips.

7.2 Sources for Downloading Reliable Dental Handbooks

Reliable dental handbooks in PDF format can be accessed through reputable sources such as professional dental associations, academic institutions, and trusted publishers. The American Dental Association (ADA) and the Oxford University Press offer authentic handbooks like the ADA Handbook for Dental Professionals and the Oxford Handbook of Clinical Dentistry. Additionally, government health programs, such as the Medi-Cal Dental Program, provide downloadable handbooks for specific patient care guidelines. Ensuring the source is credible is crucial to obtaining accurate and up-to-date information, making these platforms indispensable for dental professionals seeking high-quality resources.

7.3 Organizing Digital Handbooks for Easy Reference

Digital dental handbooks in PDF format can be efficiently organized using cloud storage platforms like Google Drive or Dropbox. Creating dedicated folders for different types of handbooks, such as clinical or policy guides, enhances accessibility. Utilizing bookmarks and tags within PDFs allows quick navigation to specific sections. Additionally, maintaining a centralized repository ensures all resources are in one place, reducing search time. Regularly updating and syncing files across devices guarantees that the latest editions are always accessible. This systematic approach maximizes the utility of digital handbooks for dental professionals, enabling seamless reference and application in daily practice.

Regulatory and Regional Considerations

Dental handbooks address regional policies and compliance requirements, such as Delta Dental and California Medi-Cal, ensuring adherence to local regulations and standards. They provide detailed guidelines to maintain consistency in dental practices across different regions.

8.1 Handbook Specifics for Different Dental Programs

Dental handbooks are tailored to specific programs, ensuring compliance with regional and organizational requirements. For instance, the California Medi-Cal Dental Program Handbook includes detailed policies and updates from provider bulletins, while Delta Dental handbooks outline maximum allowances and patient benefits. These guides are structured to meet the unique needs of each program, providing clear directives on service delivery, reimbursement, and patient care. They are updated regularly to reflect changes in regulations and best practices, ensuring practitioners stay informed and aligned with program-specific expectations.

8.2 Regional Policies and Their Impact on Handbook Content

Regional policies significantly influence the content of dental handbooks, ensuring they align with local regulations and standards. For example, the California Medi-Cal Dental Program Handbook incorporates state-specific policies, while Delta Dental handbooks reflect regional reimbursement rates. These policies dictate procedure allowances, patient eligibility, and service coverage, varying by jurisdiction. Handbooks are regularly updated to comply with changing laws and regional requirements, ensuring practitioners adhere to local guidelines. This customization helps maintain consistency in dental care delivery, tailored to the unique needs of each region and patient population.

8.3 Tailoring Handbooks to Local Dental Needs

Dental handbooks are often customized to address specific regional dental needs, ensuring relevance and applicability. Local health challenges, such as prevalence of certain oral diseases, influence content. Handbooks incorporate regional policies, treatment approaches, and community-specific guidelines. Regular updates reflect evolving local needs, ensuring practitioners have current, tailored resources. This customization enhances the handbook’s utility, making it a vital tool for improving patient care within specific geographic and demographic contexts. Tailored handbooks bridge the gap between generalized dental knowledge and localized healthcare delivery, fostering more effective and targeted dental practices.

Ethics and Professionalism in Dental Handbooks

Dental handbooks emphasize ethical considerations and professional conduct, serving as a foundation for leadership and excellence in dentistry. They guide practitioners in maintaining high standards of care.

9.1 Ethical Considerations in Dental Practice

Dental handbooks highlight ethical considerations as fundamental to patient care, ensuring dentists adhere to principles like patient autonomy, confidentiality, and informed consent. These guides emphasize the importance of avoiding conflicts of interest and maintaining professional integrity. By integrating ethical standards, handbooks help practitioners navigate complex clinical scenarios while prioritizing patient welfare. They also address issues like transparency in treatment options and the responsible use of advanced technologies. These resources are indispensable for fostering a culture of ethical practice, ensuring dentists deliver care that aligns with the highest professional and moral standards.

9.2 Handbook Sections on Professional Conduct

Dental handbooks often include dedicated sections on professional conduct, outlining expectations for ethical behavior and workplace standards. These sections emphasize the importance of clear communication, accurate record-keeping, and adherence to legal requirements. They also address issues like patient confidentiality and boundaries between professionals and patients. Handbooks serve as a reference for understanding appropriate workplace behavior, ensuring a respectful and professional environment. By providing clear guidelines, they help dentists maintain integrity and trust in their practice. These sections are essential for fostering a culture of professionalism and accountability in dental care settings.

9;3 Leadership and Excellence in Dentistry

Dental handbooks play a pivotal role in fostering leadership and excellence within the dental profession. They provide insights into advanced clinical techniques, evidence-based practices, and innovative approaches to patient care. By emphasizing continuous improvement and professional development, these resources inspire dentists to strive for excellence in their practice. Handbooks also highlight the importance of mentorship and leadership in shaping the future of dentistry. They serve as a foundation for dentists to develop the skills and confidence needed to lead effectively in their roles. This promotes a culture of excellence and innovation, benefiting both professionals and patients alike.

Tele-Dentistry and Handbook Policies

Handbooks address tele-dentistry policies, ensuring compliance with remote care regulations and promoting best practices for virtual consultations and treatments, enhancing accessibility and quality of dental services.

10.1 Handbook Guidelines for Remote Dental Services

Dental handbooks provide detailed guidelines for remote dental services, ensuring compliance with legal and ethical standards. They outline protocols for tele-dentistry, including virtual consultations and remote monitoring of patients. Handbooks specify that all remote services must be performed by licensed dentists or supervised staff, adhering to applicable laws. For instance, services provided via tele-health modalities are processed under specific codes, such as D0190, to ensure accurate documentation and billing. These guidelines aim to maintain high-quality patient care while expanding access to dental services through remote platforms. They also emphasize the importance of patient confidentiality and data security in virtual interactions.

10.2 Policies on Tele-Health Modalities in Dentistry

Dental handbooks detail policies for tele-health modalities, ensuring adherence to legal and professional standards. They emphasize that remote services must be conducted by licensed dentists or supervised staff, following state-specific regulations. Policies outline requirements for documentation, patient consent, and data security to maintain confidentiality. Tele-dentistry services, such as virtual consultations, are processed under specific codes, like D0190, to ensure accurate billing and compliance. Handbooks also address technical requirements for tele-health platforms, ensuring reliable and secure communication. These policies aim to integrate tele-dentistry seamlessly into modern practice while upholding ethical and legal obligations.

10.3 Ensuring Compliance with Remote Care Regulations

Dental handbooks outline compliance measures for remote care, emphasizing adherence to state and federal laws. They require tele-dentistry services to be performed by licensed dentists or their supervised staff, ensuring patient safety and legal compliance. Handbooks specify documentation standards, including patient records and consent forms, to maintain accountability. Secure data transmission and confidentiality are prioritized, with guidelines for encryption and secure communication platforms. Regular audits and training are recommended to ensure ongoing compliance. These regulations aim to uphold high standards of care while expanding access to dental services through tele-health modalities; Compliance ensures ethical, professional, and legally sound remote dental practice.

Future of Dental Handbooks

Dental handbooks are evolving with technology, integrating digital tools and evidence-based updates to meet modern dental needs, ensuring accessibility and comprehensive guidance for future dental professionals.

11.1 Emerging Trends in Dental Handbook Development

Emerging trends in dental handbook development include the integration of digital tools, AI-driven updates, and interactive content. Handbooks are increasingly being designed as PDF resources, offering portability and ease of access. Personalized treatment plans and real-time updates are becoming standard, ensuring clinicians stay informed. Enhanced focus on preventive care and minimally invasive techniques reflects modern dental practices. Ethical considerations and tele-dentistry guidelines are also being incorporated, addressing the evolving needs of dental professionals and patients globally.

11.2 Integration of Technology in Handbook Content

The integration of technology in dental handbook content is revolutionizing how professionals access and utilize information. Digital formats like PDF enable easy sharing and accessibility across devices. Handbooks now incorporate interactive elements such as 3D imaging, virtual simulations, and real-time updates. AI-driven content recommendations ensure relevancy to individual practices. Additionally, embedded links to research and guidelines enhance evidence-based decision-making. This technological evolution ensures handbooks remain dynamic, user-friendly, and aligned with modern dental advancements, making them indispensable tools for both education and clinical practice.

11.3 Adapting Handbooks to Changing Dental Needs

As dentistry evolves, handbooks are continually updated to address emerging trends and patient needs. Regular revisions ensure content remains relevant, incorporating advancements in techniques, materials, and policies. Digital platforms allow for seamless updates, ensuring professionals access the latest guidelines. Handbooks now emphasize preventive care, tele-dentistry, and interdisciplinary approaches. Tailored sections for specific regions or programs, like the California Medi-Cal Dental Program, highlight adaptability. This responsiveness ensures handbooks remain vital resources, bridging gaps between theory and practice while fostering continuous improvement in dental care delivery.

venstar t2800 user manual

Welcome to the Venstar T2800 User Manual, your comprehensive guide to understanding and operating the T2800 thermostat․ This manual covers installation, programming, and maintenance, ensuring optimal performance for both new and experienced users․

1․1 Overview of the Venstar T2800 Thermostat

The Venstar T2800 is a commercial 7-day programmable thermostat designed for precise temperature control in various environments․ It supports up to 3 heat stages and 2 cool stages, making it versatile for different HVAC systems․ Featuring a sleek, backlit display and touchscreen interface, the T2800 offers ease of use and advanced functionality․ It is compatible with heat pumps, electric, gas, and hydronic heating systems, ensuring flexibility for diverse applications․ The thermostat also includes features like setpoint limiting, configurable outputs, and humidity control options․ With its robust design and user-friendly interface, the T2800 is ideal for commercial settings requiring reliable and efficient climate management solutions․

1․2 Key Features of the T2800 Model

The Venstar T2800 thermostat stands out with its advanced features, including 7-day programmability and compatibility with systems up to 3 heat and 2 cool stages․ It offers a backlit display and configurable outputs for precise temperature control․ The thermostat supports heat pumps, electric, gas, and hydronic heating systems, making it highly versatile․ Additional features include setpoint limiting, adjustable stage timers, and humidity control options․ Its touchscreen interface provides easy navigation, while the outdoor sensor integration allows for enhanced temperature monitoring․ Designed for commercial use, the T2800 meets California Title 24 requirements, ensuring energy efficiency and compliance․ These features make it a reliable choice for managing complex HVAC systems efficiently․

1․3 Benefits of Using the T2800 Thermostat

The Venstar T2800 thermostat offers numerous benefits, including enhanced energy efficiency and precise temperature control․ Its 7-day programmability allows for customized heating and cooling schedules, reducing energy consumption․ The thermostat’s compatibility with various HVAC systems ensures versatility, while its backlit display and touchscreen interface provide ease of use․ The outdoor sensor integration enables accurate temperature monitoring, improving system performance․ Additionally, the T2800 meets California Title 24 requirements, making it an environmentally friendly choice․ With features like setpoint limiting and adjustable timers, users can optimize their comfort while saving on energy costs․ Overall, the T2800 is designed to deliver reliable performance, flexibility, and convenience for both residential and commercial applications․

Installation Instructions for the Venstar T2800

Install the T2800 by disconnecting power, setting the thermostat to OFF, and following the manual’s step-by-step wiring and mounting instructions for a secure setup․

2․1 Pre-Installation Checklist

Before installing the Venstar T2800 thermostat, ensure compatibility with your HVAC system, including 1 or 2-stage electric cooling and up to 3-stage gas heating․ Verify the thermostat’s power requirements and gather necessary tools․ Disconnect power to the HVAC system for safety․ Review the wiring diagram to confirm terminal connections․ Ensure the thermostat is set to OFF mode prior to installation․ Check for any damaged components and ensure all materials are included․ Familiarize yourself with the installation manual to avoid errors․ This checklist ensures a smooth and safe installation process, preventing potential issues during setup․

2․2 Wiring Diagram and Connections

The Venstar T2800 thermostat requires precise wiring to ensure proper functionality․ Refer to the provided wiring diagram to identify terminal labels, which typically include R, W, Y, G, C, and O/B connections; Connect the R (24V) wire to the R terminal and the W wire to the heating stage terminal․ The Y wire links to the cooling stage, while G controls the fan․ For heat pumps, connect the O/B wire accordingly․ Ensure all connections are secure and match the diagram․ Double-check the wiring configuration to prevent short circuits or system malfunctions․ If unsure, consult a licensed electrician․ Proper wiring ensures safe and efficient operation of the thermostat․

2․3 Mounting the Thermostat

Mounting the Venstar T2800 thermostat requires careful preparation to ensure proper installation․ Begin by turning off the power to your HVAC system at the circuit breaker․ Remove any existing thermostat and take note of the wiring configuration․ Use the provided wall plate to mark the mounting location, ensuring it is level and secure․ Attach the wall plate firmly to the wall using screws․ Gently align the thermostat with the wall plate, ensuring all terminals are accessible․ Secure the thermostat to the wall plate using the provided mounting screws; Double-check that the device is level and evenly positioned․ Finally, restore power and perform a quick test to ensure the thermostat powers on and functions correctly․

2․4 Final Installation Checks

After completing the installation, perform a series of final checks to ensure the Venstar T2800 thermostat operates correctly․ First, verify that all wiring connections match the diagram provided in the manual․ Set the thermostat to “OFF” and restore power to the HVAC system․ Turn the thermostat back on and test each mode (HEAT, COOL, etc․) to confirm proper operation․ Check the display for clarity and responsiveness․ Ensure no error messages appear and that all programmed settings are functional․ Review safety precautions, such as ensuring the thermostat is mounted securely and away from direct sunlight or drafts․ Finally, confirm that the system cycles on and off correctly․ These steps ensure a safe and efficient installation process․

Programming the Venstar T2800 Thermostat

Program the Venstar T2800 to customize temperature settings, schedules, and modes․ Use the touchscreen interface to set daily routines, adjust heat/cool stages, and enable humidity control for efficient comfort․

3․1 Understanding the Programming Modes

The Venstar T2800 thermostat offers versatile programming modes to suit different comfort needs․ It features a 7-day programmable schedule, allowing users to set unique temperature profiles for each day․ The thermostat supports up to 3 heat stages and 2 cool stages, ensuring compatibility with various HVAC systems․ Additionally, it includes adjustable timers and deadbands for precise temperature control․ The T2800 also supports heat pump operation and integrates with an optional outdoor sensor for enhanced functionality․ Users can program setpoint limits to restrict temperature ranges, preventing excessive heating or cooling․ With its intuitive interface, the T2800 allows easy configuration of schedules, modes, and advanced features, making it a flexible solution for commercial and residential applications;

3․2 Setting Up Daily Schedules

Setting up daily schedules on the Venstar T2800 thermostat is straightforward, allowing users to customize temperature settings for each day of the week․ The 7-day programmable feature enables unique temperature profiles, ensuring energy efficiency and comfort․ To create a schedule, navigate to the programming mode and select the desired day․ Set the temperature set points for heating and cooling during specific time periods․ The thermostat allows multiple time slots per day, with adjustable start and end times․ Users can also enable repeat schedules for consistent settings across similar days․ The T2800’s touchscreen interface makes it easy to adjust timers and temperature thresholds, ensuring precise control over your HVAC system’s operation throughout the day․

3․3 Adjusting Temperature Set Points

Adjusting temperature set points on the Venstar T2800 thermostat is a simple process that allows precise control over your heating and cooling system․ To modify the set points, navigate to the temperature settings menu via the touchscreen interface․ Use the arrow keys to increase or decrease the desired temperature for both heating and cooling modes․ The thermostat also features set point limiting, which prevents the system from exceeding predefined temperature ranges, helping to save energy and protect your equipment․ Additionally, you can adjust deadbands to customize the temperature swing between heating and cooling cycles․ These adjustments ensure comfort while optimizing energy efficiency, making the T2800 a versatile and user-friendly thermostat for any commercial setting․

Advanced Features of the Venstar T2800

The Venstar T2800 offers advanced features like heat pump compatibility, outdoor sensor integration, and humidity control, ensuring enhanced performance and energy efficiency for both residential and commercial use․

4․1 Heat Pump Compatibility

The Venstar T2800 thermostat is fully compatible with heat pump systems, offering seamless integration for efficient temperature control․ It supports up to 3 heat stages and 2 cool stages, making it suitable for various HVAC configurations․ The thermostat is designed to work with heat pumps, ensuring optimal performance and energy savings․ It also features a built-in outdoor sensor ready option, providing high and low temperature readouts for precise system management․ This compatibility allows users to maximize the benefits of their heat pump system while maintaining comfort and efficiency․ The T2800 meets Commercial California Title 24 standards, ensuring compliance and reliability for both residential and commercial applications․

4․2 Outdoor Sensor Integration

The Venstar T2800 thermostat is designed to integrate seamlessly with an outdoor sensor, enhancing its ability to monitor and respond to external temperature conditions․ This feature allows for precise high and low temperature readouts, providing users with real-time data to optimize their heating and cooling systems․ The outdoor sensor compatibility ensures that the thermostat can adapt to changing outdoor conditions, improving overall system performance and energy efficiency․ It is particularly useful for heat pump systems, where outdoor temperature monitoring is crucial for maintaining optimal operation․ The T2800’s outdoor sensor integration is a key feature that contributes to its advanced functionality and user convenience, making it a versatile choice for various HVAC setups․

4․3 Humidity Control Options

The Venstar T2800 thermostat offers advanced humidity control options, enabling users to maintain optimal indoor air quality and comfort․ It supports integration with humidity-sensing devices and can be configured to work with dehumidifiers or humidifiers․ This feature allows for precise control over moisture levels, preventing excessive humidity or dryness in the space․ The thermostat’s configurable outputs ensure compatibility with various HVAC systems, making it adaptable to different humidity management needs․ By integrating humidity control, the T2800 enhances comfort while preventing potential issues like mold growth or static electricity․ This feature is particularly beneficial in regions with extreme humidity levels, providing a comprehensive solution for indoor climate management;

Maintenance and Troubleshooting

Regular maintenance ensures optimal performance and longevity of the Venstar T2800 thermostat․ This section provides troubleshooting tips and solutions for common issues, helping users resolve problems efficiently․

5․1 Regular Maintenance Tips

Regular maintenance is essential to ensure the Venstar T2800 thermostat operates efficiently․ Clean the thermostat’s display and sensors periodically to remove dust and debris․ Check and replace the batteries (if applicable) as indicated by the manufacturer․ Inspect the wiring connections to ensure they are secure and free from damage․ Additionally, verify the outdoor sensor’s accuracy and clean it if necessary․ Update the thermostat’s software to the latest version for optimal performance․ Finally, recalibrate the thermostat if you notice any temperature inaccuracies․ These simple steps help prevent issues and maintain precise temperature control, ensuring your HVAC system runs smoothly year-round․

5․2 Common Issues and Solutions

Common issues with the Venstar T2800 thermostat include display malfunctions, inaccurate temperature readings, and unresponsive touchscreens․ For display issues, restart the thermostat or check power connections․ Temperature inaccuracies can often be resolved by recalibrating the thermostat or ensuring the outdoor sensor is clean and properly installed․ If the touchscreen is unresponsive, try resetting the device or updating its software․ Wiring problems may require checking connections or consulting a professional․ Additionally, ensure the thermostat is set to the correct mode (heat/cool) and that set points are properly configured․ Addressing these issues promptly ensures reliable performance and energy efficiency․ Always refer to the manual for detailed troubleshooting steps before seeking external assistance․

5․3 Resetting the Thermostat

To reset the Venstar T2800 thermostat, press and hold the MODE and HUMIDITY buttons simultaneously for 5 seconds․ This action restores factory default settings, including temperature set points and schedules․ Ensure the thermostat is in OFF mode before performing the reset․ After resetting, the thermostat will restart, and the LED will flash briefly․ Note that all custom settings, including daily schedules and temperature preferences, will be lost․ Users must reprogram the thermostat after a reset․ This procedure is useful for resolving persistent issues or preparing the device for new configuration․ Always refer to the manual for specific instructions and precautions before resetting․ Resetting does not affect the thermostat’s compatibility with HVAC systems or connected sensors․

Technical Specifications

The Venstar T2800 thermostat features 7-day programmability, compatibility with heat pumps, and gas heating systems․ It includes a sleek backlit display, configurable outputs, and humidity control options․

6․1 Compatibility with HVAC Systems

The Venstar T2800 thermostat is designed to work seamlessly with a wide range of HVAC systems, including 1 or 2-stage electric cooling and up to 3-stage gas heating․ It is also compatible with heat pumps, electric, or hydronic heat systems, making it a versatile solution for various heating and cooling setups․ The T2800 meets Commercial California Title 24 requirements, ensuring efficiency and compliance with energy standards․ This thermostat supports up to 3 heat stages and 2 cool stages, providing flexible control for different HVAC configurations․ Its compatibility with heat pumps and outdoor sensors further enhances its adaptability to diverse heating and cooling needs․

6․2 Power Requirements

The Venstar T2800 thermostat is a battery-powered device, requiring 2 AA alkaline batteries for operation․ It does not require a common wire (C-wire) for installation, making it compatible with systems that lack this connection․ The thermostat is designed to be energy-efficient, ensuring long battery life and reliable performance․ It operates on low voltage, typically used in HVAC systems, and is compatible with most heating and cooling setups․ The T2800 meets Commercial California Title 24 requirements, ensuring it adheres to energy efficiency standards․ This thermostat is designed to function seamlessly with a wide range of power configurations, making it a versatile choice for various commercial and residential applications․

6․3 Display and Interface Details

The Venstar T2800 thermostat features a backlit display with clear readability in various lighting conditions․ The touchscreen interface offers intuitive navigation, allowing users to easily access settings, schedules, and system status․ The display shows current temperature, setpoint, and operational mode, while the button legends provide clear feedback․ The interface supports humidity control and outdoor sensor integration, displaying relevant data such as humidity levels and outdoor temperatures․ The thermostat’s design ensures a user-friendly experience, with configurable options to customize the display and interface according to user preferences․ This makes it easy to monitor and control your HVAC system efficiently․

Safety Precautions

Always disconnect power before servicing․ Handle electrical components carefully to avoid damage or shock․ Follow all safety guidelines to ensure safe installation and operation of the thermostat․

7․1 Handling Electrical Components

When handling electrical components of the Venstar T2800 thermostat, always disconnect power to the HVAC system․ Ensure the thermostat is in the OFF mode before making any adjustments․ Avoid touching live wires or components to prevent electrical shock․ Use proper tools and follow safety guidelines to avoid damage to the thermostat or the system․ Never attempt repairs without proper training․ If unsure, consult a licensed professional․ Always refer to the manual for specific instructions to ensure safe and correct handling of electrical parts․

7․2 Avoiding Damage to the Thermostat

To prevent damage to the Venstar T2800 thermostat, ensure proper installation and handling․ Mount the thermostat on a flat, dry surface, away from direct sunlight and moisture․ Avoid exposing it to extreme temperatures or physical stress․ Never disconnect or reconnect wires while the system is powered on․ Use the correct tools for adjustments to prevent scratching or breaking the display․ Clean the screen gently with a soft cloth to avoid damage․ Regularly update the software if prompted to maintain optimal functionality․ Always follow the manual’s guidelines for troubleshooting and repairs․ If unsure, consult a professional to avoid irreversible damage․

7․3 Emergency Shutdown Procedures

In case of an emergency, follow these steps to safely shut down your Venstar T2800 thermostat․ First, switch the thermostat mode to OFF using the control panel․ This will disconnect the system from the HVAC equipment․ Next, disconnect the power supply to the thermostat at the circuit breaker or fuse box․ For critical situations, such as a malfunction or overheating, immediately turn off the main power supply to the entire HVAC system․ Avoid touching electrical components without proper insulation․ If unsure about any procedure, contact a licensed technician to prevent potential hazards․ Always refer to the manual for specific shutdown instructions tailored to your system configuration․

Warranty and Support Information

The Venstar T2800 is backed by a comprehensive warranty covering parts and labor for a specified period․ For support, contact Venstar’s customer service or refer to the online FAQs and troubleshooting guides for assistance․

8․1 Warranty Coverage Details

The Venstar T2800 thermostat is covered by a comprehensive warranty that protects your investment․ The warranty typically includes coverage for parts and labor for a specified period, ensuring reliability and performance․ Terms vary depending on the region and installation type, but generally, the warranty applies to defects in materials and workmanship under normal use․ Proper installation by a licensed professional is often a condition for warranty validity․ For detailed warranty terms, including duration and coverage limits, refer to the official Venstar T2800 user manual or contact their customer support team․ Always retain your proof of purchase and installation records to facilitate any warranty claims․

8․2 Contacting Customer Support

For any questions or issues regarding the Venstar T2800 thermostat, you can contact Venstar’s customer support team through multiple channels․ Visit their official website to access the support portal, where you can submit a contact form or find direct email addresses for specific inquiries․ Phone support is also available during business hours, with a dedicated toll-free number for convenience․ Additionally, the website provides a comprehensive FAQ section and downloadable resources to help troubleshoot common issues independently․ Ensure to have your thermostat model number, purchase date, and detailed issue description ready when reaching out for faster assistance․ Venstar’s support team is committed to providing timely and effective solutions to ensure optimal product performance․

8․3 Online Resources and FAQs

Venstar offers extensive online resources and FAQs to help users navigate the T2800 thermostat․ The official Venstar website provides a dedicated support section with downloadable manuals, installation guides, and troubleshooting tips․ Frequently Asked Questions cover common issues, such as programming, connectivity, and maintenance․ Additional resources include video tutorials and user forums where customers can share experiences and solutions․ These online tools empower users to resolve issues independently and maximize their thermostat’s performance․ Regular updates ensure the information stays current, addressing the latest features and user concerns․ By leveraging these resources, users can optimize their T2800 experience and enjoy seamless climate control․

The Venstar T2800 thermostat offers an effective, user-friendly solution for climate control, combining advanced features with ease of use․ With comprehensive support resources, it ensures energy efficiency and consistent comfort, making it a reliable choice for commercial and residential applications․

9․1 Summary of Key Features

The Venstar T2800 is a 7-day programmable thermostat designed for commercial use, offering up to 3-heat and 2-cool stages․ It features a backlit display, configurable outputs, and compatibility with heat pumps․ The thermostat supports outdoor sensor integration, humidity control, and adjustable timers for efficient operation․ Its programmable fan and setpoint limiting functions enhance energy efficiency․ Designed for ease of use, the T2800 includes a touchscreen interface and EZ Programmer compatibility․ It meets California Title 24 requirements and works with various HVAC systems, including gas heating, electric cooling, and hydronic systems․ This versatile thermostat is ideal for both residential and commercial applications, providing precise temperature control and flexibility for diverse heating and cooling needs․ Its robust features make it a reliable choice for modern climate management․

9․2 Final Tips for Optimal Use

To maximize the performance of your Venstar T2800 thermostat, regular maintenance is essential․ Ensure the display is clean and free from obstructions for accurate readings․ Schedule periodic checks of wiring connections to prevent malfunctions․ Utilize the programmable features to create energy-efficient schedules tailored to your needs․ Take advantage of the humidity control and outdoor sensor options to maintain consistent comfort levels․ For troubleshooting, refer to the manual or contact customer support for assistance․ Always update the thermostat firmware to access the latest features and improvements․ By following these tips, you can enjoy precise temperature control and long-term reliability from your T2800 thermostat․ Proper use ensures energy savings and enhanced comfort year-round․

a witch’s guide to magical innkeeping

Step into the enchanting world of A Witch’s Guide to Magical Innkeeping, where magic and everyday life blend seamlessly. Follow Sera Swan, a former powerful witch turned innkeeper, as she navigates a life filled with spells, charm, and heartwarming discovery in the whimsical setting of Glimmer Falls.

The Protagonist: Sera Swan

Meet Sera Swan, a once-powerful witch who now manages an enchanted inn. Her journey from a life of magic to a humble innkeeper is filled with charm, resilience, and a quest for self-discovery in A Witch’s Guide to Magical Innkeeping.

2.1 Background and History

Sera Swan was once one of the most powerful witches in Britain, known for her exceptional magical abilities. Born into a family of gifted witches, Sera was destined for greatness from a young age. Her parents, prominent figures in the magical community, nurtured her talents, and she quickly became a prodigy. However, her life took a dramatic turn at the age of 15 when she attempted a forbidden spell to resurrect her late mother, a decision that cost her nearly all her powers. This loss led Sera to abandon her former life and seek solace in a quieter existence. She found a new purpose in managing an enchanted inn in Glimmer Falls, where she could still utilize her limited magic to create a welcoming haven for magical creatures and guests alike. This transition marked the beginning of her journey toward redemption and self-discovery, as she learned to embrace her new role and the challenges it brought.

2.2 Loss of Powers and Redemption

Sera Swan’s life was forever altered when, at the tender age of 15, she attempted a forbidden spell to resurrect her late mother. This bold yet reckless act resulted in the loss of nearly all her magical powers, a devastating blow for someone who had once been considered one of the most powerful witches in Britain. The aftermath of this event led Sera to abandon her former life, seeking solace in a simpler, quieter existence. She eventually found herself managing an enchanted inn in the mystical town of Glimmer Falls. This new role allowed her to reconnect with her magical roots in a different way, as she learned to harness what little power she had left to create a welcoming and nurturing environment for her guests. Through her journey, Sera discovered that true redemption and strength could be found not in the magnitude of one’s magic, but in the love, care, and community one fosters. Her story became one of resilience and the power of second chances, as she slowly rebuilt her sense of identity and purpose.

2.3 Key Relationships and Allies

Sera Swan’s journey is deeply influenced by her relationships, which serve as both her support system and a source of inspiration. One of her most loyal companions is Clemmie, an enchanted fox who has been by her side since childhood. Clemmie’s wisdom and unwavering friendship play a crucial role in guiding Sera through her challenges, especially during her darkest moments. Additionally, Sera forms meaningful bonds with the magical creatures and guests at the inn, who become like a family to her. These connections not only help her regain her confidence but also remind her of the power of community and love. Through these alliances, Sera learns to embrace her new life and find joy in the simple, everyday acts of kindness and hospitality. Her relationships highlight the importance of trust, loyalty, and the transformative impact of having others believe in you, even when you struggle to believe in yourself.

The Enchanted Setting

Glimmer Falls is a captivating haven where magic thrives in every corner. This enchanting locale, with its whimsical charm, serves as the perfect backdrop for Sera’s journey, blending the ordinary with the extraordinary in a way that feels both inviting and otherworldly.

3.1 Location and Description of the Inn

Nestled in the heart of the mystical town of Glimmer Falls, the inn serves as a beacon of warmth and magic. Surrounded by lush greenery and enchanted streams, the inn’s location is nothing short of picturesque. Its architecture is a delightful mix of ancient charm and modern convenience, with twinkling lights adorning the roof and ivy crawling up the walls. Inside, the inn is cozy and inviting, filled with the scent of freshly baked pastries and the soft hum of magical energy. Each room is uniquely designed, blending traditional witchy aesthetics with modern comforts. The inn’s layout is carefully crafted to maximize its magical properties, with certain areas amplifying spells and others providing peaceful retreats. The surrounding meadow is a hotspot for magical creatures, adding to the inn’s enchanting ambiance. Together, the inn and Glimmer Falls create a setting that feels like a step into a fairy tale, where magic is woven into everyday life.

3.2 Magical Architecture and Layout

The inn’s design is a masterful blend of magical functionality and charm. Its architecture is infused with spell-enhancing materials, such as enchanted wood and shimmering stone, which amplify the witchy energies within. The layout is carefully planned to optimize magical flow, with specific areas designated for spellcasting, potion-making, and relaxation. Towering ceilings adorned with glittering crystals allow for the free circulation of magic, while hidden compartments and secret passages add an air of mystery. The inn’s rooms are arranged to cater to diverse magical needs, from cozy suites for solo travelers to grand halls for gatherings; The kitchen, a hub of culinary magic, features a hearth that doubles as a potion-brewing station, combining practicality with whimsy. Every detail, from the winding staircases to the glowing floorboards, reflects a deep understanding of magical principles, creating a space where comfort and enchantment coexist seamlessly. This thoughtful design makes the inn not just a place to stay, but a living, breathing entity that supports its inhabitants’ magical journeys.

3.3 Role of Glimmer Falls

Glimmer Falls is more than just a picturesque backdrop; it is a living, breathing entity that pulses with magic. Nestled deep within an enchanted forest, the falls are a source of powerful magical energy, drawing witches, creatures, and wanderers alike. The cascading water is infused with spell-enhancing properties, making it a central resource for the inn’s operations. The falls’ magic seeps into every corner of the inn, sustaining its enchanted architecture and fostering an atmosphere of wonder; They are also home to Clemmie, the enigmatic fox, who acts as both a guardian and a guide. Glimmer Falls symbolizes renewal and transformation, playing a crucial role in Sera’s journey of self-discovery and redemption. Its presence attracts a variety of magical beings, creating a vibrant community that thrives on the falls’ energy. The falls’ essence is woven into the fabric of the inn, making it a place where magic is not just a tool but a way of life.

Magical Creatures and Beings

The inn attracts an array of magical creatures and beings, from mischievous sprites to wise, ancient beings. These inhabitants enrich the inn’s atmosphere, creating a tapestry of enchanted interactions and unexpected alliances.

4.1 Clemmie the Enchanted Fox

Clemmie, the enchanted fox, is a central and charismatic figure in Sera Swan’s life. With her shimmering fur and mischievous demeanor, Clemmie serves as both a loyal companion and a catalyst for Sera’s journey. Their bond is deeply rooted in trust and mutual support, as Clemmie often provides comfort and guidance during Sera’s challenges.

Clemmie’s role extends beyond mere companionship; she is a key player in the magical dynamics of the inn. Her presence attracts other enchanted creatures, creating a vibrant ecosystem within Glimmer Falls. Clemmie’s wisdom and intuition often help Sera navigate the complexities of her newfound life as an innkeeper.

Despite her playful nature, Clemmie harbors her own secrets, adding layers to her character. Her unwavering loyalty to Sera and the inn underscores her importance in the story, making her a beloved and integral part of the magical world Sera inhabits. Clemmie’s enchanting presence enriches the inn’s atmosphere, blending magic and camaraderie seamlessly.

4.2 Other Creatures in the Inn

The inn in Glimmer Falls is a haven for a variety of magical creatures, each contributing to its unique charm. Beyond Clemmie, the enchanted fox, the inn is home to a diverse array of beings, from playful sprites to wise, ancient trees. These creatures, drawn by the inn’s warm atmosphere, form a vibrant community that supports Sera in her role as innkeeper.

Some creatures, like the mischievous dust bunnies, add a touch of whimsy, while others, such as the gentle forest spirits, offer guidance and protection. The inn’s magical architecture attracts beings like the luminous fireflies that light the halls and the soft-spoken library ghosts who guard ancient tomes.

These creatures not only enhance the inn’s enchantment but also create a sense of belonging for Sera. Together, they form a harmonious balance of magic and everyday life, making the inn a place where everyone feels at home. The presence of these beings underscores the inn’s role as a sanctuary for both magical and non-magical visitors alike.

Spellcasting and Potions

Spellcasting and potions are essential tools for Sera Swan, blending practical magic with heartfelt hospitality. From enchanted cleaning spells to welcoming potions, these practices create a warm and inviting atmosphere for guests at the inn.

5.1 Practical Magic for Innkeeping

Practical magic plays a vital role in Sera Swan’s daily life as an innkeeper. Simple yet effective spells are woven into everyday tasks, ensuring the smooth operation of the inn. From enchanted cleaning charms that dust and polish effortlessly to potions that infuse delicious aromas into the kitchen, magic becomes a tool for efficiency and warmth. Sera uses these spells to maintain the inn’s welcoming atmosphere, creating a sense of comfort and charm for her guests. For instance, a flick of her wand can summon a crackling fire or fresh linens, while a gentle incantation can coax the perfect brew from the tea kettle. These practical applications of magic not only simplify her workload but also add a touch of whimsy to the inn’s ambiance. With the help of Clemmie, her loyal enchanted fox companion, Sera masterfully blends magic with mundane tasks, making Glimmer Falls a truly magical destination.

5.2 Potion Recipes for Hospitality

Creating a welcoming atmosphere at Glimmer Falls requires more than just charm; it demands a touch of magical hospitality. Sera Swan relies on a collection of potion recipes that enhance guest experiences, blending comfort with enchantment. One of her signature creations is the Welcome Warmth Potion, a soothing brew made with cinnamon, honey, and a pinch of stardust. This potion ensures that every room feels cozy and inviting, immediately making guests feel at home. Another favorite is the Memory Lane Mist, which subtly enhances nostalgia, allowing guests to reconnect with fond memories while staying at the inn. These potions, often served in teas or infused into linens, showcase Sera’s knack for combining practical magic with heartfelt hospitality. By personalizing her approach, she ensures every visitor leaves with a sense of belonging and a touch of magic in their hearts; Her potion recipes are a testament to her dedication to creating a truly enchanting haven.

Themes in the Book

A Witch’s Guide to Magical Innkeeping explores themes of identity, self-discovery, and the power of family legacy. It delves into the struggle to find one’s place in the world, blending magic with the warmth of human connection and belonging.

6.1 Identity and Self-Discovery

A Witch’s Guide to Magical Innkeeping delves deeply into themes of identity and self-discovery, particularly through the journey of its protagonist, Sera Swan. Once a powerful witch, Sera loses her magic after attempting a forbidden spell, forcing her to redefine herself without the crutch of her abilities. This loss becomes a catalyst for her growth, as she learns to navigate a world where her worth is no longer tied to her powers. The novel explores her struggle to find purpose and belonging, highlighting the resilience of the human spirit. Through her experiences managing the enchanted inn and reconnecting with her past, Sera uncovers a new sense of self, one that blends her magical heritage with the warmth of everyday life. The story beautifully illustrates how identity is shaped by both loss and discovery, offering a heartfelt and relatable exploration of finding one’s true path in life.

6.2 Family, Legacy, and Belonging

A Witch’s Guide to Magical Innkeeping intricately weaves themes of family, legacy, and belonging into Sera Swan’s journey. As a once-prominent witch, Sera is deeply tied to her magical heritage, yet her loss of powers forces her to confront the weight of her family’s expectations and the legacy she once carried. The novel explores her longing to reconnect with her roots while forging a new path, one that doesn’t rely on her magical prowess. The enchanted inn becomes a symbol of her quest for belonging, offering her a sense of community and purpose. Through her interactions with the inn’s staff and guests, Sera discovers that family can be found in unexpected places, and legacy is not solely defined by power. The story beautifully highlights the tension between honoring one’s past and creating a future that feels truly one’s own, offering a poignant reflection on what it means to belong in a world of magic and mundanity.

Innkeeping Tips and Tricks

Discover the art of magical innkeeping with Sera Swan’s insights. From enchanted hospitality practices to managing a harmonious staff, learn how to blend practical magic with heartfelt charm to create unforgettable guest experiences in Glimmer Falls.

7.1 Enchanted Hospitality Practices

Enchanted hospitality lies at the heart of magical innkeeping, blending charm and practical magic to create unforgettable guest experiences. Sera Swan’s approach emphasizes personalized touches, such as welcoming spells and room enhancements tailored to each visitor’s needs. These practices ensure every guest feels valued and enchanted during their stay at the inn.

Clemmie the fox often assists by delivering small, magical gestures, like leaving tokens of welcome or guiding guests to hidden wonders. Spell-infused meals and protective charms further enhance the inn’s ambiance, making it a haven of warmth and safety. Sera’s techniques not only delight but also foster a sense of belonging, weaving magic into every interaction and transforming the inn into a true home away from home.

7.2 Managing a Magical Staff

Managing a magical staff at the inn requires a unique blend of leadership, empathy, and spellcraft. Sera Swan’s approach focuses on fostering a harmonious environment where each staff member’s magical abilities are valued and utilized effectively. Clemmie the fox often serves as a mediator, helping to resolve conflicts and maintain morale.

The staff includes a variety of magical beings, each with distinct talents, from spell-weavers to potion brewers. Sera ensures that everyone feels empowered, encouraging open communication and teamwork. She also implements enchanted tools to streamline tasks, such as self-replenishing supplies and automated cleaning charms, allowing the staff to focus on hospitality.

By balancing magical and mundane responsibilities, Sera creates a workplace where creativity and efficiency thrive. Her leadership not only enhances productivity but also fosters a sense of belonging among the staff, making the inn a haven for both guests and employees alike.

Sangu Mandanna’s Contributions

Sangu Mandanna captivates readers with her enchanting storytelling in A Witch’s Guide to Magical Innkeeping. Her work seamlessly blends magic, romance, and heartwarming tales, creating a unique cozy fantasy experience that resonates deeply with fans of witchy narratives.

8.1 The Very Secret Society of Irregular Witches

Sangu Mandanna’s The Very Secret Society of Irregular Witches is a cozy, heartwarming tale that explores themes of magic, identity, and belonging. The novel follows a group of witches who find solace in an enchanted manor, learning to embrace their unique abilities and forming strong bonds. Mandanna’s writing style, characterized by her ability to blend whimsical fantasy with relatable emotional depth, resonates deeply with readers seeking comfort and charm in their stories.

  • The book highlights the importance of community and acceptance among magical beings.
  • It introduces a cast of quirky, endearing characters who navigate love, friendship, and Self-discovery.
  • Mandanna’s portrayal of magic is both creative and accessible, making the fantastical feel familiar.

The Very Secret Society of Irregular Witches has become a beloved favorite in the cozy fantasy genre, praised for its uplifting tone and genuine character development. Its success has also heightened anticipation for Mandanna’s subsequent works, including A Witch’s Guide to Magical Innkeeping.

8.2 Relevance to Magical Innkeeping

Sangu Mandanna’s work in The Very Secret Society of Irregular Witches lays the groundwork for the themes explored in A Witch’s Guide to Magical Innkeeping. Both works emphasize the importance of community, acceptance, and the transformative power of magic in everyday life. The idea of a safe, welcoming space for magical beings—first introduced in The Very Secret Society—is central to the concept of magical innkeeping. Sera Swan’s journey mirrors the lessons from Mandanna’s earlier novel, as she creates a haven where witches and creatures can belong, heal, and thrive.

  • The focus on hospitality and the blending of magic with mundane life is a common thread.
  • The concept of a shared, enchanted space highlights the power of unity and acceptance.
  • Mandanna’s storytelling style, which combines whimsy with emotional depth, bridges both narratives seamlessly.

Together, these works showcase Mandanna’s ability to craft worlds where magic is not just a tool, but a metaphor for connection and understanding.

A Witch’s Guide to Magical Innkeeping is a heartwarming and enchanting tale that blends magic, romance, and self-discovery. Sera Swan’s journey from a powerful witch to a humble innkeeper offers a unique perspective on identity, family, and belonging. The whimsical setting of Glimmer Falls and its magical inhabitants create a captivating world that feels both familiar and extraordinary.

Sangu Mandanna’s storytelling weaves together themes of redemption, love, and the power of community, making this book a standout in the cozy fantasy genre. The blend of practical magic, charming characters, and emotional depth ensures that readers will be spellbound from start to finish.

This novel is a delightful escape for fans of witchy tales, offering a fresh take on magical realism. With its uplifting message and irresistible charm, A Witch’s Guide to Magical Innkeeping is a must-read for anyone seeking a story that warms the heart and sparks the imagination;

6r140 rebuild manual pdf

This comprehensive guide covers the Ford 6R140 transmission, including models 6R140, 6R140W, and Torqshift 6 speed, designed for Ford Super Duty trucks from 2010 onward.

Purpose and Scope of the Manual

This manual provides detailed instructions for rebuilding the Ford 6R140 transmission, covering disassembly, inspection, and reassembly processes. It is designed for both professional technicians and experienced DIY enthusiasts, offering step-by-step guidance. The scope includes troubleshooting common issues, diagnosing hydraulic and electrical systems, and installing high-quality rebuild kits. The manual emphasizes the importance of using proper tools and following safety protocols to ensure a successful rebuild. It also covers essential pre-installation checks and post-rebuild testing to validate transmission performance. By following this guide, users can restore their 6R140 transmission to optimal functionality, ensuring reliability and durability.

Target Audience: Professional Mechanics and DIY Enthusiasts

This manual is designed for both professional transmission technicians and experienced DIY enthusiasts seeking to rebuild the Ford 6R140 transmission. It provides detailed, step-by-step instructions for disassembly, inspection, and reassembly, ensuring clarity for all skill levels. Professional mechanics will appreciate the technical depth and troubleshooting guidance, while DIYers will benefit from clear explanations and safety tips. The manual assumes a basic understanding of transmission systems but does not require prior experience with the 6R140 specifically. It is an essential resource for anyone aiming to restore their transmission to factory specifications or enhance its performance with aftermarket components.

Overview of the 6R140 Transmission

The Ford 6R140 transmission, also known as the TorqShift 6, is a six-speed automatic transmission designed for heavy-duty applications, including F-250 to F-550 Super Duty trucks. Introduced in 2011, it features a robust design to handle high torque engines like the 6.7L Power Stroke diesel and 6.2L V8 gas engines. This transmission is known for its durability, electronic controls, and advanced features such as Tow Haul Mode and manual shift capabilities. It is built to deliver smooth shifting and reliable performance under heavy loads, making it a critical component for both work and towing applications.

Safety Precautions and Essential Tools

Essential tools include a torque wrench, socket set, and diagnostic equipment like Ford IDS. Always follow safety protocols to avoid injury and ensure proper transmission function.

Important Safety Measures for Transmission Rebuilding

When rebuilding the 6R140 transmission, wear protective gear like gloves and safety glasses. Ensure proper ventilation to avoid inhaling harmful fumes. Use a torque wrench correctly to prevent over-tightening. Never work under a lifted vehicle without proper jack stands. Handle transmission fluids and cleaning solvents responsibly, adhering to environmental guidelines. Keep the workspace clean to avoid accidents. Always follow the manufacturer’s instructions for specialized tools and equipment. Be cautious of hot components, such as the torque converter, which may retain heat after disassembly. Properly label and store small parts to prevent loss or misplacement during the rebuild process.

Required Tools and Equipment for the Rebuild

To successfully rebuild the 6R140 transmission, you’ll need a comprehensive set of tools and equipment. Start with basic tools like wrenches, sockets, and pliers. A torque wrench is essential for precise bolt tightening to prevent damage. Specialty tools, such as a transmission jack and press, are necessary for handling and assembling specific components. A workbench with a vice provides a stable workspace for detailed tasks. Cleaning tools like a parts washer, solvents, brushes, and compressed air are crucial for preparing components. Measuring tools, including a micrometer and dial indicator, ensure parts meet specifications. Diagnostic tools like the Ford IDS scan tool are required for TCM flashing and drive cycle relearns. Safety equipment such as gloves, safety glasses, and a face mask is vital. Consider using a parts organizer to keep components sorted. Consult the rebuild manual and suppliers like Revmax and BD for specialized tools. Ensure availability and budget for essential items, and prepare a checklist to stay organized during the process.

Diagnostic and Flashing Tools Needed

Proper diagnostic and flashing tools are crucial for a successful 6R140 transmission rebuild. A Ford IDS scan tool is essential for TCM (Transmission Control Module) reprogramming and flashing solenoid strategy codes. This tool allows you to clear KAM (Keep Alive Memory) and perform drive cycle relearns, ensuring the transmission operates correctly after installation. Additional tools include oscilloscope for solenoid testing, pressure test kits for hydraulic system verification, and pan gasket sets for proper sealing. Always use high-quality tools to ensure accuracy and reliability during the rebuild process.

Transmission Disassembly Process

The 6R140 disassembly involves removing the valve body, torque converter, and pump. Special tools are required to safely separate components while preventing fluid loss and damage.

Step-by-Step Guide to Disassembling the 6R140

Disassembly begins with draining transmission fluid and removing the pan. Next, detach the torque converter and pump assembly. Use a torque wrench to remove bolts securing the valve body. Carefully lift the valve body to access internal components. Remove the turbine shaft and speed sensors, followed by the output shaft. Use specialized tools to extract the planetary gear set and clutch packs. Document each step to ensure proper reassembly. Refer to the manual for specific torque specifications and alignment marks. Avoid forcing parts, as this can cause irreversible damage. Proper disassembly is critical for a successful rebuild.

Valve Body Removal and Inspection

Valve body removal involves detaching electrical connectors and solenoid pack. Use a wrench to remove retaining bolts, then gently pry the valve body loose. Inspect for wear, cracks, or debris. Clean all passages and check valve operation. Replace worn components or seals to ensure proper hydraulic control. Reinstall securely, ensuring alignment marks are correct. Torque bolts to specified values to prevent damage. Inspect solenoid pack and connectors for corrosion or damage. Proper valve body function is crucial for transmission performance, so thorough inspection and maintenance are essential during the rebuild process. Always refer to the manual for precise torque specifications and procedures.

Accessing the Torque Converter and Pump

To access the torque converter and pump, start by removing the transmission pan and draining the fluid. Detach the torque converter from the flywheel or flex plate using a puller. Remove the converter bolts and carefully slide it off the input shaft. Next, remove the pump bolts and pull the pump straight off the case. Inspect the pump for wear or damage and clean the area thoroughly. Check the torque converter for proper balance and alignment. Ensure all mating surfaces are clean before reassembly. Proper alignment and secure installation are critical for optimal transmission performance and longevity. Always refer to the manual for precise torque specifications.

Inspection and Diagnosis

Inspect the 6R140 transmission for wear, damage, and leaks. Use scan tools to diagnose issues like solenoid faults or hydraulic system problems. Refer to the manual for troubleshooting.

Identifying Common Issues in the 6R140

The 6R140 transmission is prone to issues like pressure regulator valve failure, leading to inconsistent line pressure. Wear on clutch packs and bands can cause slipping or hesitation. The valve body often requires attention due to solenoid malfunctions or faulty sensors. Torque converter issues, such as improper engagement or lockup, are common, especially in high-load conditions. Additionally, the hydraulic system may develop leaks or blockages, affecting transmission performance. Diagnosing these problems requires a combination of visual inspection, scan tool data, and pressure testing. Early detection of these issues is critical to prevent further damage and ensure a successful rebuild.

Checking for Wear and Damage in Key Components

Inspecting key components is crucial for a successful 6R140 rebuild. The torque converter should be checked for cracks, excessive wear, or improper balancing. Clutch packs and bands must be examined for friction material degradation or excessive wear. The valve body requires attention to solenoids, springs, and valves, ensuring they function correctly. Bearings and bushings should be inspected for scoring or excessive play. The pump and stator assembly must be checked for wear or damage. All components should be thoroughly cleaned and measured against factory specifications. Any damaged or worn parts must be replaced to ensure optimal transmission performance and longevity.

Using Scan Tools for Initial Diagnosis

Utilizing a capable scan tool is essential for diagnosing issues in the 6R140 transmission. Begin by connecting the tool to the vehicle’s OBD-II port to retrieve any stored DTCs (Diagnostic Trouble Codes). Monitor live data, such as transmission temperature, fluid pressure, and solenoid operation, to identify irregularities. Perform a drive cycle relearn procedure to ensure proper transmission adaptation. Clear the TCM’s Keep Alive Memory (KAM) and reflash the solenoid strategy code if necessary. This step is critical for verifying electrical and hydraulic system functionality before proceeding with physical inspections or disassembly, ensuring accurate troubleshooting and minimizing unnecessary repairs.

Rebuild Kit Information

BD’s performance 6R140 rebuild kit includes locking pressure plates for increased clutch count without machining. Overhaul kits for 2011-Up models are also available.

Revmax Rebuild Kits: Features and Benefits

Revmax rebuild kits are designed for professional technicians, offering high-quality components for the 6R140 transmission. These kits ensure durability and performance, with parts like seals, gaskets, and clutch packs. They are engineered to restore transmission functionality, addressing common wear issues. Revmax kits are known for their reliability, helping to prevent premature failure. They include all necessary components for a complete overhaul, ensuring a smooth and efficient rebuild process. Proper installation by experienced technicians is crucial for optimal results and longevity of the transmission. Revmax kits are a trusted choice among professionals for rebuilding the 6R140 transmission effectively.

Components Included in the Rebuild Kit

A typical 6R140 rebuild kit includes essential components like seals, gaskets, clutch packs, and steel plates, ensuring a comprehensive overhaul. Kits often feature high-quality bearings, bushings, and filters, along with solenoid and valve body gaskets. They are designed to address common wear points, providing everything needed for a complete rebuild. The kit’s components are carefully selected to restore transmission performance and durability. Professional technicians rely on these kits to ensure all critical areas are addressed, eliminating the need for multiple parts orders. The inclusion of detailed instructions and specifications helps streamline the rebuild process, ensuring accuracy and reliability.

Importance of Using High-Quality Parts

Using high-quality parts in a 6R140 transmission rebuild is crucial for ensuring long-term performance and reliability. Cheap or inferior components can lead to premature wear, reduced efficiency, and even transmission failure. Genuine or OEM-equivalent parts are engineered to meet exact specifications, providing optimal durability and compatibility. Low-quality alternatives may fail sooner, requiring costly repairs. Additionally, high-quality parts ensure proper sealing, reduced leakage risks, and consistent hydraulic performance. Investing in reputable brands like Revmax or BD Performance ensures your rebuild withstands the demands of heavy-duty applications, such as towing or hauling. Properly sourced parts are essential for a successful and lasting rebuild.

Reassembly and Overhaul

Reassembling the 6R140 transmission requires precision, starting with the torque converter and pump installation, followed by the valve body and solenoid pack. Use a torque wrench and ensure proper alignment to avoid damage. High-quality kits like Revmax or BD Performance provide durable components. Follow factory torque specifications for all bolts and fasteners. After reassembly, perform a thorough leak check and test the transmission in manual and tow modes to ensure proper function. Proper reassembly ensures optimal performance and longevity of the transmission.

Reassembling the Transmission: A Step-by-Step Guide

Reassembly begins with installing the torque converter, ensuring proper alignment with the crankshaft. Next, reinstall the pump and torque converter housing, securing it with factory-specified torque. The valve body is then reattached, ensuring all electrical connectors are securely plugged in. Install the solenoid pack and transmission pan, replacing the gasket to prevent leaks. Reattach the tailshaft housing and driveshaft, ensuring proper alignment. Use a torque wrench for all bolts, following factory specifications. Finally, fill the transmission with the recommended fluid and perform a leak check. Test the transmission in manual, tow, and drive modes to confirm proper operation and shift quality.

Installing the Valve Body and Solenoid Pack

Begin by cleaning the valve body mounting surface and applying a thin layer of sealant to the new gasket. Carefully align the valve body with the transmission case, ensuring proper orientation. Secure it using the factory torque specification in a star pattern to avoid warping. Next, install the solenoid pack, connecting all electrical connectors firmly. Apply a small amount of silicone sealant to the solenoid pack gasket before installation. Tighten the solenoid pack bolts in the specified sequence, ensuring even pressure. Finally, reconnect the transmission control module (TCM) harness and test all electrical connections to confirm proper function and communication.

Reinstalling the Torque Converter and Pump

Start by ensuring the torque converter is clean and free of debris. Align the converter with the pump gear, verifying proper engagement. Install the converter retaining studs and tighten them evenly to the specified torque. Next, reinstall the pump, applying a thin layer of sealant to the gasket. Secure the pump bolts in a star pattern, ensuring even pressure to prevent leakage. Connect the electrical connectors to the pump solenoid and fluid pressure sensors. Finally, fill the pump with the recommended transmission fluid and test for leaks before proceeding with the rebuild. Ensure all connections are secure and function properly.

Troubleshooting Common Issues

Common issues include slipping gears, solenoid malfunctions, and hydraulic system leaks. Use scan tools to diagnose TCM faults and address problems promptly to ensure smooth transmission operation.

Common Problems Encountered During Rebuild

During a 6R140 rebuild, common issues include incorrect solenoid installation, improper torque converter alignment, and worn-out clutch packs. Ensure all components are thoroughly inspected and replaced as needed. Misaligned or damaged parts can lead to transmission failure. Proper use of specialized tools, like the IDS scan tool, is crucial for reprogramming the TCM. Additionally, over-tightening or under-tightening bolts can cause leaks or internal damage. Always refer to the ATSG manual for precise torque specifications and assembly procedures to avoid these pitfalls and ensure a successful rebuild.

Diagnosing and Resolving Hydraulic System Issues

Hydraulic system issues in the 6R140 transmission often manifest as slipping or delayed shifts. Start by checking the transmission fluid level and condition, as low or degraded fluid can cause poor hydraulic pressure. Inspect the solenoid pack for proper function and ensure all electrical connections are secure. Use a scan tool to monitor pressure sensor readings and detect anomalies. Worn clutch packs or seals should be replaced to restore hydraulic integrity. If pressure plates or pistons are damaged, consider using BD’s patent-pending locking pressure plates to increase clutch count without machining. Always refer to the ATSG manual for detailed diagnostic procedures.

Troubleshooting Electrical and Solenoid-Related Problems

Electrical issues in the 6R140 transmission often involve faulty solenoids or wiring. Begin by using a scan tool to check for TCM (Transmission Control Module) error codes, which can pinpoint solenoid performance issues. Inspect the solenoid pack for signs of wear or damage, and ensure all electrical connections are clean and secure. If solenoid strategies are outdated, use the IDS tool to flash the TCM with updated software. BD’s PressureLoc module can enhance line pressure control, but always follow proper installation and flashing procedures. Referencing the ATSG manual ensures accurate diagnosis and repair of electrical and solenoid-related malfunctions. Regular maintenance prevents recurring problems.

Installation and Setup

Proper installation of the rebuilt 6R140 requires pre-installation checks, ensuring all components are clean and aligned. Use the IDS tool to flash the TCM with updated solenoid strategies, enabling optimal performance. Follow the drive cycle relearn procedure to reset transmission adaptive learning. Always refer to the ATSG manual for detailed steps to avoid errors and ensure a smooth setup process. Correct installation is crucial for the transmission’s longevity and functionality in Ford Super Duty trucks.

Pre-Installation Checks and Preparations

Before installing the rebuilt 6R140 transmission, ensure all components are thoroughly inspected and cleaned. Check for any residual debris from the rebuild and verify that all new parts are properly seated. The torque converter must align correctly with the engine’s crankshaft, and the transmission mounts should be securely attached. Use a scan tool to clear any TCM keep-alive memory (KAM) to prevent old adaptations from affecting performance. Ensure the transmission fluid is at the recommended level and temperature, typically between 180°F and 200°F, before starting the engine. Proper preparation is key to a successful installation and optimal functionality.

Installing the Rebuilt Transmission

Begin by carefully lifting the rebuilt 6R140 transmission into position, ensuring proper alignment with the engine and chassis mounts. Secure the transmission using the provided crossmember brackets and bolts, tightening them in the specified sequence. Reattach the driveshaft, making sure it is properly seated and balanced. Connect the electrical connectors to the TCM and solenoid pack, ensuring all wires are securely fastened. Once installed, use a Ford IDS scan tool to flash the solenoid strategy code and perform the drive cycle relearn procedure to adapt the transmission to the vehicle’s system. This step is crucial for optimal performance and functionality.

Connecting and Configuring the TCM and Solenoids

Connect the Transmission Control Module (TCM) to the solenoid pack using the designated electrical connectors. Ensure all wiring is securely attached and routed away from heat sources. Use a Ford IDS scan tool to flash the TCM with the correct solenoid strategy code, following the instructions provided in the scan tool. After flashing, perform the drive cycle relearn procedure to synchronize the transmission with the vehicle’s system. This involves a series of throttle and brake inputs while monitoring the transmission’s adaptive learning process. Proper configuration ensures smooth shifting, optimal performance, and prevents potential issues with transmission operation and control.

Post-Rebuild Testing and Validation

After rebuilding, conduct initial startup tests to ensure smooth engagement and operation. Perform a drive cycle relearn procedure to adapt transmission settings to the vehicle. Test manual shift and Tow Haul modes to verify proper functionality.

Initial Startup and Basic Function Tests

After reassembly, start the engine and check for leaks or unusual noises. Ensure the transmission shifts smoothly through all gears. With the brakes applied, cycle through each gear manually to confirm proper engagement. Monitor the transmission temperature, ensuring it stays within the recommended range (180°F to 200°F). Use a scan tool to clear any Keep Alive Memory (KAM) and verify that all solenoids and sensors are functioning correctly. Perform a basic drive cycle to test acceleration, deceleration, and gear transitions under varying conditions. Address any issues immediately to prevent further complications during extended operation.

Drive Cycle Relearn Procedure

Following the transmission rebuild, a drive cycle relearn procedure is essential to recalibrate the Transmission Control Module (TCM). Start with a cold engine and ensure all accessories are off. Drive the vehicle in a controlled environment, accelerating gradually from a standstill to 40 mph, then decelerate to a stop. Repeat this process three times to allow the TCM to adapt to the new transmission components. Perform shifts in both automatic and manual modes, covering all gear ranges. This process ensures the TCM learns the new clutch pack and band engagements, optimizing shift quality and transmission performance. Use a scan tool to monitor real-time data during the procedure.

Testing Manual Shift and Tow Haul Modes

After rebuilding the 6R140 transmission, verify manual shift and Tow Haul modes to ensure proper functionality. In manual mode, test each gear from 1st to 6th, checking for smooth engagements without slipping or hesitation. Use a scan tool to monitor gear engagement and solenoid operation. For Tow Haul mode, activate it and test under load, observing higher shift points and firmer engagements. Ensure the transmission holds gears appropriately during acceleration and deceleration. Verify that the torque converter locks and unlocks correctly. Any irregularities indicate potential issues with solenoid calibration or clutch pack wear. Record all findings for further diagnosis if necessary.

Maintenance and Upkeep

Regular fluid changes, filter replacements, and performance monitoring are essential for the 6R140 transmission. Follow the recommended schedule to ensure optimal functionality and longevity of the unit.

Recommended Maintenance Schedule

The 6R140 transmission requires regular maintenance to ensure optimal performance. Fluid changes should be performed every 30,000 to 60,000 miles, depending on usage conditions. The transmission filter should be replaced annually or every 15,000 miles. Monitoring transmission temperature and fluid levels is crucial, especially in Tow Haul mode or under heavy loads. Inspect the pan gasket and seals for leaks annually. Additionally, scan tool checks every 12,000 miles can help identify potential issues early. Adhering to this schedule ensures the transmission operates efficiently and extends its lifespan, preventing costly repairs.

Fluid Requirements and Filter Replacement

The 6R140 transmission requires Ford Motorcraft MERCON® LV or equivalent synthetic fluid for optimal performance. Fluid capacity typically ranges from 12 to 14 quarts, depending on application. The transmission pan gasket and filter must be replaced every 15,000 to 30,000 miles or as needed. Ensure the filter is properly seated and the pan gasket is clean to prevent leaks. After replacement, fill the transmission with the recommended fluid and check for leaks. Always consult the factory manual for specific fluid requirements and capacities. Proper fluid and filter maintenance ensures smooth operation and prevents premature wear.

Monitoring Transmission Performance

Regular monitoring ensures the 6R140 transmission operates efficiently. Check fluid levels monthly and top up as needed using Ford Motorcraft MERCON® LV. Inspect for leaks around the pan, cooler lines, and seals; Use a scan tool to monitor transmission temperature, ensuring it stays below 220°F during normal operation. Shift through all gears manually to verify smooth engagement. Pay attention to unusual noises or slipping between gears, which may indicate worn clutches or solenoid issues. Address any concerns promptly to prevent major repairs. Keep a maintenance log to track fluid changes, inspections, and any repairs performed.

Additional Resources and References

Consult the ATSG 6R140 manual for detailed procedures, Revmax rebuild kits for parts, and online forums for community support and expert advice on transmission repairs.

ATSG Manual: Detailed Rebuild and Overhaul Guide

The ATSG 6R140 manual provides a comprehensive, fully-illustrated guide for rebuilding and overhauling the Ford 6R140 transmission. It covers essential procedures for disassembly, inspection, and reassembly, ensuring precise and efficient repairs. The manual includes detailed instructions for valve body assembly, torque converter installation, and hydraulic system diagnosis. Designed for both professional technicians and skilled DIY enthusiasts, it offers troubleshooting tips and step-by-step solutions to common issues. With its thorough coverage, the ATSG manual is an indispensable resource for anyone aiming to restore their transmission to optimal performance and reliability. It’s available in paperback format for easy reference during the rebuild process.

Online Forums and Communities for Support

Online forums and communities are invaluable resources for 6R140 transmission rebuilds. Platforms like Ford Truck Enthusiasts Forum and Transmission Rebuilders Group offer extensive discussions, troubleshooting tips, and real-life experiences. Members often share detailed guides, photos, and videos to aid in complex procedures. Additionally, the 6R140 Transmission Rebuild Manual PDF is frequently referenced in these communities, alongside recommendations for diagnostic tools like the Ford IDS scan tool. These forums also host discussions on BD Performance upgrades and Revmax rebuild kits, providing insights into enhancing transmission performance. Whether you’re a professional or a DIY enthusiast, these communities offer a wealth of knowledge and support to ensure a successful rebuild.

Recommended Tools and Suppliers

Rebuilding a 6R140 transmission requires specialized tools and high-quality components. Essential tools include a Ford IDS scan tool for flashing the TCM, a torque converter holding tool, and a valve body test bench. Suppliers like BD Performance and Revmax offer rebuild kits with upgraded components, such as locking pressure plates and high-capacity clutch packs. ATSG is a trusted source for detailed repair manuals and technical support. Always use OEM or equivalent parts to ensure reliability. For diagnostic needs, consider investing in a capable scan tool to perform drive-cycle relearn procedures and clear TCM memory. These resources are crucial for a successful rebuild.