Welcome to the comprehensive guide for vintage Singer sewing machines. This manual provides detailed instructions for setup, maintenance, and troubleshooting, ensuring optimal performance and longevity of your machine.
Discover how to thread, sew, and care for your antique Singer, with tips for preserving its value and functionality for generations to come.
Overview of the Importance of Vintage Singer Sewing Machines
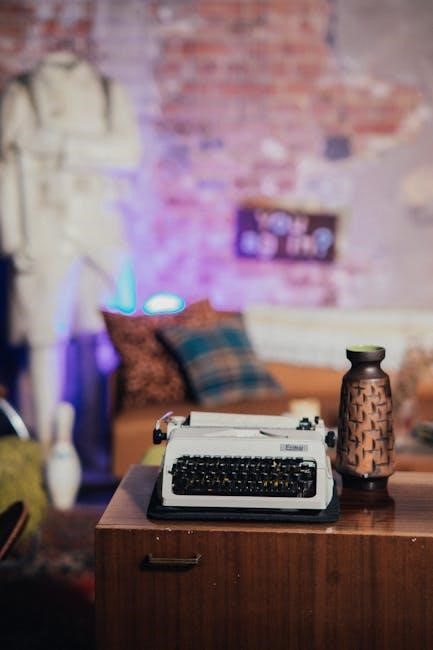
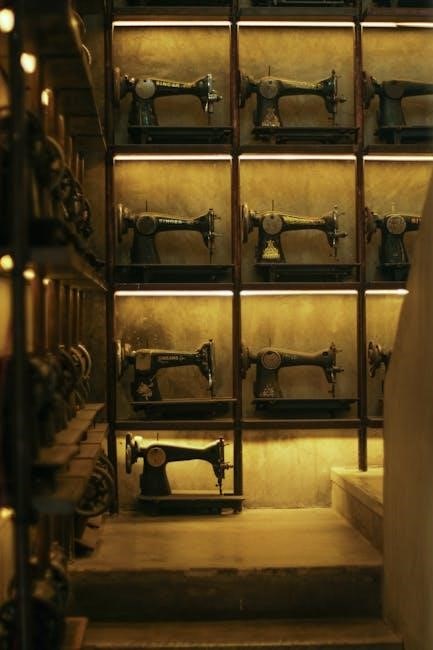
Vintage Singer sewing machines hold significant historical and practical value, offering a glimpse into the evolution of sewing technology. These machines are prized for their durability, craftsmanship, and timeless functionality. Many models remain operational, making them valuable for both collectors and sewists. Their enduring popularity stems from their reliability and the nostalgic appeal of traditional sewing methods. Preserving these machines not only honors their heritage but also provides a sustainable alternative for modern sewing needs.
Understanding the Structure of the Manual
This manual is organized into clear sections, guiding users through setup, operation, and maintenance of vintage Singer sewing machines. Each chapter addresses specific topics, from threading and stitching to troubleshooting and care. Detailed instructions, accompanied by diagrams, ensure ease of understanding. The structure is designed to help users master their machine’s capabilities while preserving its condition. Whether you’re a novice or experienced sewer, this manual provides a comprehensive resource for optimal use and longevity of your vintage Singer.
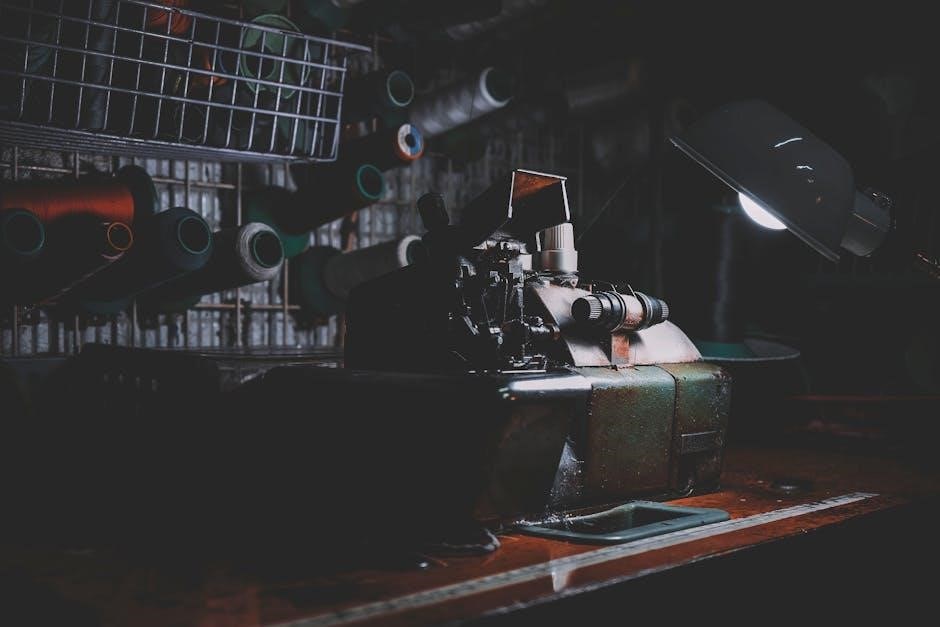
Key Features of Old Singer Sewing Machines
Old Singer sewing machines are renowned for their durability and versatility. They feature mechanical components that allow for precise stitching and various stitch lengths. Many models include attachments like the buttonholer and cloth guide, enabling specialized sewing tasks. The machines are built with high-quality materials, ensuring longevity. Their compact design and user-friendly interface make them accessible to sewers of all skill levels. These features have made vintage Singer machines timeless favorites among sewing enthusiasts.

Identifying Your Old Singer Sewing Machine Model
Locate the model number on the machine, often found near the bobbin area or on a metal plate. Check for unique features like decals or attachments to determine the model accurately.
How to Determine the Model Number
Locate the model number on your vintage Singer sewing machine, typically found on a metal plate or engraved directly on the body. It may be near the bobbin area or on the base. Check for a series of numbers or letters that identify the specific model. If unclear, consult the machine’s original manual or search online databases for Singer models. This step is crucial for accurate maintenance and troubleshooting.
Understanding the Serial Number and Production Date
The serial number on your vintage Singer sewing machine is a unique identifier that reveals its production date and model specifics. Typically located on the base, near the bobbin area, or on a metal plate, it consists of a series of numbers. By cross-referencing this number with Singer’s official database or historical records, you can determine the machine’s age and production details. This information is essential for maintenance, troubleshooting, and understanding your machine’s heritage.
Recognizing Unique Features of Different Models
Each Singer sewing machine model boasts distinct features, such as stitch options, mechanical components, and design elements. For instance, the Featherweight model is known for its portability and straight-stitch capability, while the 201K and 99K models offer reverse stitching and decorative stitch options. Understanding these unique features helps in identifying your machine’s model and optimizing its use. Refer to Singer’s official database or historical records for detailed specifications and model-specific guidance.
Setting Up Your Vintage Singer Sewing Machine
Setting up your vintage Singer involves unpacking, inspecting, and securing it to a table. Lubricate moving parts and ensure all attachments, like the cloth guide, are properly installed.
Unpacking and Initial Inspection
When unpacking your vintage Singer sewing machine, carefully remove all components from the packaging. Inspect the machine for any signs of damage or wear. Check for completeness, ensuring all accessories like bobbins, needles, and attachments are included. Examine the exterior and interior for dust or debris. Before use, clean the machine gently and verify that all parts are in working condition. This step ensures your machine is ready for proper setup and operation.
Attaching the Machine to a Table or Base
To ensure stability, attach your vintage Singer sewing machine to a sturdy table or base using the provided screws or bolts. Align the machine’s mounting holes with the table’s surface and tighten securely. Ensure the machine is level to prevent vibration or uneven sewing. Refer to the manual for specific hardware requirements. A stable setup enhances sewing accuracy and reduces noise, making your sewing experience more efficient and enjoyable.
Oiling and Lubricating the Machine
Regular oiling is essential for maintaining your vintage Singer sewing machine’s smooth operation. Use high-quality Singer sewing machine oil, applying a few drops to the hand wheel, gears, and shuttle. Turn the hand wheel gently to distribute the oil evenly. Lubricate moving parts every 10 hours of use to prevent friction and wear. Avoid over-oiling, as it may attract dust and dirt. Proper lubrication ensures quiet, efficient performance and extends the machine’s lifespan.
Threading and Basic Operations
Learn to thread your vintage Singer machine correctly, from the spool to the needle. Understand basic operations like setting stitch length and starting your first sew.
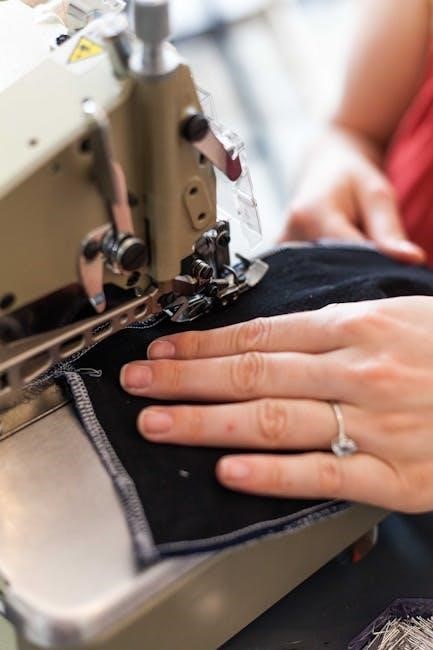
Step-by-Step Guide to Threading the Machine
Start by removing the spool pin and attaching the spool of thread; Guide the thread through the machine’s tension discs, ensuring it passes through the take-up lever.
Next, insert the thread into the needle bar and pull gently to secure it. Finally, test the thread by sewing a few stitches to ensure proper tension and flow.
Setting the Needle and Bobbin
To set the needle, insert it into the needle bar, ensuring it aligns with the machine’s mechanism.
For the bobbin, wind thread around it evenly, then place it into the bobbin case.
Gently pull the thread to secure the bobbin in position, ensuring smooth stitching.
Basic Sewing Techniques and Stitches
Mastering basic stitches is essential for effective sewing. Start with a straight stitch for simple seams.
For reverse sewing, use the backstitch feature.
The running stitch is ideal for gathering fabric or basting.
Adjust stitch length and width as needed for different fabrics and projects.
Always maintain proper thread tension to ensure even stitching.
Practice on scrap fabric to refine your technique before working on final projects.

Maintenance and Care
Regular cleaning, oiling, and proper storage are crucial for preserving your vintage Singer sewing machine. Follow the manual’s guidelines to ensure optimal performance and longevity.
Cleaning the Machine Regularly
Regular cleaning is essential to maintain your vintage Singer sewing machine’s performance. Use a soft brush to remove dust and debris from the exterior and internal mechanisms. For tight spaces, compressed air can be effective. Avoid harsh chemicals, as they may damage the finish. Gently wipe surfaces with a dry cloth. After each use, clean the machine to prevent lint buildup. Refer to your manual for specific cleaning instructions tailored to your model.
Replacing Parts and Accessories
Replacing parts and accessories on your vintage Singer sewing machine ensures optimal performance. Always use genuine Singer parts or high-quality reproductions. Refer to your manual for specific instructions. Locate replacement parts through online suppliers or sewing communities. Before replacing, turn off and unplug the machine. Follow the manual’s guidance for installation. Regularly check for worn or damaged components to maintain functionality and prevent further damage. Proper replacement extends the machine’s lifespan and reliability.
Storing the Machine Properly
Proper storage is essential for preserving your vintage Singer sewing machine. Keep it in a dry, cool place away from direct sunlight and moisture. Cover the machine with a breathable cloth or use a hard case to protect it from dust. Clean the machine thoroughly before storage to prevent rust or damage. Avoid extreme temperatures and humidity. Store accessories separately in a labeled container for easy access. Regularly inspect stored items to ensure they remain in good condition.
Troubleshooting Common Issues
Identify and resolve issues like thread breakage, improper tension, or insufficient oiling. Refer to the manual for step-by-step solutions to ensure smooth operation and extend machine lifespan.
Diagnosing Machine Malfunctions
Start by checking the power source and ensuring the machine is properly plugged in. Inspect for thread breakage or improper tension, which can cause uneven stitching. Verify that the needle is correctly aligned and the bobbin is threaded properly. If the machine is noisy, check for loose parts or insufficient oiling. Refer to the manual for specific troubleshooting guides tailored to your Singer model to address issues effectively and maintain optimal performance.
Fixing Thread Breakage and Tension Problems
Thread breakage often occurs due to incorrect threading or improper tension. Re-thread the machine, ensuring the thread passes through all guides smoothly. Check the tension discs and bobbin case for proper alignment. If the thread is too tight or loose, adjust the tension knob. For persistent issues, clean the tension discs and re-thread. Ensure the take-up spring is functioning correctly. These steps help restore even stitching and prevent further breakage on your vintage Singer sewing machine.
Addressing Noise or Vibration Issues
Noise or vibration in vintage Singer sewing machines often results from improper setup or lack of lubrication. Ensure the machine is securely attached to a sturdy table or base. Check for loose screws or belts and tighten them if necessary. Regularly oil moving parts to reduce friction. If the balance wheel wobbles, adjust its alignment. Clean the interior to remove dust or debris that may cause uneven operation. Proper maintenance helps restore smooth, quiet functionality to your machine.

Using Attachments and Accessories
Explore the variety of attachments and accessories for vintage Singer sewing machines, such as buttonholers and cloth guides, to enhance your sewing experience and versatility.
Understanding Different Attachments for Specialized Sewing
Vintage Singer sewing machines offer various attachments for specialized tasks, such as buttonholers, rufflers, and edge joiners. These accessories enhance stitching capabilities, allowing for intricate designs and professional finishes. Explore how each attachment expands your sewing options, from creating perfect buttonholes to handling delicate fabrics. Original and reproduction attachments are widely available, ensuring compatibility with your machine. Always refer to your manual for installation and usage guidance to maximize your sewing experience.
Installing and Using the Cloth Guide
The cloth guide is an essential attachment for maintaining straight stitching on vintage Singer machines. To install, attach it securely to the machine’s arm or base. Use it to guide fabric evenly, ensuring precise seams. Adjust the guide according to fabric width for consistent results. Refer to your manual for specific installation steps and tips on optimizing its use for various materials and projects. This tool enhances accuracy and simplifies sewing straight lines effortlessly.
Utilizing the Buttonholer and Other Accessories
The buttonholer is a valuable accessory for creating professional-looking buttonholes on vintage Singer machines. Attach it by aligning the shank with the machine’s needle bar and securing it firmly. Use the buttonholer to sew precise, evenly spaced buttonholes. For other accessories, like rufflers or tuckers, follow the manual’s installation guide. These tools expand your machine’s capabilities, allowing for specialized stitching and fabric manipulation. Explore their uses to enhance your sewing projects with ease and precision.

Advanced Sewing Techniques
Explore advanced sewing techniques with your vintage Singer machine. Adjust stitch length and width for custom results. Sew various fabrics and create decorative patterns with precision and ease.
Adjusting Stitch Length and Width
Adjusting the stitch length and width on your vintage Singer sewing machine allows for precise control over your sewing projects. To modify the stitch length, locate the stitch length dial, typically found on the front or side of the machine. Turn the dial clockwise for shorter stitches and counterclockwise for longer ones. For stitch width adjustment, use the stitch width dial, usually positioned near the stitch length control. Ensure the machine is threaded correctly before making adjustments. Experiment with different settings to achieve the desired stitch pattern for your fabric type. Always test stitches on scrap fabric before sewing your final project to ensure optimal results;
Sewing Different Fabrics and Materials
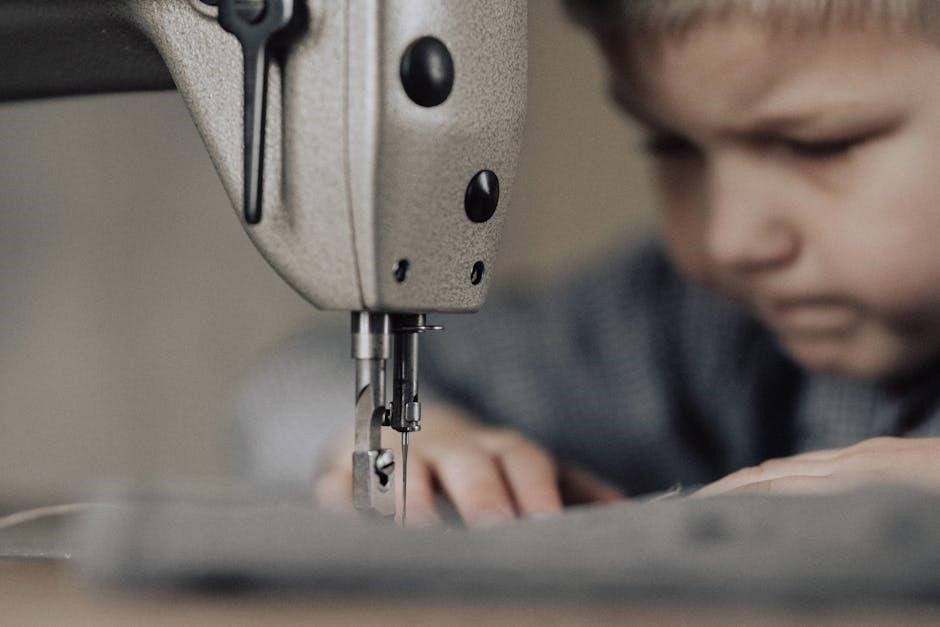
When sewing various fabrics with your vintage Singer machine, choose the appropriate needle size and type for the material. Use a sharp needle for delicate fabrics like silk or cotton, and a heavy-duty needle for thicker materials like denim or canvas. Adjust the tension and stitch length to suit the fabric weight. For slippery fabrics, use a walking foot or Teflon foot attachment. Always test stitches on scrap fabric to ensure proper settings and avoid damage to your project.
Creating Decorative Stitches and Patterns
Enhance your sewing projects with decorative stitches and patterns using your vintage Singer machine. Adjust the stitch length and width to create intricate designs. Use the buttonholer attachment for precise buttonholes or explore embroidery techniques. Experiment with different thread colors and fabrics to add visual interest. For delicate patterns, reduce the stitch length, while longer stitches work well for bold designs. Practice on scrap fabric to master these techniques and achieve professional-looking results.
Safety Precautions
Ensure safe operation by keeping loose clothing tied back, avoiding distractions while sewing, and using attachments correctly. Regularly maintain the machine to prevent malfunctions. Keep children away and follow electrical safety tips to avoid accidents.
General Safety Guidelines for Operating Vintage Machines
Always inspect the machine for damage before use. Avoid loose clothing and long jewelry that could get caught. Keep children and pets away while sewing. Ensure the workspace is well-lit and clear of clutter. Use the correct voltage for your machine to prevent electrical issues. Never touch electrical components with wet hands. Use the provided attachments and tools as instructed. Regular maintenance is crucial to ensure safe operation. Consult the manual for specific safety recommendations tailored to your model.
Preventing Accidents and Injuries
Always keep loose clothing and long hair tied back while operating the machine. Avoid distractions and ensure hands are dry. Never touch sharp parts like needles or presser feet. Keep fingers away from the sewing area while the machine is in motion. Use the provided accessories and attachments correctly. Regularly inspect needles and replace them if damaged. Store the machine out of children’s reach and ensure the workspace is stable and free from hazards.
Electrical Safety Tips
Always use the original power cord and avoid damaged plugs or frayed cords. Keep the machine dry and away from moisture. Never operate near water or in humid environments. If unsure about electrical safety, consult a professional. Unplug the machine during maintenance or when not in use. Ensure all electrical components are in good condition to prevent shocks or fires. Regularly inspect cords and plugs for wear and tear. Keep children away from electrical parts to avoid accidents.
Resources and Further Reading
Explore comprehensive guides, manuals, and communities online for vintage Singer sewing machines. Visit archive.org for original manuals and join forums for expert advice and support.
Where to Find Vintage Singer Sewing Machine Manuals
Vintage Singer sewing machine manuals can be found on platforms like archive.org, which offers a wide range of free downloads. Additionally, Singer’s official website and specialty sewing stores provide digital versions. Online communities and forums dedicated to vintage sewing machines often share manuals and guides. For rare models, consider purchasing reproduction manuals from trusted sellers or checking local antique shops.
Online Communities and Forums for Support
Online communities and forums are invaluable resources for vintage Singer sewing machine enthusiasts. Platforms like archive.org and Singer’s official forums offer extensive support, including troubleshooting tips and maintenance advice. These spaces allow users to share knowledge, ask questions, and learn from experienced sewists. Many communities also provide access to rare manuals and guides, making them essential for anyone looking to restore or operate their antique machine effectively.
Recommended Tools and Supplies for Maintenance
Proper maintenance of your vintage Singer sewing machine requires essential tools and supplies. Invest in high-quality sewing machine oil, a small screwdriver set, and a soft-bristle brush for cleaning. Replaceable parts like needles, bobbins, and belts should be kept on hand. Additionally, a lint brush and a seam ripper are useful for routine upkeep. These tools ensure your machine runs smoothly and extends its lifespan, keeping it in optimal condition for years of reliable service.
Thank you for following this guide. With proper care and maintenance, your vintage Singer sewing machine will remain a reliable and cherished companion for years to come.
Final Tips for Enjoying Your Vintage Singer Sewing Machine
Regularly oil and clean your machine to ensure smooth operation. Experiment with different stitches and fabrics to explore its full potential; Join online communities for tips and inspiration. Store your machine properly when not in use to preserve its condition. By following these guidelines, you can enjoy your vintage Singer sewing machine for years, creating beautiful projects while appreciating its timeless craftsmanship and reliability;
The Value of Preserving Vintage Sewing Machines
Preserving vintage Singer sewing machines is a testament to their historical significance and timeless craftsmanship. These machines represent a connection to the past, offering insights into earlier sewing techniques and designs. Restoring and maintaining them not only honors their legacy but also ensures they remain functional for future generations. By caring for these machines, you contribute to the preservation of sewing history while enjoying their enduring utility and charm in your creative projects.
Frequently Asked Questions (FAQ)
Discover answers to common queries about vintage Singer sewing machines, including model identification, threading, maintenance, and troubleshooting, helping you make the most of your machine.
Common Questions About Vintage Singer Machines
Owners often ask about model identification, threading techniques, and maintenance tips for their vintage Singer machines. Questions also arise about stitch settings, oiling procedures, and troubleshooting common issues. Many seek guidance on restoring machines to their original condition and understanding their historical value. Additionally, users inquire about compatible attachments and accessories, as well as the best practices for preserving these timeless sewing companions. This section addresses these frequently asked questions to enhance your sewing experience.
Solutions to Frequently Encountered Problems
Common issues with vintage Singer machines include thread breakage, uneven tension, and mechanical noise. To address these, ensure proper threading, clean the machine regularly, and check for worn parts. Adjusting the bobbin and needle alignment can resolve tension problems. For noise, lubricate moving components and inspect for loose screws. These solutions help maintain smooth operation and extend the lifespan of your antique Singer sewing machine, ensuring reliable performance for years to come.