Discover the joy of knitting with free baby doll patterns available as downloadable PDFs․ Create adorable outfits and accessories with these easy-to-follow designs, perfect for crafters of all skill levels․
Why Free Baby Doll Knitting Patterns Are Popular
Free baby doll knitting patterns are popular due to their accessibility and cost-effectiveness, making knitting accessible to everyone․ Crafters appreciate the convenience of downloadable PDFs, which provide instant access to designs․ These patterns cater to all skill levels, allowing beginners and experienced knitters alike to create adorable dolls and outfits․ The ability to customize and personalize projects also attracts many, fostering creativity․ Additionally, the global community of knitters shares and enjoys these patterns, creating a sense of connection and shared passion for the craft․
Benefits of Downloadable PDF Patterns for Knitting
Downloadable PDF patterns offer unparalleled convenience for knitters․ They provide instant access to designs, eliminating the need for physical copies․ PDFs are easily stored on devices, making them portable and accessible anywhere․ Free or low-cost options cater to all budgets, while clear instructions and visuals ensure projects are easy to follow․ Additionally, PDFs allow for eco-friendly printing of specific pages, reducing waste․ Their versatility and accessibility make them a preferred choice for crafters worldwide, fostering creativity and efficiency in knitting projects․
Popular Free Baby Doll Knitting Patterns
Explore a variety of free baby doll knitting patterns, including the beloved Izzy Doll, vintage-inspired designs, and modern outfits, perfect for creating unique and charming dolls․
Izzy Doll Knitting Patterns
The Izzy Doll Knitting Patterns are a popular choice among crafters, offering a simple yet charming design․ These patterns are available as free downloadable PDFs, making it easy for knitters of all skill levels to create adorable dolls․ The initiative, led by Shirley O’Connell, provides detailed instructions for knitting these endearing dolls․ Perfect for gifts or charity projects, the Izzy Doll patterns are widely appreciated for their versatility and heartwarming appeal․ They are also available in multiple languages, including French and Dutch, making them accessible to a global community of knitters․
Vintage-Inspired Baby Doll Knitting Patterns
Vintage-inspired baby doll knitting patterns bring a touch of classic charm to your creations․ These patterns often feature intricate details, such as lace trim, bootees, and delicate dresses, reminiscent of traditional doll clothing․ Available as free downloadable PDFs, they allow knitters to craft timeless outfits for their dolls․ Perfect for those who appreciate nostalgic designs, these patterns are widely shared on platforms like Etsy and other knitting communities, making it easy to access and enjoy these beautiful, retro-inspired designs for your baby dolls․
Modern and Stylish Outfit Patterns for Baby Dolls
Modern and stylish baby doll outfit patterns offer a fresh take on doll fashion․ These free downloadable PDFs feature contemporary designs, from trendy dresses to sleek cardigans and accessories․ Perfect for knitters who enjoy versatility, these patterns allow for customization to match current fashion trends․ With clear instructions, they cater to all skill levels, ensuring that every doll can sport a chic, up-to-date look․ Whether it’s a casual outfit or a festive ensemble, these patterns bring modern flair to your doll’s wardrobe, making them stand out with ease․
Materials and Tools Needed for Knitting Baby Dolls
Essential materials include soft yarn (like DK weight), knitting needles (straight or circular), and basic tools like scissors and stitch markers․ These ensure a smooth knitting experience for doll creation․
Recommended Yarn Types for Baby Doll Knitting
For baby doll knitting, medium-weight yarns like DK (Double Knitting) are ideal due to their softness and durability․ Hayfield Bonus DK is a popular choice, offering a variety of colors and a smooth texture that ensures cozy and adorable outfits․ Acrylic or blended yarns are also great for their softness and easy care, making them perfect for doll clothes․ Choose yarns with good stitch definition to bring out the details in your patterns, ensuring your dolls look their best․ Opt for colors that match your desired design for a personalized touch․
Essential Knitting Tools for Creating Dolls
To create adorable baby dolls, you’ll need a few essential tools․ Start with a pair of knitting needles, either straight or circular, in sizes specified by your pattern․ A stitch marker is handy for tracking patterns, while scissors and a tapestry needle are must-haves for cutting yarn and weaving ends․ A stitch holder can help with complex designs, and a measuring tape ensures accuracy․ Don’t forget a yarn needle for sewing seams․ With these tools, you’ll be well-equipped to craft beautiful, professional-looking dolls․
Step-by-Step Tutorials for Knitting Baby Dolls
Perfect your knitting skills with our step-by-step guides․ From basic stitches to assembling the doll, these tutorials offer clear instructions for crafters of all skill levels․
Beginner-Friendly Tutorials for Baby Doll Knitting
Start your knitting journey with beginner-friendly tutorials designed for baby doll patterns․ These guides offer step-by-step instructions, perfect for new knitters․ Learn basic stitches, doll assembly, and essential techniques through easy-to-follow PDF downloads․ Many tutorials include photos and videos to help you understand complex steps․ Popular platforms like Ravelry and Yarnspirations provide free resources tailored for beginners․ Patterns such as the Izzy Doll and vintage-inspired designs are great starting points․ With these tools, you can create adorable dolls and outfits with confidence, even if you’re new to knitting․
Video Guides and Tips for Knitting Dolls
Enhance your knitting skills with free video guides and expert tips available online․ Platforms like YouTube and Ravelry offer tutorials specifically for baby doll knitting․ These videos provide step-by-step instructions, from basic stitches to assembling complex patterns․ Tips include choosing the right yarn, mastering doll proportions, and troubleshooting common mistakes․ Many guides focus on popular patterns like the Izzy Doll and vintage-inspired designs․ Whether you’re a beginner or an experienced knitter, these resources help you create charming dolls with ease and precision․
Where to Find Free Baby Doll Knitting Patterns
Explore platforms like Ravelry, Yarnspirations, and Etsy for a wide variety of free downloadable PDF patterns․ These sites offer diverse designs, from vintage to modern styles, perfect for crafting adorable dolls․
Ravelry and Yarnspirations
Ravelry and Yarnspirations are top destinations for free baby doll knitting patterns․ Ravelry offers a vast community-driven library, while Yarnspirations provides curated, high-quality designs․ Both platforms feature PDF downloads, making it easy to access patterns for dolls, outfits, and accessories․ Explore a variety of styles, from the popular Izzy Doll pattern to vintage-inspired designs․ Users can filter by skill level, ensuring beginners and experienced knitters alike find suitable projects․ These sites are perfect for discovering unique and adorable doll knitting patterns to bring your creativity to life․
Etsy and Other Marketplaces
Etsy and other online marketplaces offer a wide range of free and premium PDF knitting patterns for baby dolls․ Many sellers provide instant downloads, allowing you to start your project immediately․ From vintage-inspired designs to modern outfits, these platforms cater to diverse tastes․ While some patterns are free, others may require a small fee․ Additionally, sites like eBay and independent craft stores often feature unique or exclusive doll knitting patterns․ These marketplaces are great for finding one-of-a-kind designs to enhance your doll collection or create personalized gifts․
Customization Ideas for Your Knitted Baby Dolls
Personalize your knitted dolls with unique outfits, accessories, and hairstyles․ Add embroidered details or fabric paint for a personalized touch, making each doll truly special and one-of-a-kind․
Personalizing Doll Clothes
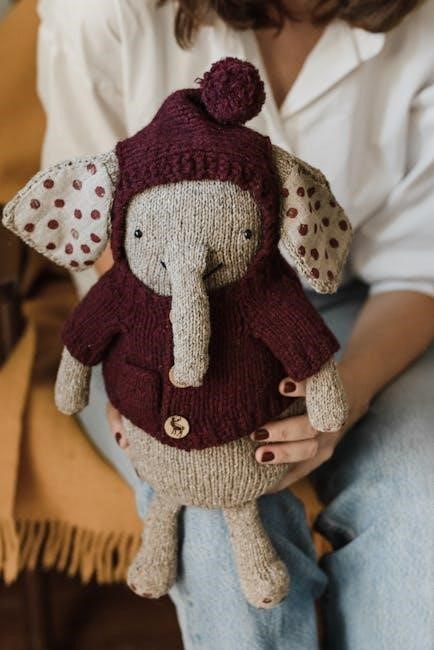
Personalizing doll clothes allows you to add unique touches to your knitted creations․ Use colorful yarns, embroidery, or fabric paint to create distinctive designs․ Mix patterns, like stripes or polka dots, for a personalized look․ Add small accessories such as bows, buttons, or lace to enhance outfits․ Consider matching the doll’s clothes to your own or a child’s wardrobe for a special connection․ With free PDF patterns, you can experiment with various styles and details, making each doll truly one-of-a-kind․ This creative process fosters imagination and adds sentimental value to your handmade dolls․
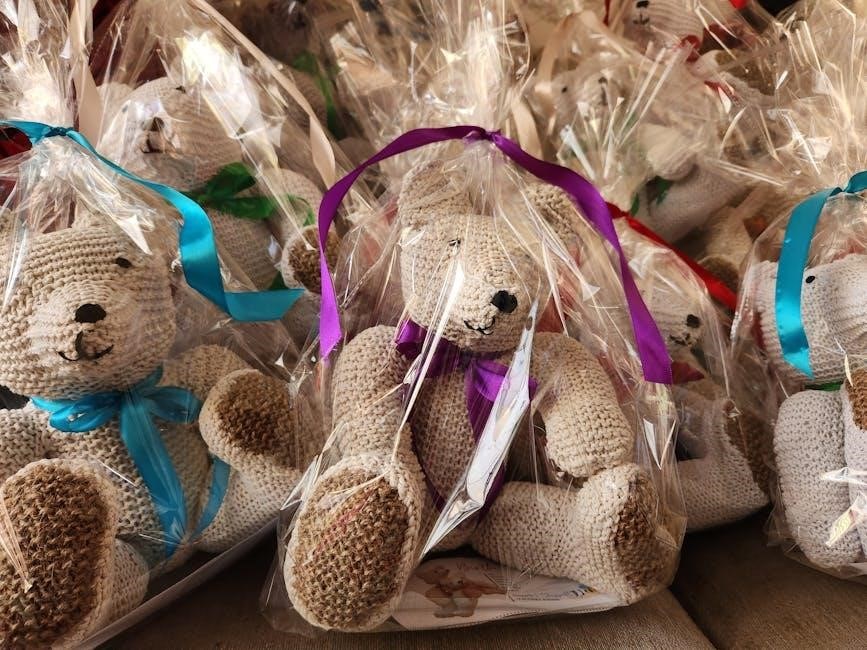
Adding Accessories to Your Dolls
Accessorizing your knitted dolls can elevate their charm and uniqueness․ Hats, shoes, and small bags are popular additions that complement outfits․ Use yarn remnants to create hair bows, scarves, or belts․ For a vintage look, add lace trim or buttons to dresses․ Patterns often include options for these extras, allowing you to mix and match․ Accessories not only enhance the doll’s appearance but also provide an opportunity to express your creativity․ They make the doll more engaging and personalized, offering endless possibilities for customization and character development․
Charity and Community Involvement in Knitting
Knitting for charity fosters community and kindness․ Many knitters create dolls and clothes for donation, supporting causes like children’s hospitals or disaster relief․ The Izzy Doll initiative, for example, distributes handmade dolls globally, spreading joy and comfort․ Sharing free patterns encourages collective creativity and generosity, uniting crafters worldwide for meaningful projects․
Knitting Dolls for Charity
Knitting dolls for charity is a heartfelt way to give back to the community․ Many organizations, like the Izzy Doll Initiative, use free patterns to create dolls for children in need․ These dolls provide comfort and joy to kids worldwide․ Charities such as Simpsons Special Care Babies (SSCB) encourage young people to knit, fostering a sense of purpose․ By downloading PDF patterns, crafters can easily join these efforts, creating meaningful gifts while supporting good causes․ This collective creativity strengthens communities and spreads kindness globally․
Community Patterns and Collaborations
Knitting communities thrive on collaboration, with many creators sharing free baby doll patterns online․ Platforms like Ravelry and Yarnspirations host a wealth of shared designs, fostering creativity and connection among crafters․ Collaborative projects, such as the Izzy Doll Initiative, encourage global participation, with patterns available in multiple languages․ These efforts highlight the power of shared passion, uniting knitters worldwide to create unique and heartfelt designs for baby dolls, while inspiring innovation and camaraderie within the crafting community․
Storage and Organization of Knitting Patterns
Keep your knitting patterns organized by storing PDF downloads in cloud folders or on your device․ Print favorites and store them in binders or labeled envelopes for easy access․
Tips for Storing Digital and Physical Patterns
For digital patterns, create folders on your device or cloud storage, labeling them by type or size․ Regularly back up your files to prevent loss․ Use descriptive filenames like “12-inch-baby-doll-dress-pattern․pdf” for easy searching․ Print physical patterns and store them in binders with clear covers or labeled envelopes․ Consider organizing by doll size or outfit type․ Use acid-free paper and protect patterns from moisture and dust․ Keep frequently used patterns in an accessible location, while storing others in a dry, cool space․ This system ensures your collection remains tidy and easy to manage, saving time and reducing clutter․
Organizing Completed Knitting Projects
Keep your finished knitting projects tidy by storing them in labeled bins or boxes․ Use acid-free tissue paper to protect delicate items․ Photograph each completed doll or outfit and create a digital or physical portfolio for easy reference․ Store smaller accessories like hats or booties in separate compartments․ Maintain a list of materials used for future repairs․ Consider displaying a few favorite pieces on shelves or in glass-front cabinets․ This organized approach helps preserve your creations and makes them easy to admire or gift․
Cultural Impact of Knitting Baby Dolls
Knitting baby dolls has united global craft communities, fostering creativity and cultural exchange․ The availability of free PDF patterns has made this tradition accessible worldwide, preserving heritage while inspiring modern designs․
Global Popularity of Knitting Dolls
Knitting baby dolls has become a global phenomenon, with enthusiasts from diverse cultures creating adorable dolls using free downloadable PDF patterns․ The ease of access to these patterns has connected crafters worldwide, fostering a sense of community․ From vintage-inspired designs to modern outfits, the variety of patterns caters to all skill levels, making it a beloved hobby across the globe․ This shared passion has not only preserved traditional knitting techniques but also inspired creativity, uniting people through the joy of crafting․
Cultural Variations in Doll Knitting Patterns
Doll knitting patterns reflect diverse cultural influences, offering unique designs inspired by global traditions․ From Japanese kimonos to European folk dresses, patterns often incorporate local fabrics, colors, and motifs․ Crafters worldwide adapt these designs, blending traditional techniques with modern styles․ Such variations not only preserve cultural heritage but also inspire creativity, allowing knitters to explore global aesthetics․ This diversity enriches the hobby, making it a vibrant reflection of shared human creativity and cultural exchange․
Free baby doll knitting patterns offer a diverse range of creative projects for all skill levels․ These downloadable PDFs make it easy to start knitting adorable outfits and accessories, fostering creativity and joy for crafters worldwide․
Final Thoughts on Free Baby Doll Knitting Patterns
Free baby doll knitting patterns offer endless creativity and convenience for crafters․ With downloadable PDFs, you can instantly access designs for adorable outfits, accessories, and dolls․ These patterns cater to all skill levels, from beginners to experienced knitters, and allow for personalized touches․ The joy of creating something handmade for a child or charity is unparalleled․ Whether you’re making a vintage-inspired dress or a modern outfit, these patterns inspire creativity and provide a sense of accomplishment․ They are a wonderful way to give back to the community or simply enjoy a rewarding hobby․