
visual anatomy & physiology lab manual
- Published
- in Manuals
Welcome to the Visual Anatomy & Physiology Lab Manual‚ your comprehensive guide to mastering human anatomy through interactive visuals and hands-on exercises. This manual integrates detailed diagrams‚ practical lab activities‚ and digital tools to enhance visual learning and retention.
1.1 Importance of Visual Learning in Anatomy and Physiology
Visual learning is essential for understanding anatomy and physiology‚ as it transforms complex concepts into engaging‚ easy-to-grasp content. Diagrams‚ illustrations‚ and 3D models help students connect theoretical knowledge with practical observations. This approach enhances retention‚ as visual cues simplify intricate structures and processes. By sketching and comparing observations‚ learners actively engage with material‚ reinforcing memory. Visual tools bridge the gap between textbook descriptions and real-world applications‚ making anatomy and physiology more accessible and preparing students for clinical and research environments.
1.2 How to Use the Lab Manual Effectively
To maximize the learning potential of the Visual Anatomy & Physiology Lab Manual‚ start by planning dedicated study sessions. Review visual aids like diagrams and illustrations before lab exercises to familiarize yourself with key structures. Engage actively by sketching observations and comparing them with provided visuals. Practice labeling and identifying anatomical features to reinforce memory. Utilize digital resources for interactive learning and quizzes to test understanding. Regularly review notes and summaries to ensure retention of complex concepts‚ and seek clarification on any unclear topics promptly.
1.3 Key Features of the Visual Anatomy & Physiology Lab Manual
The Visual Anatomy & Physiology Lab Manual stands out with its modular organization and visual approach. It features high-quality diagrams‚ illustrations‚ and real-life images to simplify complex anatomical concepts. Interactive digital tools‚ such as 3D models and quizzes‚ enhance engagement and understanding. The manual includes practical exercises‚ lab reports‚ and self-assessment quizzes to reinforce learning. Its clear‚ concise language and step-by-step instructions make it accessible for students at all levels‚ ensuring a comprehensive and effective learning experience.
Essential Tools for Visual Learning
Essential tools for visual learning include diagrams‚ microscopy‚ and digital resources that enhance understanding through interactive visuals and practical observations‚ fostering a comprehensive learning experience.
2;1 Diagrams and Illustrations in Anatomy and Physiology
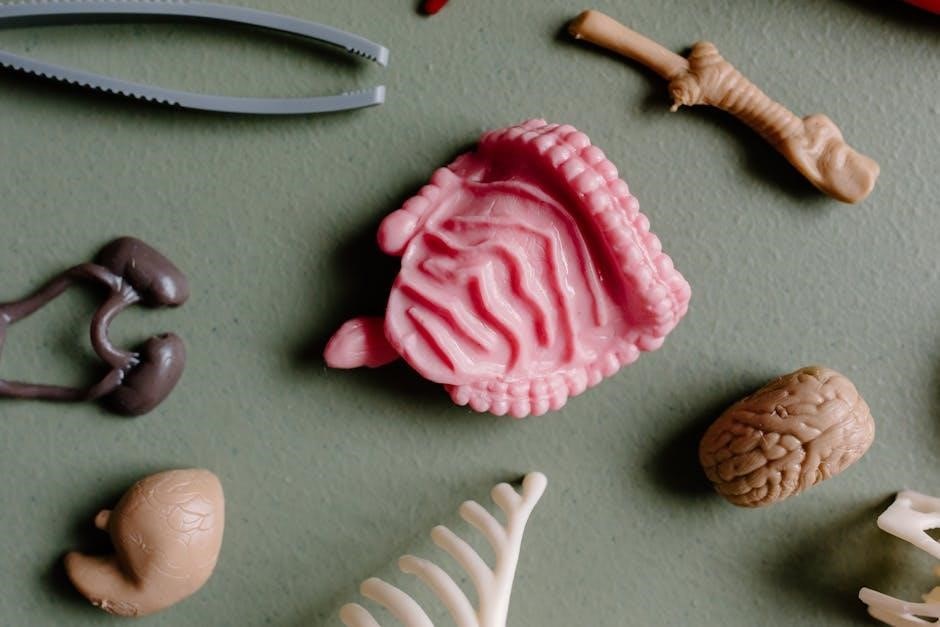
Diagrams and illustrations are cornerstone tools in anatomy and physiology‚ providing clear visual representations of complex structures. They enable students to identify bones‚ muscles‚ and organs‚ while detailed histology slides reveal cellular anatomy. Neuroanatomy visuals simplify brain and spinal cord structures. These visuals‚ often paired with labels and descriptions‚ enhance 3D understanding. Interactive digital resources further amplify learning‚ allowing students to explore anatomical layers and systems dynamically. By sketching and comparing observations‚ learners reinforce retention and mastery of anatomical concepts effectively.
2.2 The Role of Microscopy in Lab Exercises
Microscopy is a vital tool in anatomy and physiology labs‚ enabling detailed exploration of cellular and tissue structures. Students use microscopes to examine histology slides‚ identifying features like muscle fibers and epithelial layers. Proper slide preparation and focusing techniques are essential skills. Digital microscopes further enhance learning by capturing and sharing images. Regular practice with microscopy helps develop observational skills‚ bridging the gap between visual aids and real-world specimens. This hands-on approach deepens understanding of microscopic anatomy‚ a cornerstone of physiology studies.
2.3 Using Digital Resources for Enhanced Learning
Digital resources play a crucial role in modern anatomy and physiology education‚ offering interactive tools that complement traditional lab manuals. Platforms like Pearson’s MyLab provide virtual simulations‚ 3D models‚ and quizzes to engage students. These resources allow for self-paced learning‚ enabling students to revisit complex concepts. Digital atlases and video tutorials further enhance understanding by visualizing processes like blood circulation and muscle movements. Accessible on multiple devices‚ these tools ensure flexibility‚ making it easier for students to study anytime and anywhere‚ while also tracking their progress for improved retention.
Lab Safety and Preparation
Lab safety and preparation are essential for a secure and efficient learning environment. Always wear protective gear‚ follow protocols‚ and ensure materials are ready for hands-on activities.
3.1 General Safety Guidelines for Lab Work
Adhering to safety guidelines is crucial in anatomy and physiology labs. Always wear protective gear like gloves and goggles. Follow proper protocols for handling specimens and equipment. Ensure work areas are clean and well-organized. Familiarize yourself with emergency procedures‚ such as fire extinguisher locations and spill cleanup. Avoid eating or drinking in the lab. Dispose of biological materials and chemicals according to guidelines. Stay attentive during demonstrations and follow instructor instructions carefully. Proper preparation and caution ensure a safe and effective learning environment for all students.
3.2 Preparing for Lab Exercises: Materials and Equipment
Prepare for lab exercises by gathering essential materials like disposable gloves‚ lab coats‚ and safety goggles. Ensure you have a lab manual‚ pens‚ and a notebook for note-taking. Familiarize yourself with equipment such as microscopes‚ dissection tools‚ and anatomical models. Digital tools‚ including virtual dissection software and 3D anatomy apps‚ may also be required. Review the lab schedule and required readings beforehand. Organize your materials to maximize efficiency during exercises. Proper preparation enhances your ability to engage fully with the hands-on activities and visual learning opportunities provided in the lab.
3.3 Understanding Lab Etiquette and Best Practices
Respect your peers and instructors by arriving prepared and engaging actively in discussions. Clean up your workstation after exercises‚ properly disposing of materials. Handle equipment with care to avoid damage. Familiarize yourself with safety protocols and follow them strictly. Active participation enhances learning‚ while courteous behavior fosters a positive environment. Adhere to lab rules‚ such as no food or drinks‚ and avoid distractions during exercises. These practices ensure a safe‚ productive‚ and respectful atmosphere for everyone involved in visual anatomy and physiology labs.
Skeletal and Muscular Systems
The skeletal system provides structural support and protects vital organs‚ while the muscular system enables movement and maintains posture. Visual aids and practical exercises enhance understanding of bone structure and muscle groups‚ promoting effective learning in anatomy and physiology labs.
4.1 Identifying Bones and Joints Through Visual Aids
Visual aids like diagrams and 3D models are essential for identifying bones and joints‚ allowing students to recognize structures and their relationships. Detailed illustrations highlight bone classifications‚ such as long‚ short‚ and flat bones‚ while interactive tools enable exploration of joint types‚ including hinge‚ ball-and-socket‚ and pivot joints. These resources facilitate understanding of bone markings and articulations‚ making complex anatomy accessible. By comparing visual aids with lab specimens‚ students can accurately identify and label bones and joints‚ enhancing their knowledge of skeletal anatomy and its functional role in movement and support.
4.2 Mapping Muscle Groups and Their Functions
Mapping muscle groups involves identifying major muscles‚ their locations‚ and functions using visual aids like diagrams and 3D models. These tools help students recognize muscle attachments‚ origins‚ and insertions‚ as well as their roles in movement. Detailed illustrations highlight muscle layers‚ facilitating understanding of how muscles interact. Interactive tools allow learners to explore muscles in different body regions‚ such as the upper limb‚ lower limb‚ and torso. This visual approach enhances comprehension of muscle anatomy and their functional roles in movement‚ posture‚ and overall physiology.
4.3 Practical Exercises for Skeletal and Muscular Anatomy
Engage in hands-on activities to reinforce skeletal and muscular anatomy knowledge. Labeling exercises using detailed diagrams help identify bones and muscles. Palpation exercises allow students to locate muscles on themselves or partners‚ connecting visual learning with tactile experience. Dissection labs provide a deeper understanding of muscle structure and function. Interactive simulations and quizzes further test comprehension. These practical exercises ensure a comprehensive mastery of skeletal and muscular systems‚ bridging visual learning with real-world application and retention.
Nervous and Circulatory Systems
Explore the intricate structures of the nervous and circulatory systems through visual aids and interactive labs. Gain insights into neural pathways‚ brain function‚ and blood circulation processes.
5.1 Visualizing the Structure of the Brain and Spinal Cord
Understanding the brain and spinal cord is enhanced through detailed visuals and diagrams. The lab manual provides cross-sectional views and 3D models to illustrate neural pathways and anatomical features; By examining these visuals‚ students can identify key structures like the cerebrum‚ cerebellum‚ and spinal cord segments. Interactive exercises allow learners to label and explore these components digitally. Practical activities‚ such as microscope observations of nervous tissue‚ deepen comprehension. This section emphasizes the integration of visual and hands-on learning to grasp the complex functions of the central nervous system.
5.2 Understanding Blood Circulation Through Diagrams
Diagrams play a crucial role in visualizing the complex pathways of blood circulation. The lab manual uses detailed illustrations to depict the heart’s chambers‚ arteries‚ and veins‚ allowing students to trace blood flow from the heart to the body and back. Color-coded diagrams highlight oxygen-rich and oxygen-poor blood pathways‚ while cross-sectional views reveal vessel structures. Interactive labeling exercises and 3D models further enhance comprehension. Practical lab activities‚ such as observing blood smears under a microscope‚ complement visual learning‚ ensuring a comprehensive understanding of circulatory anatomy and physiology.
5.3 Interactive Labs for Nervous and Circulatory Systems
Interactive labs offer hands-on exploration of the nervous and circulatory systems. Students engage with 3D models to visualize neural pathways and heart structures. Activities include simulating nerve impulses and tracing blood flow through digital maps. Microscopy exercises allow observation of blood components and nerve tissues. Group work and presentations encourage active learning‚ fostering deeper understanding and retention of complex anatomical relationships between these systems. These labs bridge theory and practice‚ enhancing visual and tactile learning experiences.
Digestive and Respiratory Systems
This section explores the anatomy and physiology of the digestive and respiratory systems through interactive labs‚ diagrams‚ and hands-on activities‚ enhancing visual learning and retention of key concepts.
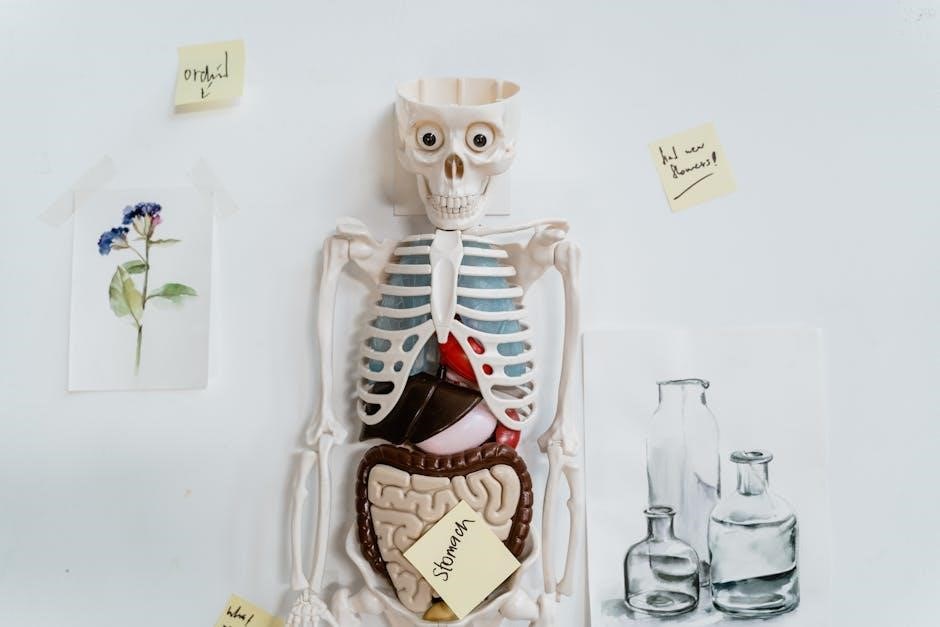
6.1 Exploring the Anatomy of the Digestive Tract
This section provides a detailed visual exploration of the digestive tract‚ from the mouth to the anus. High-quality diagrams and 3D models illustrate the structure and function of key components‚ such as the esophagus‚ stomach‚ small intestine‚ and large intestine. Interactive simulations demonstrate processes like peristalsis and nutrient absorption. Practical activities include labeling diagrams‚ observing prepared specimens‚ and using digital tools to enhance understanding of how the digestive system processes food and maintains overall health.
6.2 Visualizing the Path of Air in the Respiratory System
This section focuses on the respiratory pathway‚ tracing the journey of air from the nostrils through the nasal cavity‚ pharynx‚ larynx‚ trachea‚ and bronchi to the alveoli. Detailed diagrams and 3D animations illustrate the structure and function of each component. Interactive simulations allow students to explore gas exchange in the lungs and understand the mechanics of breathing. Practical exercises include labeling respiratory pathways‚ observing lung tissue under a microscope‚ and using digital tools to visualize airflow and oxygen exchange processes.
6.3 Hands-On Activities for Digestive and Respiratory Anatomy
Engage in interactive exercises to explore the digestive and respiratory systems. Activities include building 3D models of organs‚ simulating digestion processes‚ and using virtual dissection tools. Students analyze tissue samples under microscopes and participate in group labs to map the flow of nutrients and gases. Practical tasks‚ such as identifying structures in diagrams and performing physiology simulations‚ reinforce understanding. These hands-on experiences integrate visual learning with tactile exploration‚ enhancing retention of complex anatomical concepts and their functional roles.
Urinary and Reproductive Systems
Explore the urinary and reproductive systems through detailed visuals. The urinary system includes kidneys‚ bladder‚ and the urinary pathway‚ while the reproductive system covers male and female organs and their functions.
7.1 Visualizing the Kidneys and Urinary Pathway
Detailed diagrams and 3D models in the lab manual illustrate the structure of the kidneys‚ including nephrons‚ and the urinary pathway. Interactive activities‚ such as labeling exercises‚ help students identify key components. Comparative sketches and descriptions enable learners to visualize how urine flows from the kidneys through the ureters to the bladder. High-resolution micrographs provide insights into renal tissue structure. Hands-on tracing of the urinary pathway on diagrams enhances understanding and retention of anatomical relationships.
7.2 Understanding Reproductive Organs Through Illustrations
The lab manual uses detailed illustrations to explore the male and female reproductive systems. Cross-sectional views and labeled diagrams highlight key organs like the ovaries‚ uterus‚ testes‚ and prostate. Interactive activities‚ such as matching exercises‚ help identify structures and their functions. Digital tools‚ including 3D models‚ allow learners to visualize the reproductive pathway in real-time. High-resolution images and comparative sketches aid in understanding anatomical relationships and physiological processes‚ ensuring a comprehensive grasp of the reproductive system’s complexity and role in human biology.
7.3 Lab Exercises for Urinary and Reproductive Anatomy
Lab exercises focus on hands-on exploration of urinary and reproductive structures. Students identify key organs like the kidneys‚ ureters‚ and bladder using detailed models and histology slides. Microscopy activities highlight cellular details‚ while digital tools provide 3D views of reproductive organs. Interactive exercises‚ such as tracing the urinary pathway‚ reinforce anatomical connections. Group discussions and presentations encourage active learning‚ helping students link structure to function in these vital systems.
Endocrine System
Explore the endocrine system through visual aids and practical exercises‚ focusing on gland structure‚ hormone production‚ and regulation. Interactive labs enhance understanding of this complex system.
8.1 Identifying Endocrine Glands and Their Functions
The endocrine system consists of glands that produce and secrete hormones regulating various bodily functions. Key glands include the pancreas‚ thyroid‚ adrenal glands‚ and pituitary gland. The pancreas produces insulin and glucagon to control blood sugar levels‚ while the thyroid regulates metabolism through hormones like thyroxine. Adrenal glands produce adrenaline and aldosterone‚ influencing stress response and electrolyte balance. The pituitary gland acts as the “master gland‚” controlling other endocrine organs. Visual aids‚ such as detailed diagrams and 3D models‚ help students identify these glands and understand their roles in maintaining homeostasis. Interactive labs further enhance comprehension by linking gland structure to hormone function.
8.2 Visualizing Hormone Production and Regulation
Visualizing hormone production and regulation is essential for understanding endocrine function. Diagrams and flowcharts illustrate how glands synthesize‚ store‚ and release hormones in response to stimuli. For example‚ insulin production in the pancreas is triggered by elevated blood glucose levels‚ while thyroxine release is regulated by the hypothalamus-pituitary axis. Interactive labs allow students to explore feedback mechanisms‚ such as how hormones regulate their own production. These visual tools enhance comprehension of complex regulatory pathways‚ making abstract processes tangible and easier to retain.
8.3 Interactive Labs for the Endocrine System
Interactive labs for the endocrine system provide hands-on opportunities to explore hormone function and regulation. Virtual simulations allow students to investigate processes like insulin release or adrenal gland activity. These labs often include 3D models and interactive diagrams to visualize hormone pathways and feedback mechanisms. Practical exercises‚ such as labeling endocrine glands or tracing hormonal signals‚ reinforce key concepts. By engaging with these tools‚ learners gain a deeper understanding of how hormones regulate bodily functions‚ complementing textbook knowledge with dynamic‚ real-world applications.
Practical Exercises and Activities
This section offers practical exercises and activities designed to enhance learning through visual tools and hands-on experiences. Engaging with these resources fosters essential skills for anatomy and physiology.
9.1 Lab Safety and Specimen Preparation
Lab safety and proper specimen preparation are crucial for effective learning and experimentation. Always wear protective gear like gloves and goggles. Handle equipment with care to avoid accidents. Follow disposal protocols for biological specimens to maintain hygiene. Ensure all materials are labeled and stored correctly. Familiarize yourself with emergency procedures‚ such as eye wash stations and fire extinguishers. Properly clean and disinfect equipment after use to prevent contamination. Adhere to lab guidelines to create a safe and efficient learning environment.
9.2 Using Microscopes for Detailed Observations
Mastering microscopy is essential for detailed anatomical observations. Begin by cleaning and labeling slides properly. Focus the microscope under low magnification before switching to higher power. Adjust lighting and stage position for clear visibility. Document observations using sketches or digital tools. Regularly maintain the microscope to ensure optimal performance. Always handle specimens with care and follow lab guidelines for safe and effective microscopy practices. This skill enhances visual learning and retention in anatomy and physiology studies.
9.3 Active Learning Strategies for Retention
Engage in active learning to reinforce anatomical concepts. Participate in group discussions‚ quizzes‚ and hands-on activities to deepen understanding. Use flashcards to test recall of structures and functions. Practice labeling diagrams to enhance visual memory. Apply spaced repetition to review material over time‚ ensuring long-term retention. Pair active recall with visual aids to strengthen connections between concepts. These strategies‚ supported by the lab manual’s resources‚ foster a dynamic and effective learning environment for anatomy and physiology studies.
Review and Assessment
Summarize key concepts using self-assessment tools to identify knowledge gaps. Prepare for lab reports and presentations by organizing findings and reflections. Enhance understanding through structured reviews.
10.1 Summarizing Key Concepts from the Lab Manual
Summarizing key concepts from the lab manual involves organizing information into clear‚ concise points. Use visual aids like diagrams and charts to reinforce learning. Review major systems such as skeletal‚ muscular‚ and nervous‚ focusing on structure-function relationships. Highlight essential processes like blood circulation and digestion. Regular summaries help solidify memory and prepare for assessments. This method ensures comprehensive understanding and easy reference for future study.
10.2 Self-Assessment Tools for Anatomy and Physiology
Self-assessment tools‚ such as quizzes‚ flashcards‚ and interactive diagrams‚ allow learners to evaluate their understanding of anatomy and physiology. These tools feature labeled illustrations‚ multiple-choice questions‚ and drag-and-drop activities. They help identify knowledge gaps and track progress over time. Many digital platforms offer customizable tests and instant feedback‚ enabling learners to focus on challenging topics. Regular self-assessment enhances retention and prepares students for formal exams‚ ensuring a strong foundation in visual anatomy and physiology concepts.
10.3 Preparing for Lab Reports and Presentations
Preparing for lab reports and presentations involves organizing your findings‚ interpreting data‚ and clearly communicating your results. Use visual aids like diagrams and illustrations to enhance understanding. Practice your delivery to ensure confidence and clarity; Review feedback from previous assignments to improve your approach. Anticipate questions and prepare concise responses. Incorporate multimedia elements‚ such as videos or interactive models‚ to make your presentations engaging. Regularly review lab materials and seek guidance from instructors to refine your skills.

Teaching Strategies for Visual Learning
Integrate spaced repetition and active recall to reinforce concepts. Use high-quality visuals and interactive tools to engage students. Incorporate real-world applications to enhance understanding and retention of anatomy and physiology concepts.
11.1 Incorporating Spaced Repetition in Study Plans
Spaced repetition is a powerful tool for long-term retention in anatomy and physiology. By reviewing material at increasing intervals‚ students can reinforce memory and reduce forgetting. This method is particularly effective for visual subjects‚ as it allows learners to gradually build and retain complex mental images; Implementing spaced repetition in study plans helps students manage vast amounts of information‚ ensuring they are well-prepared for lab exercises and exams. Consistency is key to maximizing its benefits.
11.2 The Role of Active Recall in Anatomy and Physiology
Active recall is a highly effective learning strategy that involves actively testing oneself on anatomical structures and physiological processes. This method strengthens memory retention and enhances understanding by prompting learners to retrieve information from their minds rather than passively re-reading notes. Regular practice through flashcards‚ quizzes‚ or lab exercises helps identify knowledge gaps and solidifies complex concepts. By applying active recall‚ students can master the visual and functional aspects of anatomy and physiology more efficiently.
11.3 Using Visual Aids to Enhance Lecture Materials
Visual aids like diagrams‚ 3D models‚ and interactive simulations are essential for enhancing lecture materials in anatomy and physiology. They help students visualize complex structures and processes‚ making abstract concepts more tangible. Incorporating detailed illustrations from the lab manual‚ such as those from the Martini Visual text‚ allows for clearer explanations of anatomical relationships. These tools also support active learning by engaging students visually and reinforcing key concepts through interactive exploration.

FAQs and Common Challenges
This section addresses frequently asked questions and common challenges faced by students while using the Visual Anatomy & Physiology Lab Manual. It provides practical solutions and tips to overcome difficulties in understanding complex anatomical concepts and visual aids.
12.1 Addressing Frequently Asked Questions
This section provides answers to common questions about using the Visual Anatomy & Physiology Lab Manual. Students often ask about navigating the manual‚ accessing digital resources‚ and understanding visual aids. FAQs also cover tips for interpreting diagrams‚ preparing for lab exercises‚ and using active recall for better retention. Additional questions address troubleshooting common challenges‚ such as identifying anatomical structures and effectively using microscopy tools. These answers are designed to help students maximize their learning experience with the lab manual.
12.2 Overcoming Difficulties in Lab Exercises
Common challenges in lab exercises include interpreting complex anatomical diagrams and mastering microscopy techniques. To overcome these‚ students should utilize digital resources for enhanced visualization and practice active recall to reinforce learning. Seeking guidance from instructors or lab partners can also clarify uncertainties. Consistent practice and reviewing visual aids outside of class are recommended to build confidence and improve understanding of anatomy and physiology concepts.
12.3 Tips for Effective Study habits in Anatomy and Physiology
Effective study habits in anatomy and physiology involve consistent practice‚ active recall‚ and spaced repetition. Use visual aids like diagrams and illustrations to reinforce concepts. Engage in interactive labs and hands-on activities to deepen understanding. Review notes regularly and summarize key points in your own words. Utilize digital resources for supplementary learning and seek clarification on challenging topics promptly. Stay organized and create a study schedule to ensure steady progress and retention of complex anatomical and physiological information.